In this article, I will show you how to download and install Windows Insider Preview using ISO file. You can perform a clean installation with a Windows Insider Preview ISO and access Windows Insider Program benefits.
The Windows Insider Program lets you test the latest Windows 11 updates and features before they’re made available to the public. You can refer to the following guide to join the Windows Insider Program on Windows 11.
Once you download the Windows Insider preview ISO file, you can perform a clean installation of the insider preview or use it to perform an in-place upgrade from the current OS to the insider preview build.
This step-by-step guide is useful for beginners who want to enroll in the Windows Insider program and test the insider preview builds. Once you’ve had a chance to explore Windows Insider Preview Builds, use the Feedback Hub to provide your feedback on the latest updates, report issues, or suggest new features. This feedback goes directly to our engineers working to improve Windows.
Related Article: 3 Methods to Disable Widgets in Windows 11
Download Windows Insider Preview ISO
On the Windows Insider Preview Downloads page, you can download a variety of ISO images for use in your preview environment. The Insider Preview ISOs are available for both Windows 10 Insider Preview Builds and Windows 11 Insider Preview Builds.
In addition to the Enterprise edition, the Windows Insider 11 Preview option now includes these editions: Home, Pro, Education, and Home Single Language. You can select any of these editions and download the insider preview ISO.
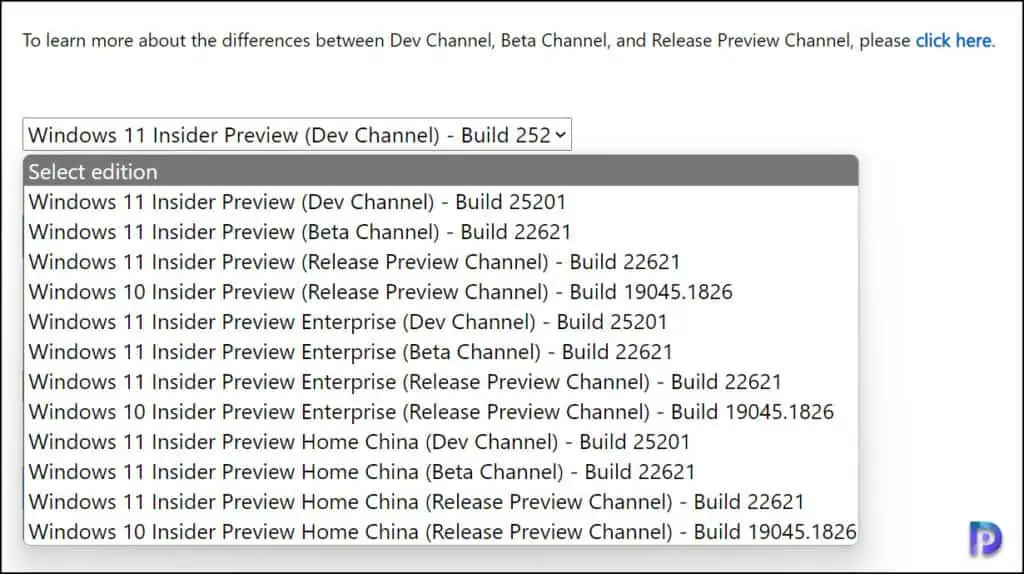
On the Windows Insider preview downloads page, select the Windows edition. There are two options for you: Windows 11 and Windows 10. I recommend downloading the Windows 11 Insider preview ISO because it is the latest client operating system and gets frequent updates.
Related Post: How To Enable Dark Theme for Notepad in Windows 11
Windows 11 Insider Preview Channels
There are specifically three channels for the Windows 11 Insider Preview.
- Dev Channel: This channel is for highly technical users. Selecting this channel for the insider program will give you access to the latest Windows 11 builds. In the development cycle, you’ll receive builds first. That’s the reason this build has more bugs and overall stability issues.
- Beta Channel: Microsoft recommends selecting the beta channel for insiders. This channel is ideal for early adopters. The Windows 11 insider preview builds that you get here are more stable and reliable than those on the Dev Channel. If you want to provide feedback on the latest Windows 11 builds, this channel is for you as your feedback has the greatest impact here.
- Release Preview Channel: The Release Preview Channel is an ideal choice for those who want new features, advanced quality updates, and relatively fewer bugs.
I am going to select Windows 11 Insider Preview (Dev Channel) with the latest available build. Next, select the product language, which is essentially your Windows language. If you are not sure what to select, pick English International and click Confirm.
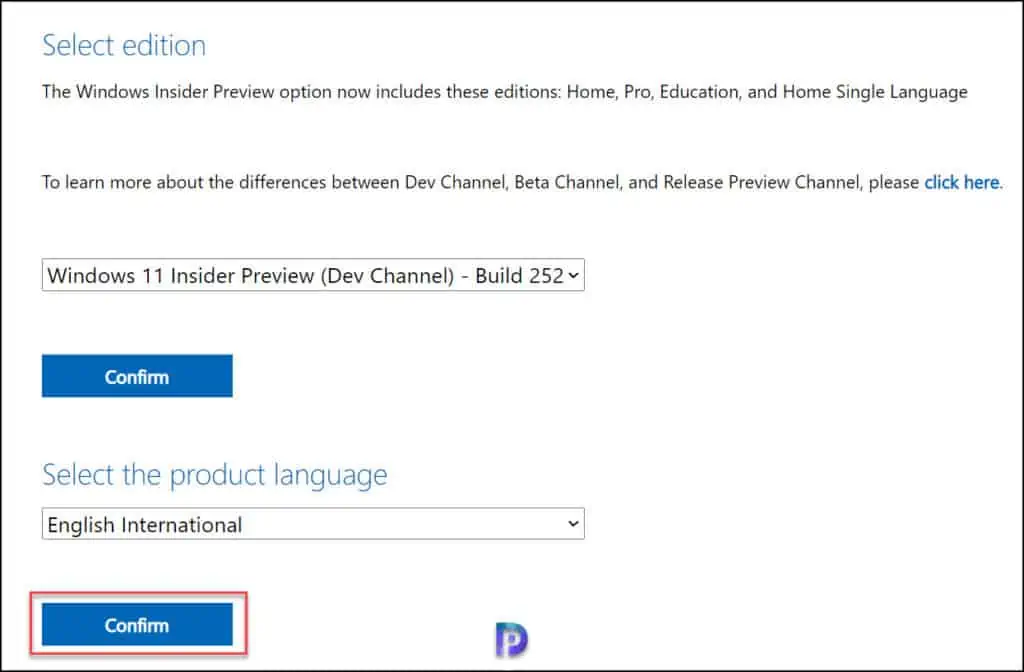
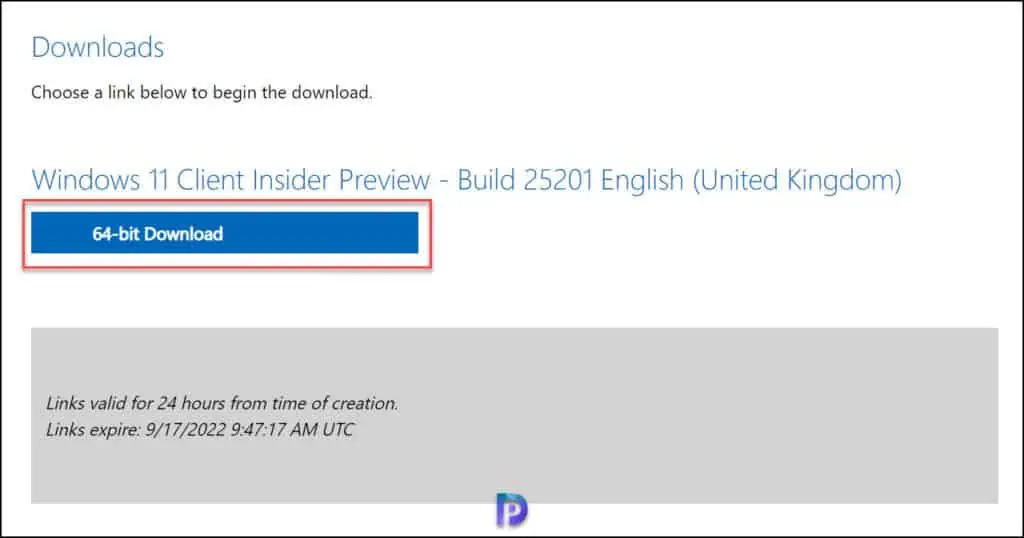
The Windows 11 Client Insider Preview – Build 25201 English (United Kingdom) is ready for download. Click on the 64-bit download button and the Windows Insider Preview ISO begins to download.
This completes the steps to download the ISO for the Windows Insider preview. In the next section, I will cover the installation steps for the Windows Insider Preview.
Create a bootable USB for Windows Insider ISOs
To install the Windows Insider build on your laptop or personal computer, you need a bootable USB that you can plug in and use for installation. If you are installing the Windows Insider on a Virtual Machine, you can simply mount the ISO file and use it to install the operating system.
To create a bootable USB media for the Windows Insider ISO, you can either use third-party software such as Rufus, USB Download Tool, etc. Refer to this useful guide on how to create a Windows 11 Bootable USB Drive.
Also Read: Download and Install Microsoft Office 2021
Prerequisites
Installing Windows 11 Insider Preview on a VM or laptop comes with certain requirements. Before you install the Windows Insider preview on your computer, please read these prerequisites.
- Check whether your device hardware is compatible with Windows 11 or not. Windows 11 can only run on 64-bit CPUs. To install or upgrade to Windows 11, devices must meet the minimum hardware requirements.
- To make it easier, run the Windows 11 PC Health Check and this should tell you if the device is eligible for Windows 11.
- You need a USB flash drive with at least 8 GB of storage space to create a bootable USB.
- To install Windows 11 Insider Preview on a VM, ensure you enable the trusted platform module.
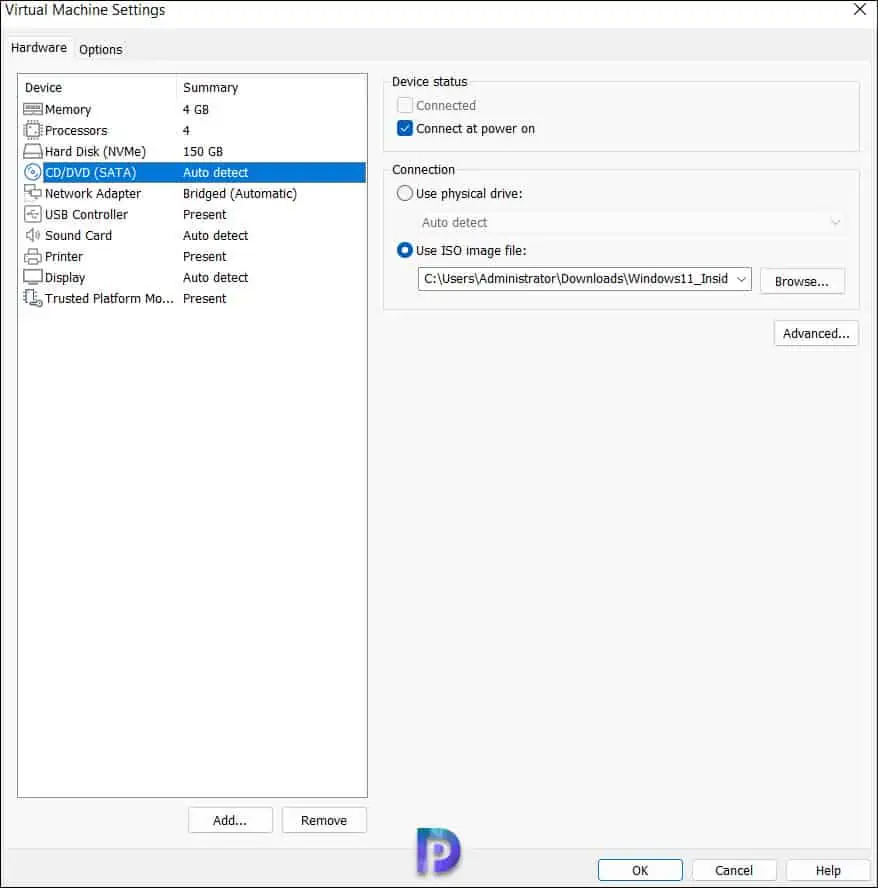
I will be installing the Windows 11 Insider preview on a virtual machine. All I need to do is go to VM settings and under Hardware, select the CD/DVD option and specify the ISO file. This allows the VM to boot from the Insider Preview ISO for installation.
Steps to Install Windows Insider Preview using ISO file
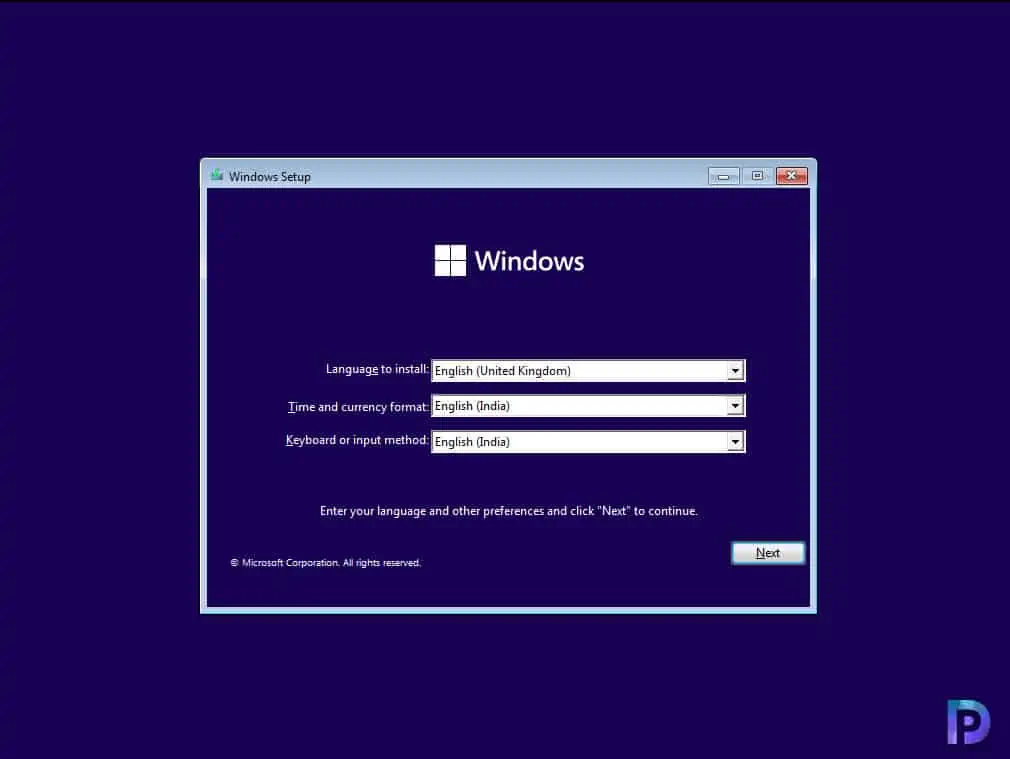
Use the following steps to install the Windows Insider Preview build. Power on the VM and press any key to boot from the DVD. This will load the operating system setup files. On the Windows Setup screen, choose the Language, Time and Currency Format, and Keyboard and Input Method. Click Next.
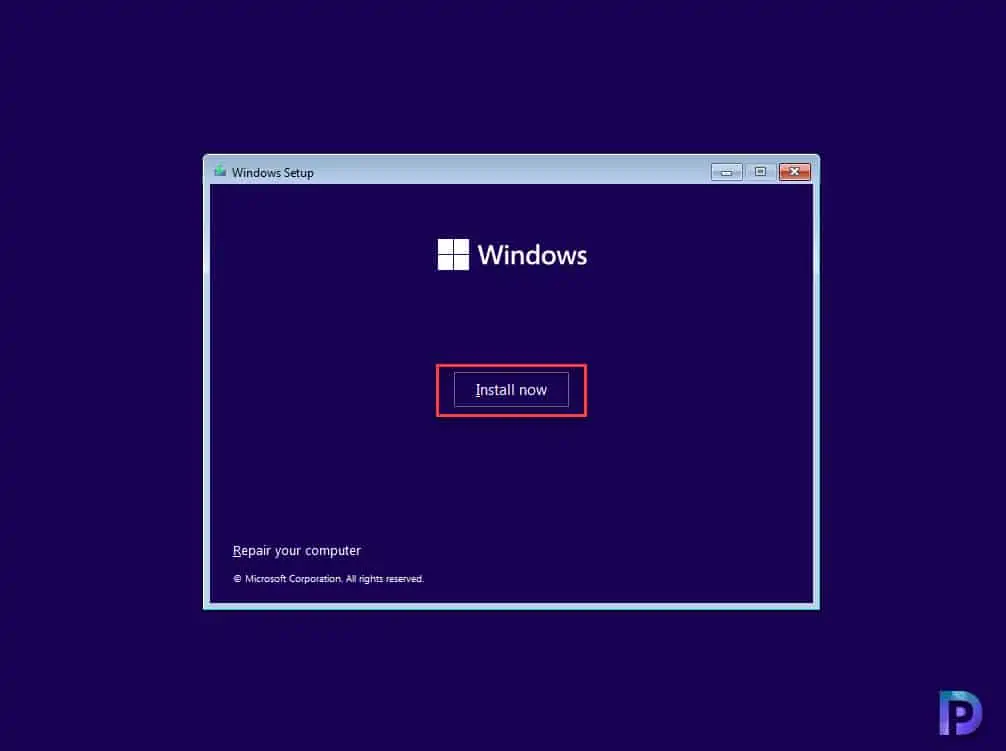
After you have made the above selections, click Install Now.
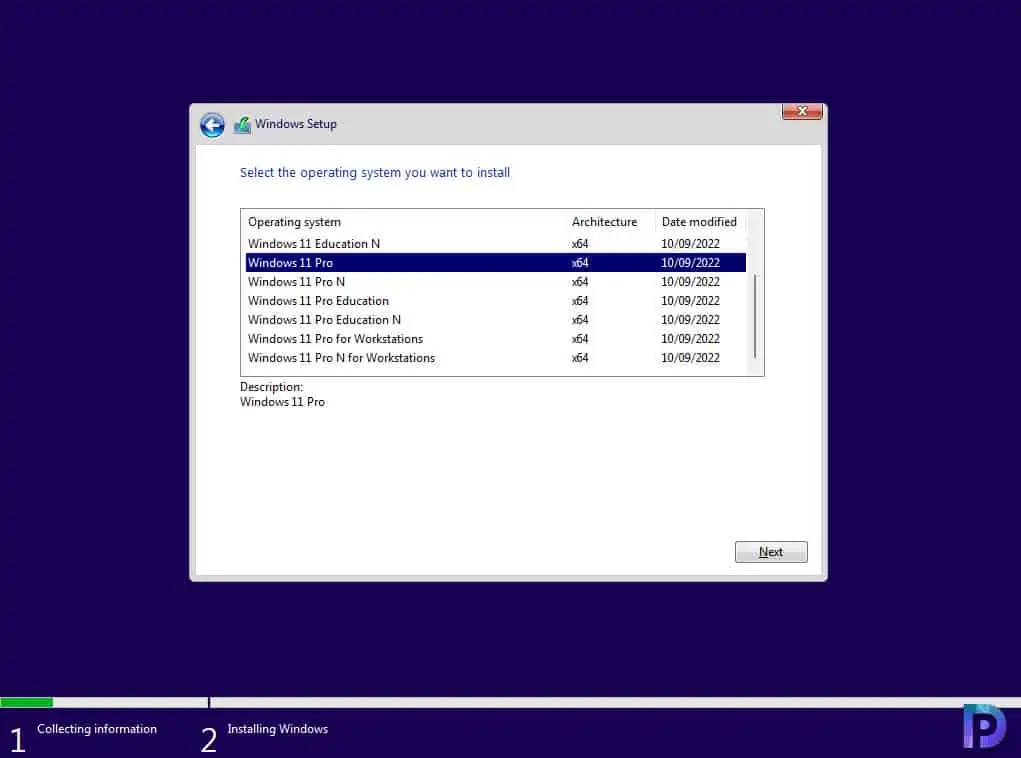
You must select the Windows 11 operating system edition before you install it. For my lab, I am going to select Windows 11 Pro. Click Next.
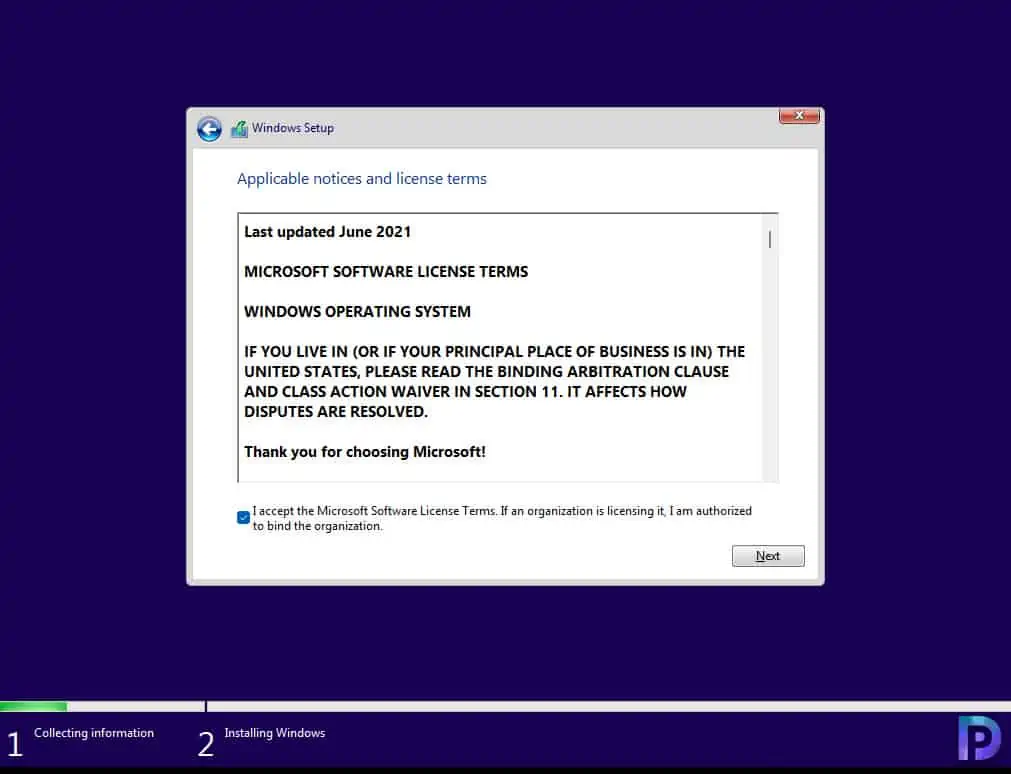
Accept Microsoft Software License Terms and click Next.
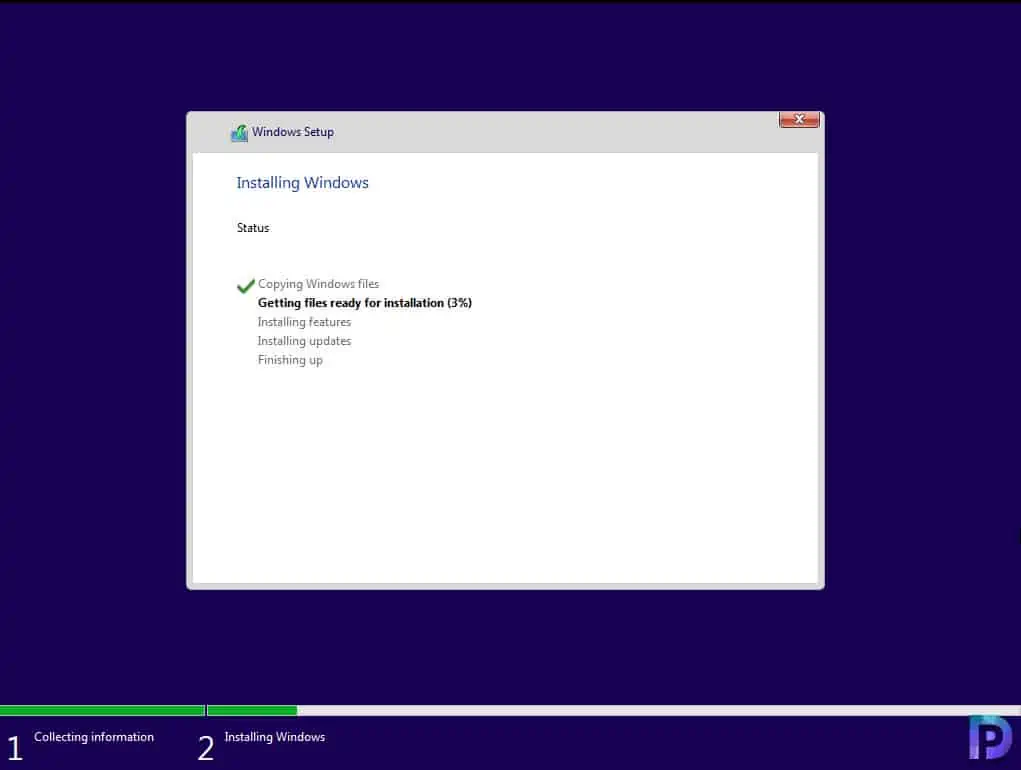
The Windows 11 Insider Preview installation begins now. Your computer will restart a couple of times during the installation.
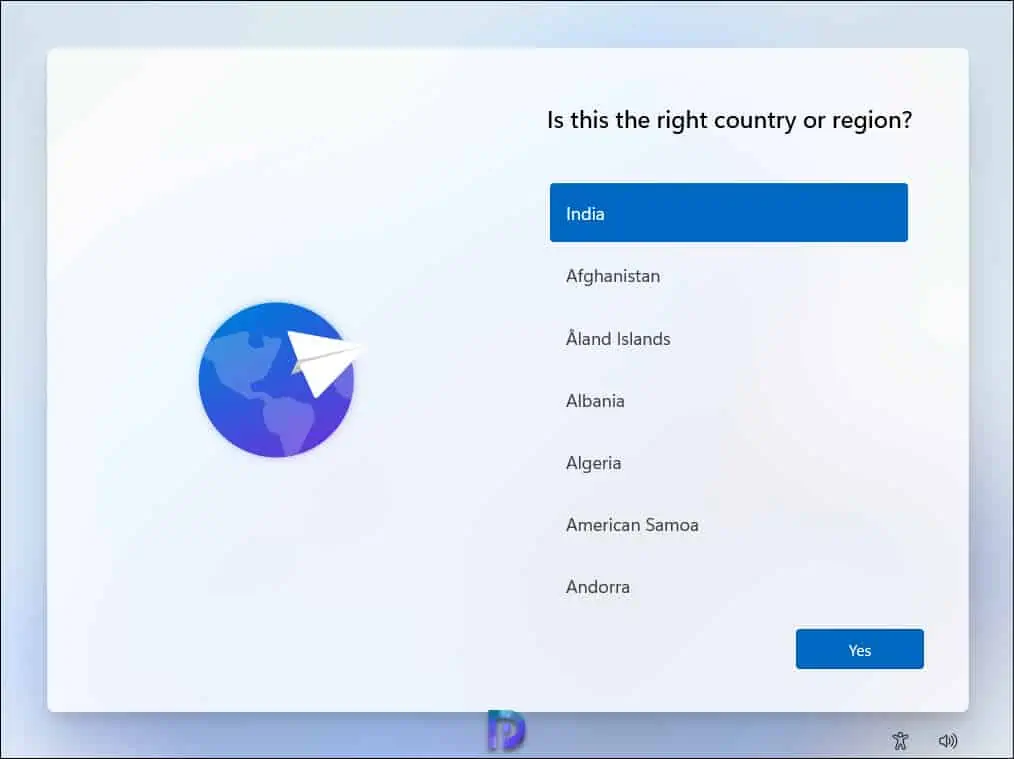
The Windows OOBE screen allows you to configure the region and keyboard layout. If Windows 11 OOBE detects an Internet connection, it will first check for updates to ensure your system is updated and ready when you reach the desktop.
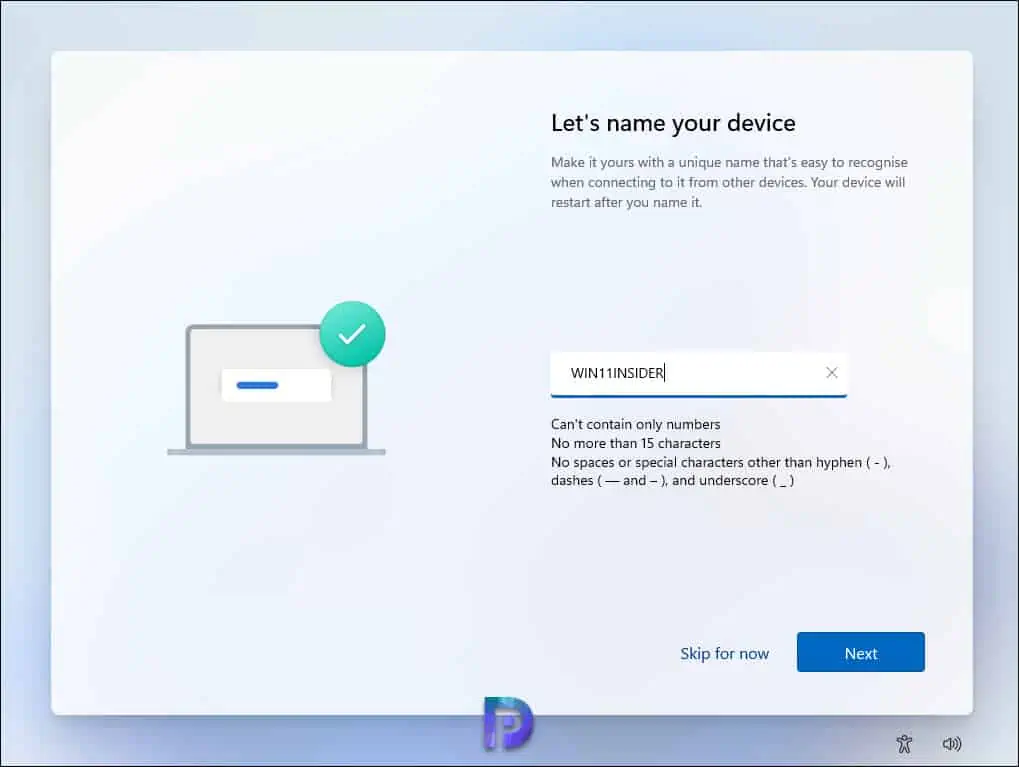
Give your device a unique name to make it easy to find on your network. You may skip this step and later rename your PC, but I am going to configure it and set a specific name. Click Next.
Recommended: Prompt Computer name during SCCM OSD
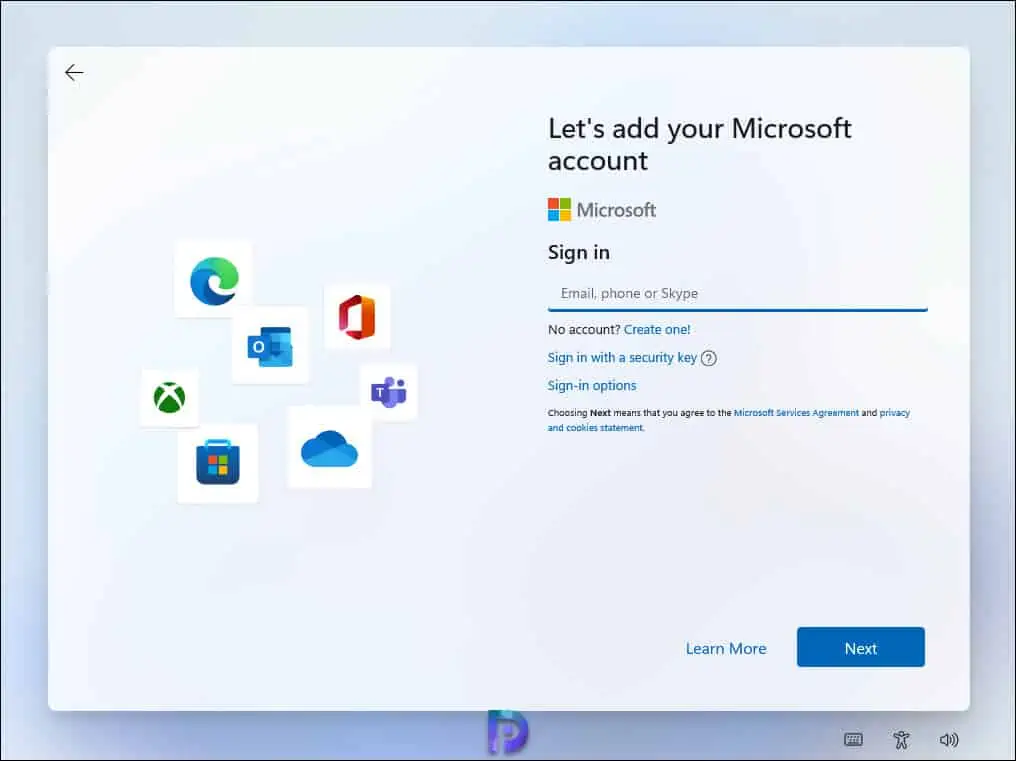
On the Let’s add your Microsoft account page, you can sign in with your Microsoft account or even create a new account. This account is your Windows Insider account that you typically use to test the preview builds. Enter the account and complete the sign-in process.
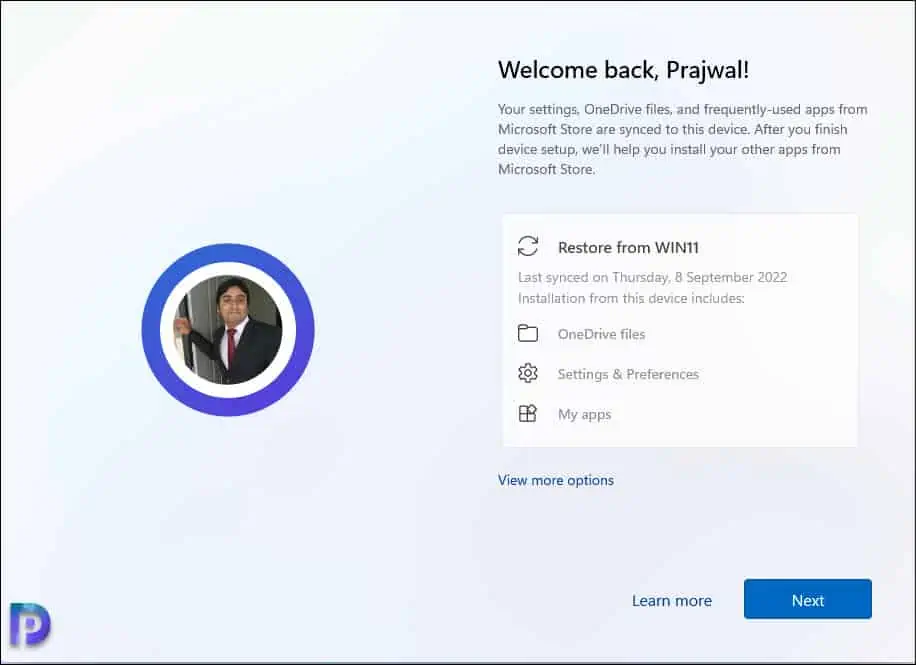
If you had linked the Microsoft account to a device earlier, you get an option to restore the settings from the previous computer. You can choose to restore the OneDrive files, Settings, and Preferences and Apps.
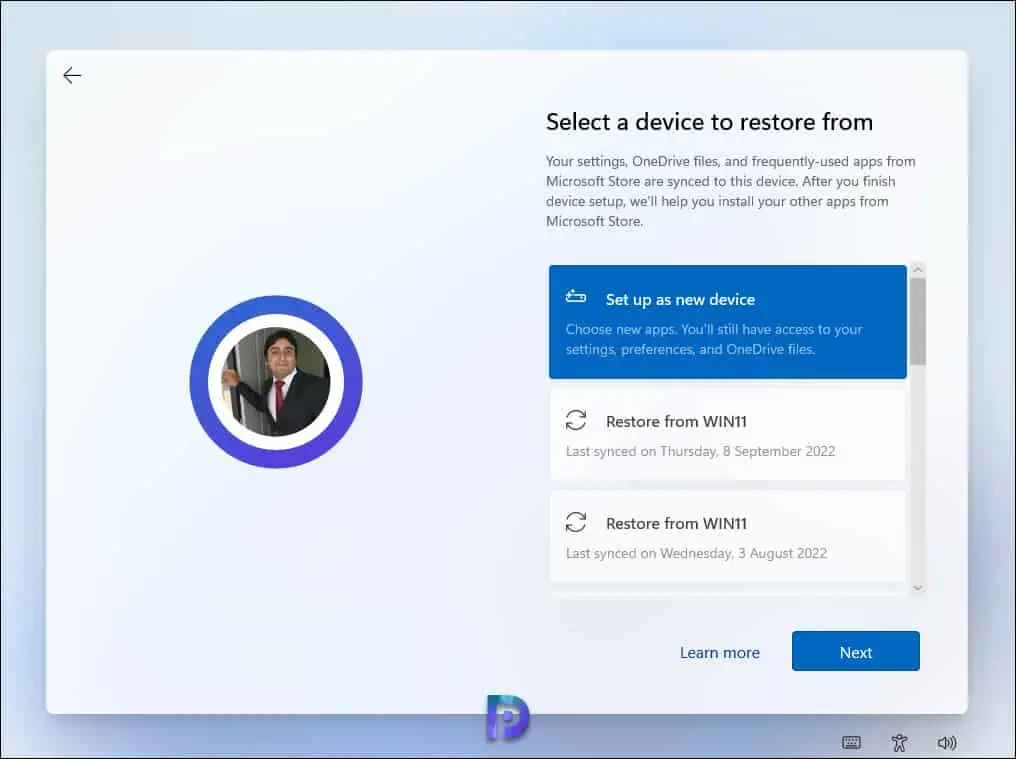
If you don’t like to restore the data from older devices, click on view more options and select Set up as a new device. Click Next.
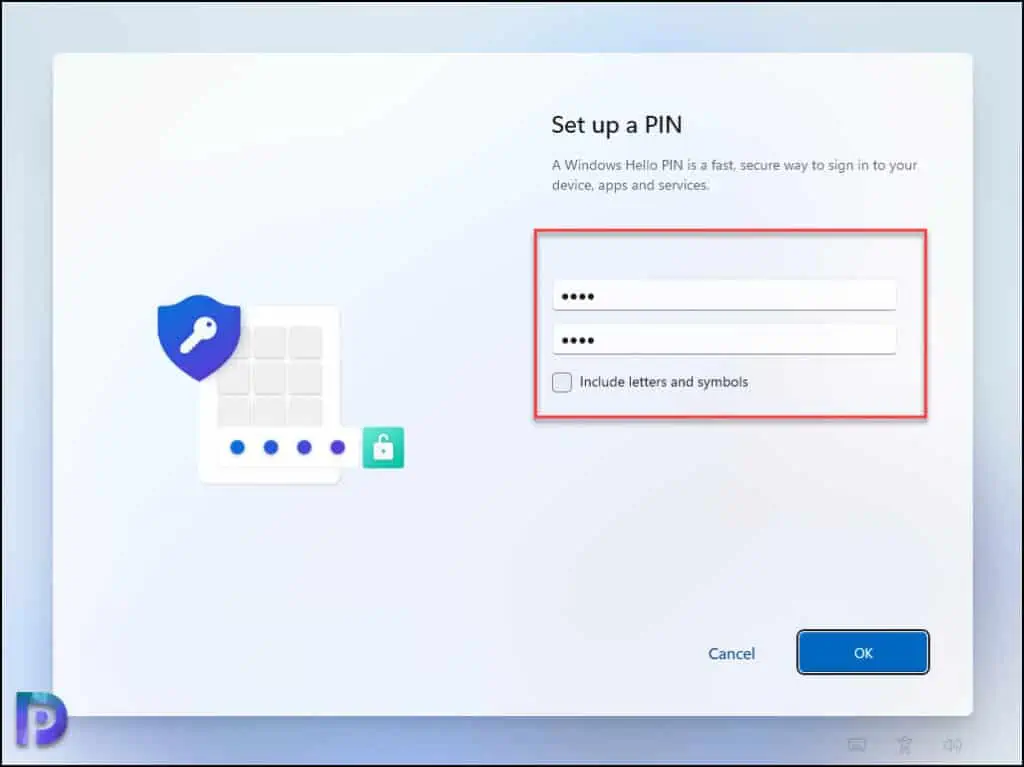
We are almost there! Set up a PIN to sign in to your devices, apps, and services. Click OK. The Windows 11 initial settings are configured in the background. This completes the steps to install the Windows Insider Preview (Windows 11) on your computer.
Verify the Windows Insider Preview Build Version
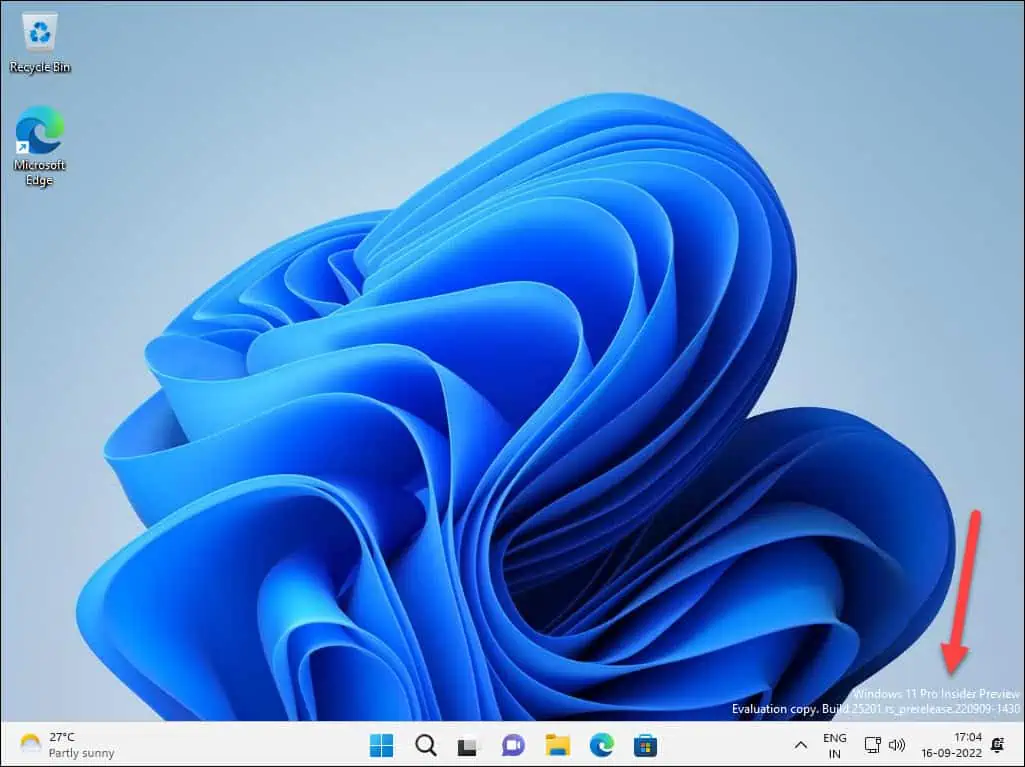
There are two ways to check the Windows Insider Preview Build version. When you log in to the computer, in the bottom-right corner of the screen, you will see the Windows insider build details. For example, the below screenshot shows the Windows 11 Pro Insider preview. Evaluation Copy. Build 25201.rs_prerelease.220909-1430.
The build numbers of the insider previews will change as and when the updates are released.
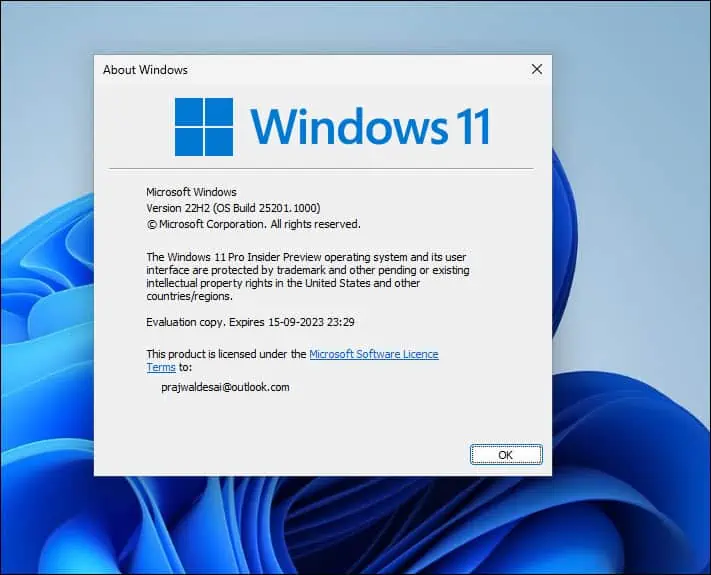
You can run the Winver command to check the Insider preview build version, build number and edition details.
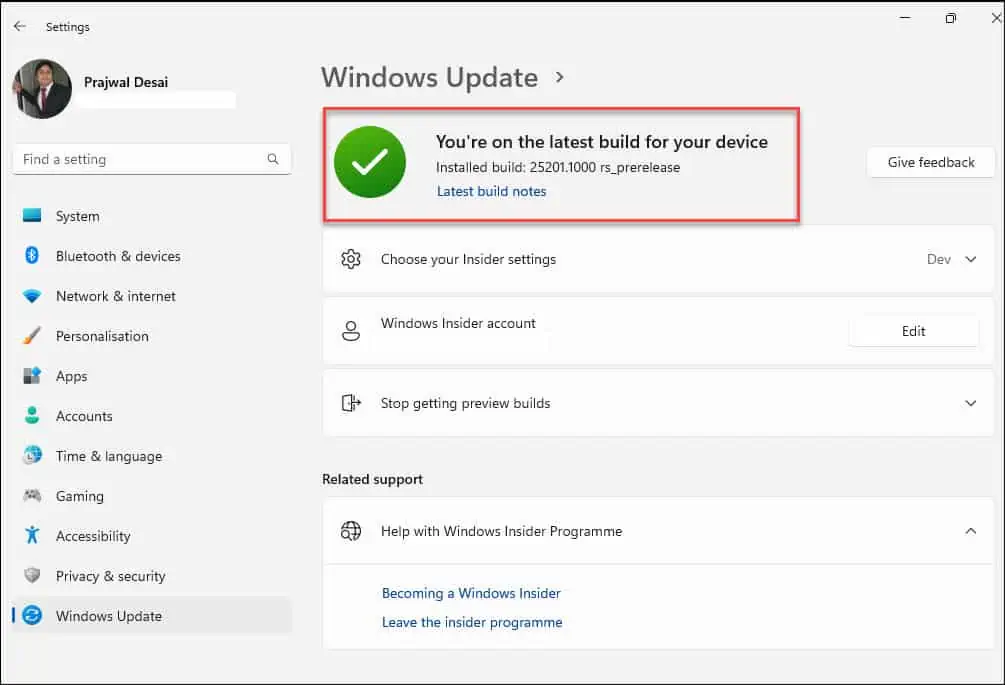
Once it’s finished installing, go to Settings > Windows Update > Windows Insider Program to make sure your Windows Insider settings are correct.
Windows Insider Preview Activation
To install Windows Insider Preview builds, you must be running a licensed version of Windows on your device. The Windows Insider Preview build must be installed on a computer that has already been activated with Windows or a Windows product key. If this is a clean installation, a Microsoft Account (MSA) with a Windows license digital entitlement attached must be used.

