

In the previous post we saw the steps to Install and Configure Windows Deployment Services. In this post we will see the steps to deploy windows 7 using windows deployment services. Before we start deploying windows 7 using WDS lets understand the role of DHCP server. Windows Deployment Services uses PXE, which relies on DHCP for IP addressing.
Right click on WDS server and click on Properties. Click on DHCP. The question is when should one select the DHCP options and in what cases ?
CASE 1 – If DHCP and WDS are running on same subnet but on different machines – You need to not configure the DHCP options at all. There will no broadcast issues when DHCP and WDS are running on different machines and on the same subnet.

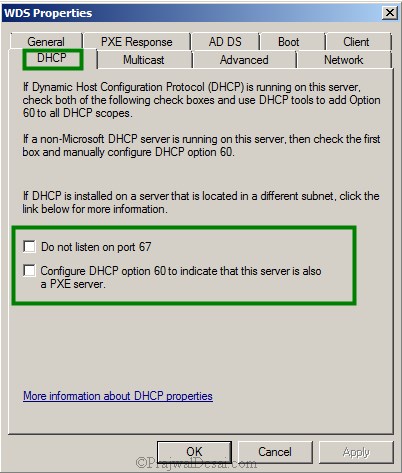
CASE 2 – If DHCP and WDS roles are installed on same server – In this case you must tell WDS not to listen on port 67 and set DHCP option 60 so that clients can find the WDS server. So options Do not listen on port 67 and Configure DHCP option 60 to indicate that this server is also a PXE server must be checked.

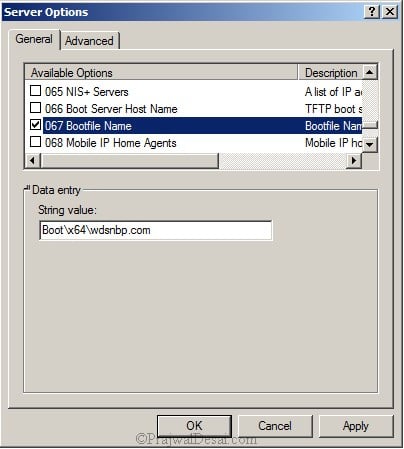
CASE 3 – If DHCP and WDS are running on a different servers that are on different subnets – In this case you must configure your router to forward broadcast packets because most often we see that broadcast packets are not allowed to cross other subnets. All DHCP broadcasts by client computers on UDP port 67 should be forwarded directly to both the DHCP server and the Windows Deployment Services server. Also, all traffic on UDP port 4011 from the client computers to the Windows Deployment Services server should be routed appropriately. To help WDS client find the WDS server we must configure DHCP option 66 and DHCP option 67. Option 66 should be set to the Windows Deployment Services server, and option 67 should be set to bootx86wdsnbp.com. Set the DHCP option 66 to hostname of the WDS server or the IP address of WDS server. DHCP option 67 is for boot file name, the clients will need the boot file in order to boot, so set option 67 to bootx86wdsnbp.com for 32 bit clients and for 64 bit clients bootx64wdsnbp.com.
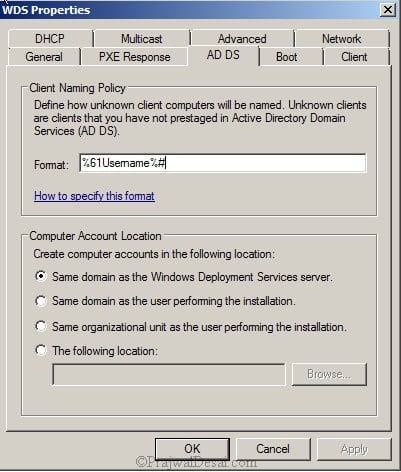
Client Naming Policy – Right click WDS server, click on Properties, select AD DS. Under the Client Naming Policy specify the format based on which computers will named. The default naming pattern is %61Username%#, this means WDS will create computer name using username who logged on when running remote installation process and # is the number 1,2,3..up to 999 will be added after username.
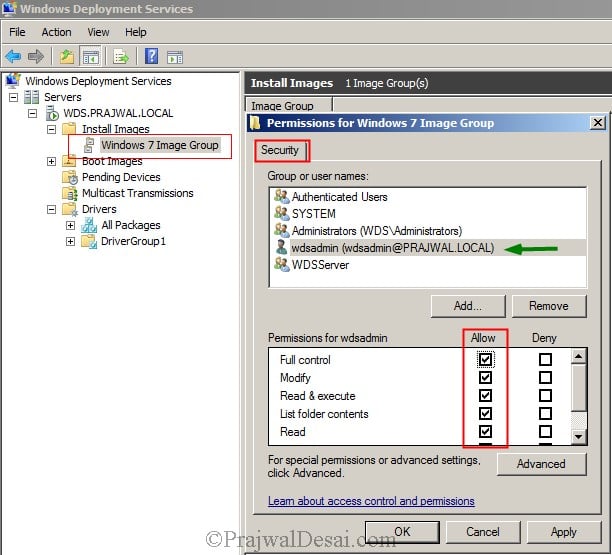
Security – To add the permissions for the user account on the Image Group, right click the Image Group and click on Security. Add the user account from the active directory and provide Full Control. If you are using a domain admin account during the installation of WDS ignore this step.
Should the computer be a part of domain after deployment – If you do not want the client to be a part of domain then the setting must be changed in the WDS server properties. Right click WDS server, click on Properties and select Client. Under Joining a Domain check the box Do not join the client to a domain after an installation.

Deploying Windows 7 Using Windows Deployment Services
In the previous post Installing and Configuring Windows Deployment Services we had imported the Boot image and Install image for windows 7. The DHCP and WDS are running on different servers but are on same subnet, so without worrying about broadcast issues, let start the deployment.
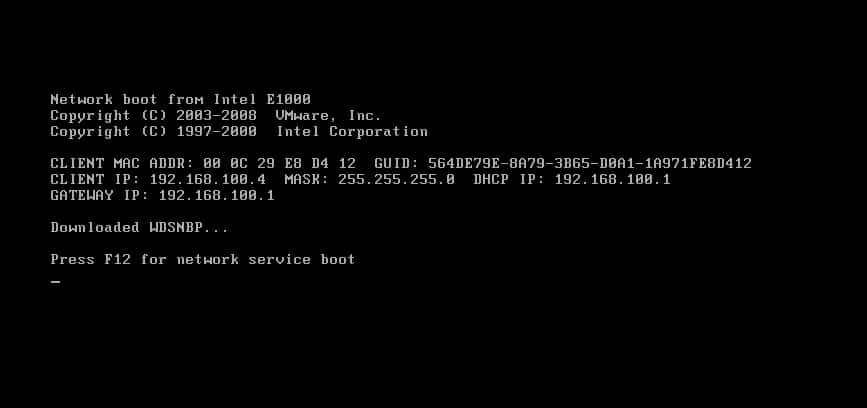
We will create a blank virtual machine and set it to boot from the network. During this boot process the client receives the IP from the DHCP server and WDS client discovers the WDS server through DHCP server or by broadcasting the packets. Once the WDS server is found the client boots with a WinPE (Windows Preinstallation Environment) and the image stored on the WDS server is installed on the client machine.
Press F12 to start the network service boot.
Wait for few seconds until the windows loads the files for installation.

choose the locale and click next.

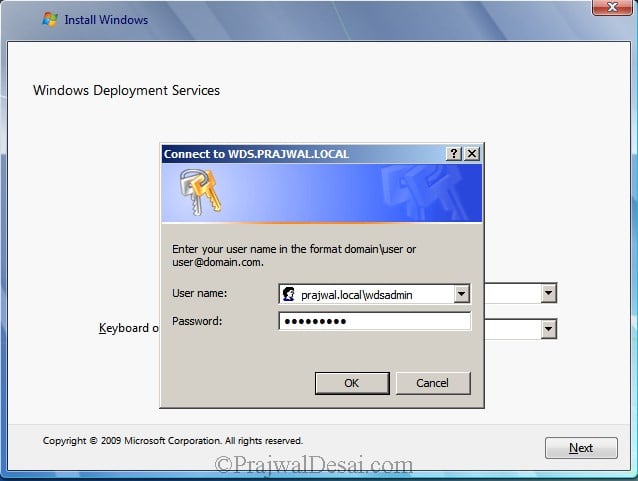
Provide the user account and password. Click on Next.
Select the edition of windows 7 that you want to install. Click Next.

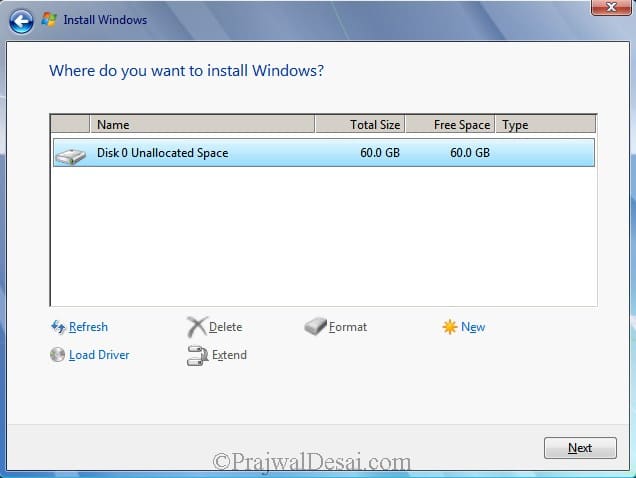
Click on next.
Once the installation is complete complete the windows 7 initial setup.

Note that the client is already joined to the domain. Login to the computer with a domain user account.
The windows 7 has been successfully deployed to a client using Windows Deployment Services.

Nice post prajwal
Thank you.
Hi Parjawal,
Can this be used in Windows Server 2003?
I’ve tried the way above,
PXE boot results on the client pc always Failed.
The description is
“the boot selection failed because a required device is inaccessible”
nice post …i have configured the same but i am unable to start from client pc, i have also attched the print screen.
please help ..m waiting your reply ..
satishmaury@gmail.com
Check if the DHCP service is up and the client machine is able to contact DHCP server to get the IP address.
Thanks a lot for your prompt reply ..
now its showing new error …pls find attached
You need to add network card drivers to the boot image. Example – https://www.prajwaldesai.com/import-vmware-drivers-to-your-sccm-boot-image/
Hello Prajwal,
Nice post
Thank you Shashikant.
Hi Prajwal, i have installed the windows 7 professional 32 bit including MSoffice and other software without driver in new machine. So my question is how do i add this windows 7 image in WDS server and use it for other machine?
while deployment i am getting the following error
PXE-T04 : Illegal operation error
PXE-E36: Error received fron TFTP server
PXE-M0F: Exiting Intel PXE ROM
Operating System not found
Hi Prajwal,
my wds was working fine until i have a power outage and now clients cannot seem to see the server when booting.
WDS is setup on a separate server then dhcp and i have also checked from services that is started, when clients pc press f12 i can only see the following
CLIENT IP: 10.79.29.45 MASK:255.255.252.0
DHCP IP: 10.79.28.4 PROXY IP: 192.168.1.99
GATEWAY:10.79.28.1
any help would be much appreciated
Syed,
You can also attach the screenshot in the ticketing tool.
Thanks,
Prajwal Desai
How should you set option 67 when you have a mixed environment of 64bit AND 32bit computers?
Good question. The x64-based computers can run x86-based or x64-based boot images but the x86-based computers can run only x86 based boot images. Hence you can have two boot images—one for x86 and one for x64. On the boot menu x86-based computers will only display x86 boot images (because x86-based computers cannot run x64 boot images).
Nice Article 🙂
good work prajwal … wanna to deploy windows but today i found that my win 7 cd doesnt have install.wim and boot.wim file
and please mention your email id too
@Rohit – The install.wim and boot.wim can be found inside a folder called “Sources”. If you don’t find them inside Sources then check your Windows 7 DVD once.. May i know what edition of Windows 7 is that ?