This simple post shows the steps to create and attach data disk to VM in Azure portal. Consider a scenario where you have windows virtual machine in Azure. You want to move data from C: drive to another drive to save some space. To do so you may want to add a storage or data disk. While you can also attach data disk to VM using powershell, I feel using Azure portal is easier because you can do it in just few steps. Azure provides lot of storage options depending upon your requirements. Before you attach data disk have a look at Azure storage pricing page.
Create and Attach Data Disk to VM in Azure Portal
The steps to create and attach data disk to VM in Azure portal are as follows. The screenshots should help you out in following the steps.
- Login to Azure portal by clicking here.
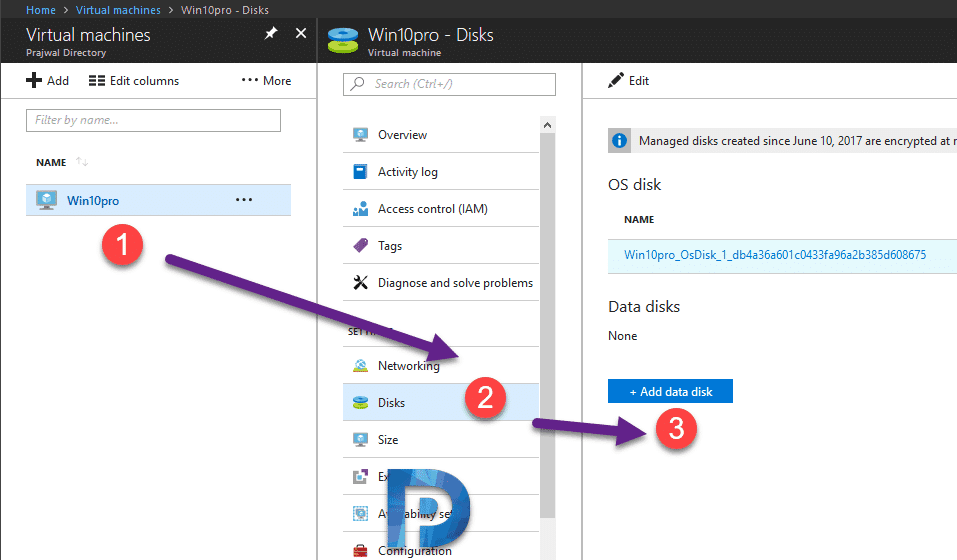
- Select the virtual machine for which you intend to add data disk.
- On the virtual machine page, click Disks.
- Under Data Disks, click +Add data disk.
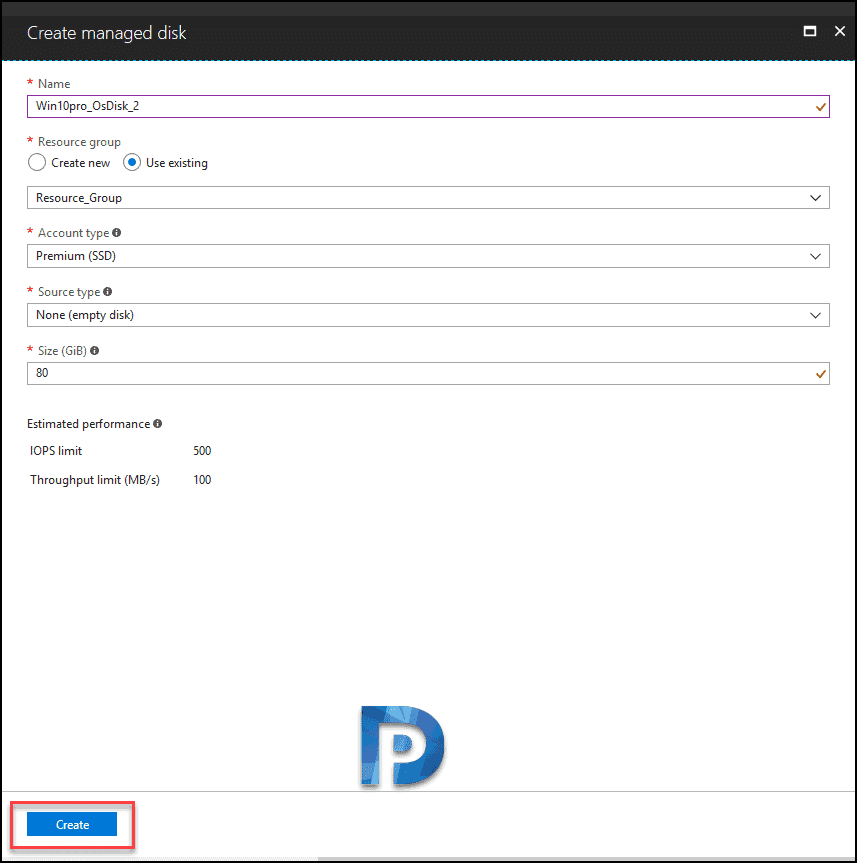
- In the drop-down for the new disk, select Create disk.

In the Create managed disk page, type a name for the disk and choose the Resource Group. Account type can be either Premium(SSD) or Standard(HDD). Specify the disk space for the data disk and click Create. Finally click Save to save the new disk configuration for the VM. Allow Azure to attach new disk to the VM. The new disk is listed in the virtual machine’s disk settings under Data disks. The next step is to initialize this new data disk. Login to the VM and go to disk management. You will find the new data disk as unallocated. The next steps are simple, format the volume and it’s ready to use. Congratulations you have successfully added new data disk to VM in Azure portal.


hi
what is the powershell cmlet for the same task