In this post I will cover two important concepts. The first one is installing WSUS and the second one SCCM 2012 firewall exceptions. I must tell you that you can install WSUS after installing SCCM as well. You might see a warning during SCCM 2012 prerequisite check. However I prefer to install it before installing SCCM.
Configuring firewall exceptions is yet another important thing. We will look at opening SQL ports for SCCM. There are few services that needs to be allowed through windows firewall to ensure client installation works fine.
Installing WSUS 3.0 SP2
As a first step let’s install WSUS. When you want SCCM to deploy software updates, SCCM uses WSUS to download the metadata. In addition to that, when you install the active software update point on a remote site system, you must install the WSUS Administration Console on the site server computer. This allows the site server to communicate with WSUS running on the active software update point.
Installing WSUS is quite simple. You can install WSUS by opening up the server manager, roles and by adding WSUS role. I prefer to install the WSUS by downloading the setup file from Microsoft.
Run the WSUS Setup file. Click Next.
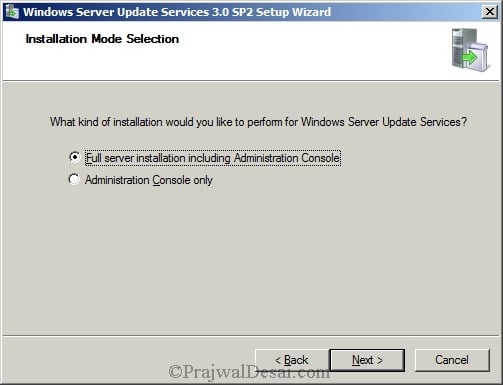
Select Full server installation including the administrator console. Click Next.
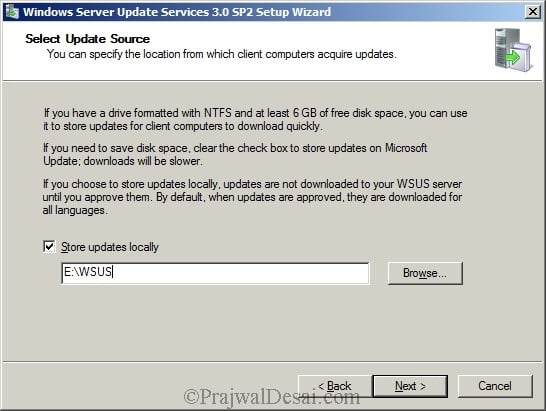
Always place the updates on different drive. We will place WSUS updates on the drive named E:. You can store the updates on C drive but it is not recommended because C: drive is meant for OS. Click Next.
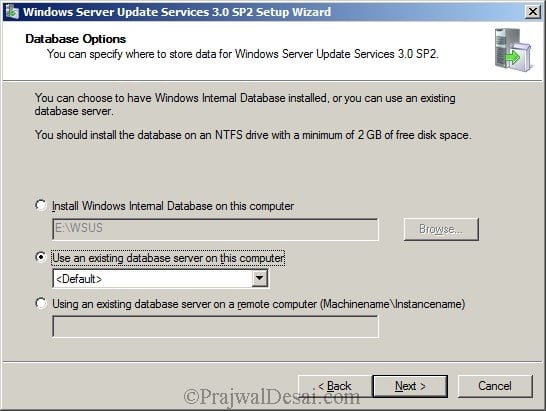
Select the SQL database instance. Click Next.
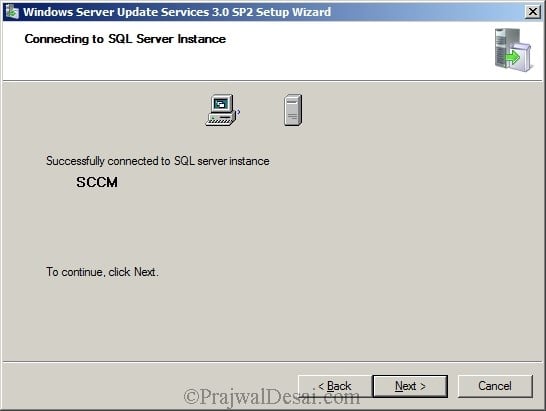
We see the connection to SQL server is successful. Click Next.
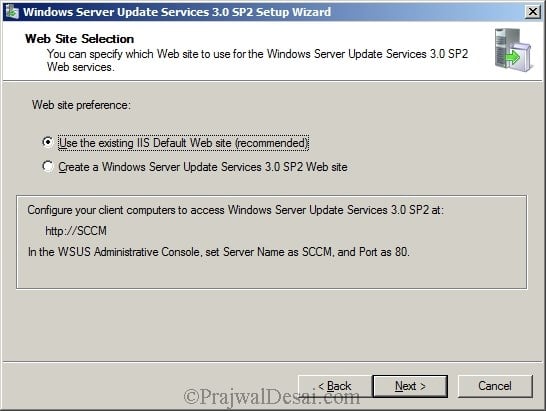
Select Use existing IIS default Web site and click Next.
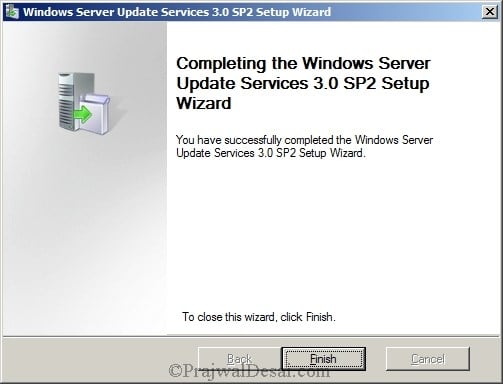
Finally, click Finish to complete the WSUS installation.
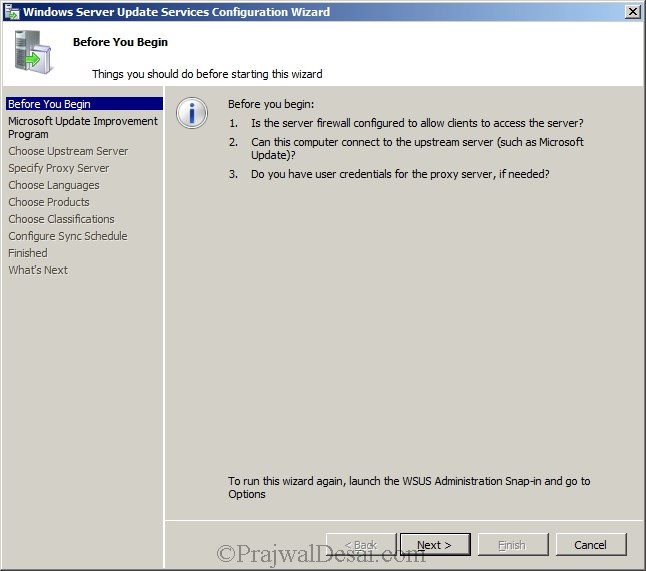
Here is very important note. Once you click Finish, the WSUS configuration wizard comes up. Do not configure anything here. Click cancel to close the wizard.
Configure SCCM 2012 Firewall Exceptions
We will now configure firewall to allow ports that are essential for SCCM client installation. In order to successfully push SCCM client agents to machines, you must add the following as exceptions to the Windows Firewall.
- Printer Sharing
- Windows Management Instrumentation (WMI)
Create Inbound Rule – File and Printer Sharing Service
We will create an inbound and outbound rule, add File and Printer sharing service as exception to firewall . An inbound rule to allow WMI. We will perform this activity on the Domain Controller.
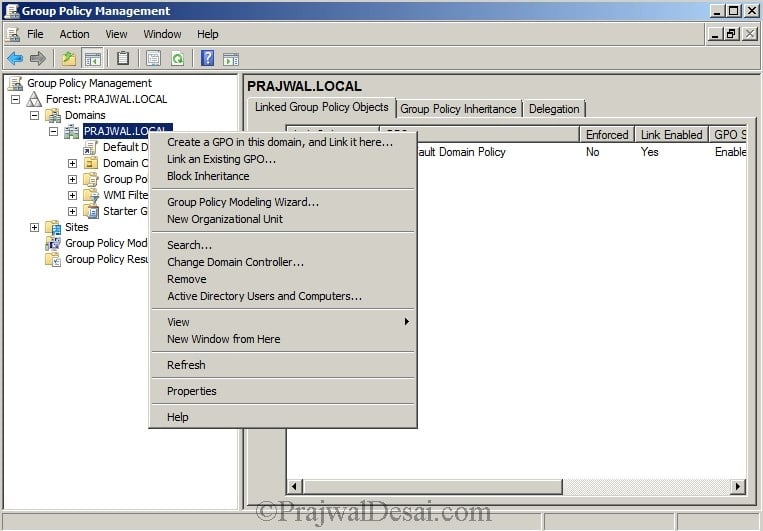
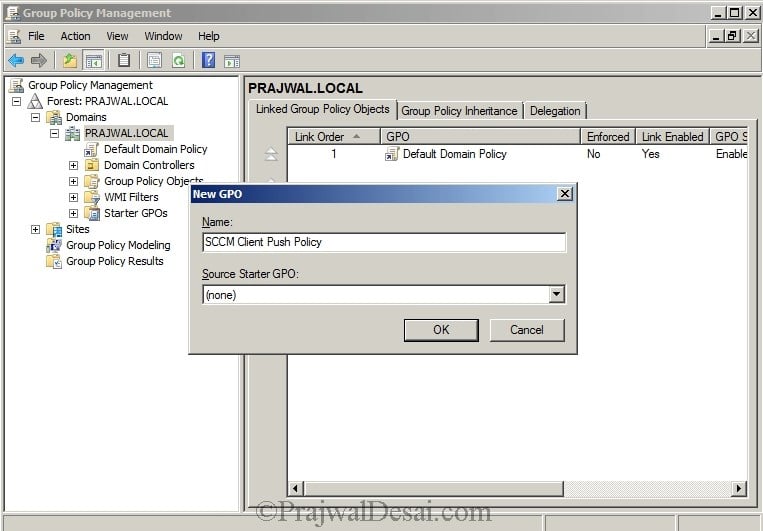
Open group policy management console. Right click Domain and create a GPO.
Specify a name to this policy such as SCCM Client Push Policy. Click OK. Right click the SCCM Client Push policy and click Edit.
Expand computer configuration, Windows settings, Security settings, Windows firewall with advanced security. Refer the below screenshot.
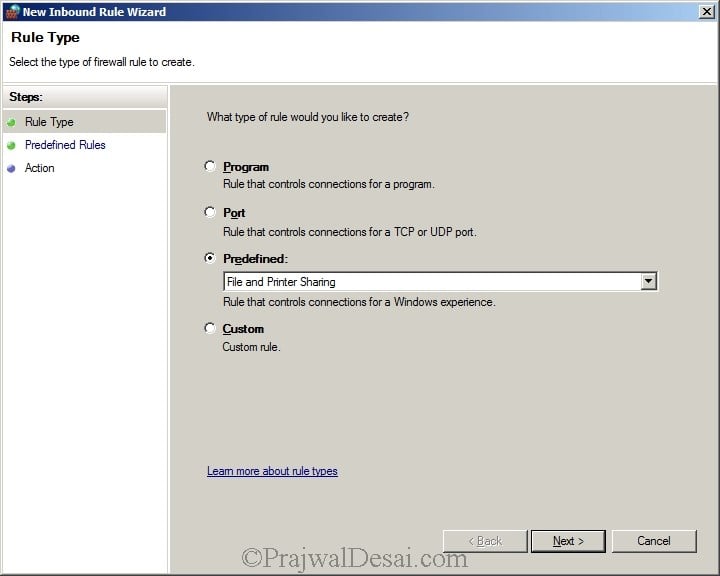
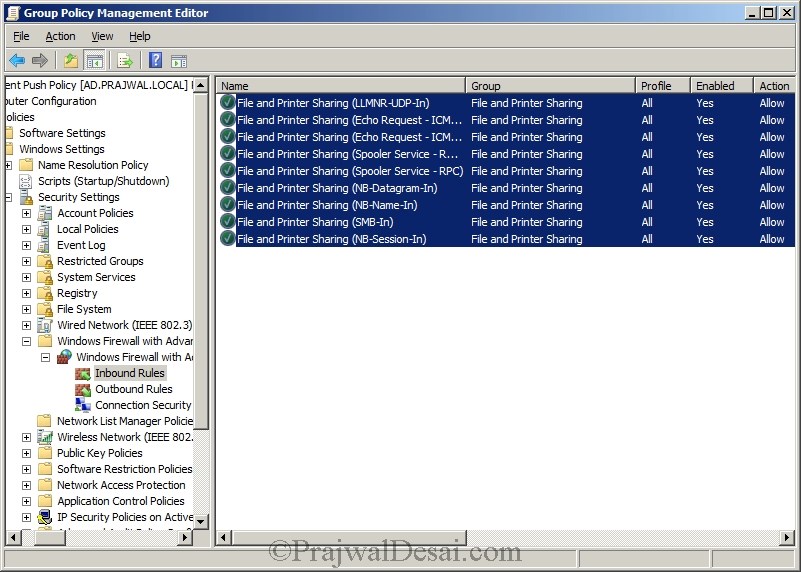
Right click Inbound Rule and select New Rule. Select Predefined and select File and Printer Sharing from the list. Click Next.
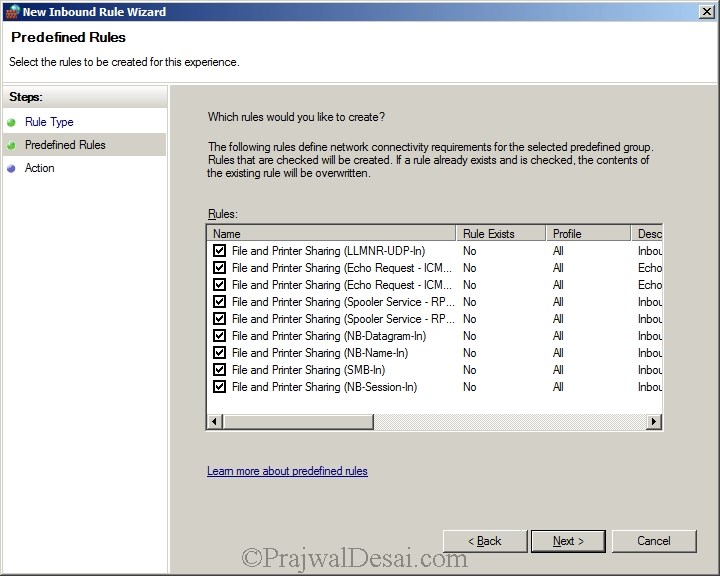
Select all Rules. Click Next.
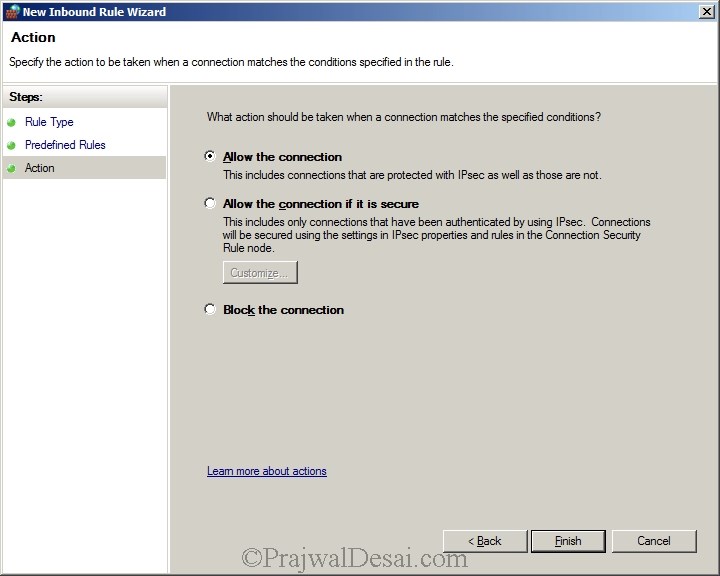
Check the radio button Allow the Connection and click Finish.
Our Inbound Rule is created.
Create Outbound Rule – File and Printer Sharing Service
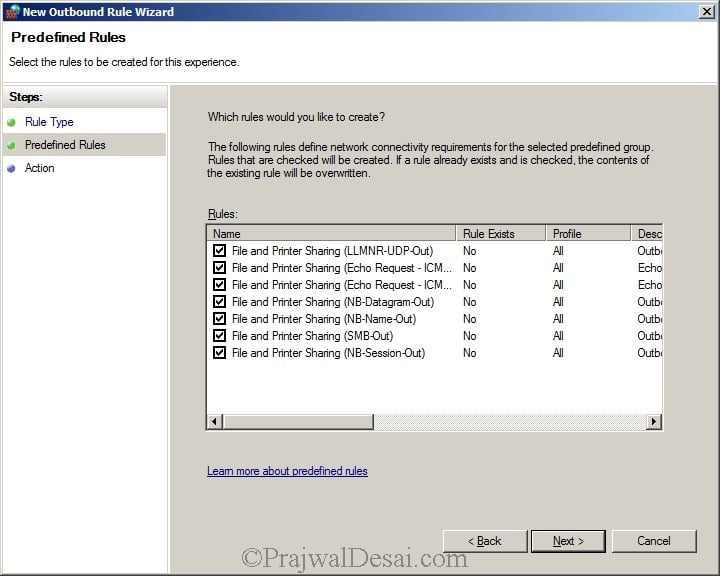
Now we will create an outbound rule for the same.
Make sure all the rules are selected. Click Next.
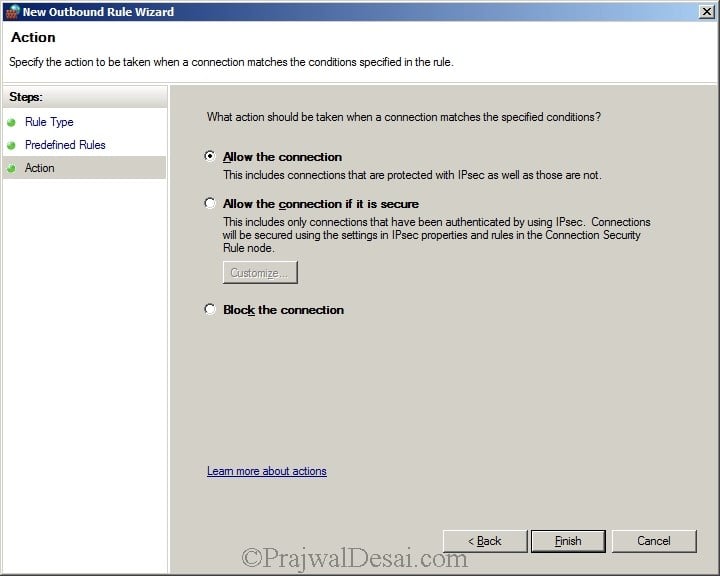
Select Allow the Connection. Click Finish.
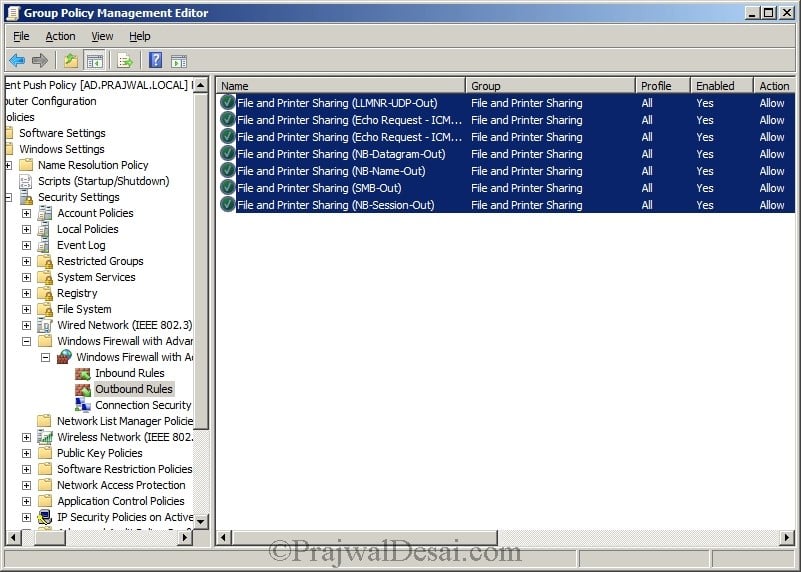
We have created a rule to allow the File and Printer sharing Outbound.
Create Inbound Outbound Rule – Windows Management Instrumentation
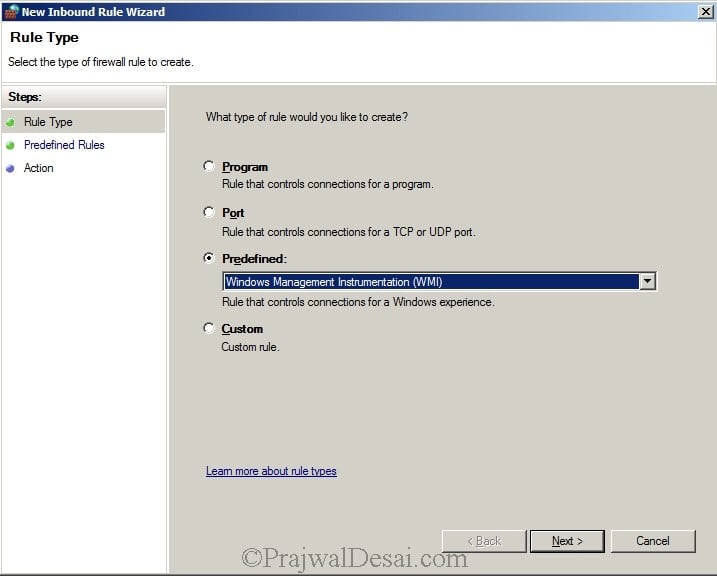
Now we will create an Inbound Rule to allow Windows Management Instrumentation. Create an inbound rule selecting Windows Management Instrumentation from predefined. Click Next.
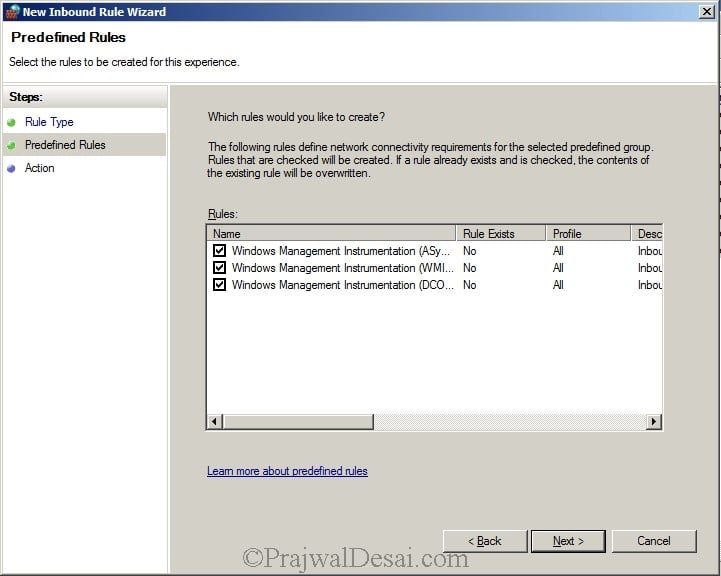
Check all the rules and click Next.
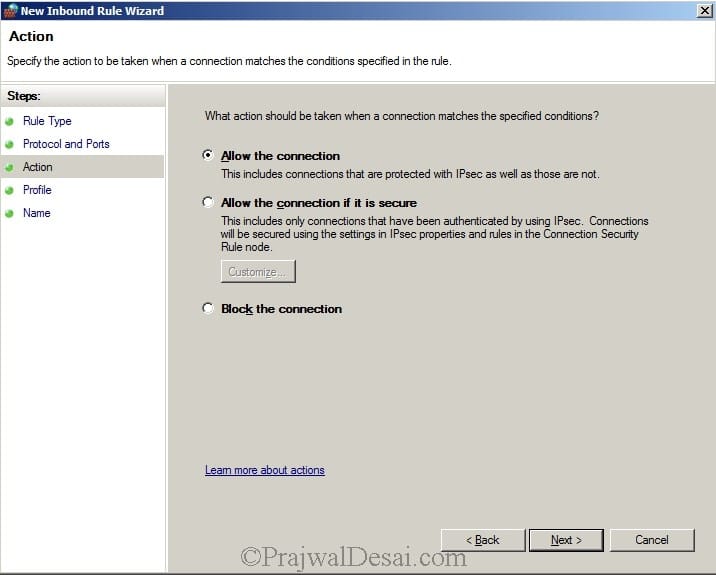
Allow the connection. Click Next.
SQL Ports for SCCM
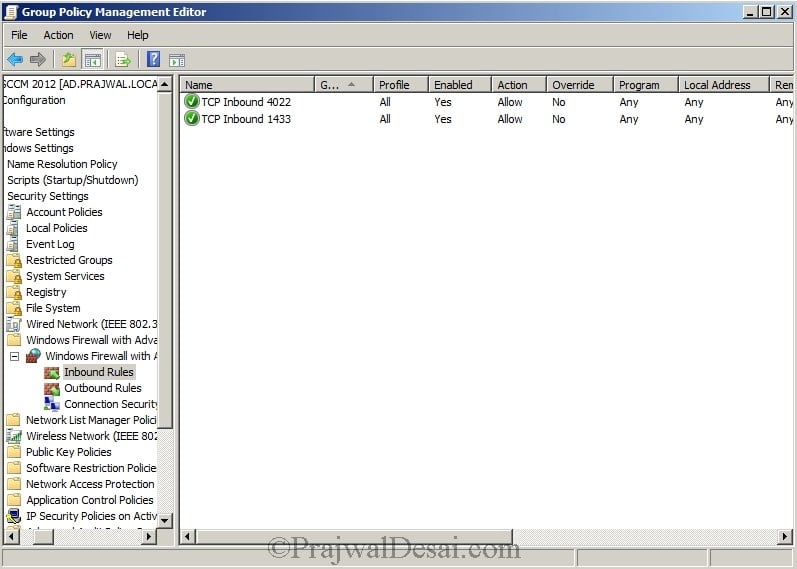
Next we will open TCP port 1433 and 4022 for SQL replication. By default, Microsoft Windows enables the Windows Firewall, which closes port 1433 to prevent Internet computers from connecting to a default instance of SQL Server on your computer. Connections to the default instance using TCP/IP are not possible unless you reopen port 1433. Let’s create a group policy to open TCP ports 1433 and 4022.
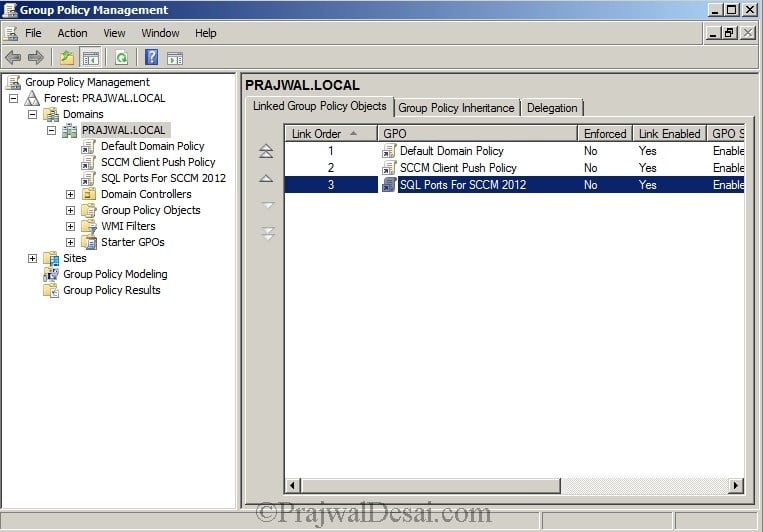
Open the Group Policy Management console. Create a new policy and name it as SQL Ports for SCCM 2012. Right Click the policy SQL Ports for SCCM 2012 and click Edit.
In the Windows GP management console, expand computer configuration, Windows settings, Security settings, Windows firewall with advanced security.
SQL Ports – Open TCP Port 1433
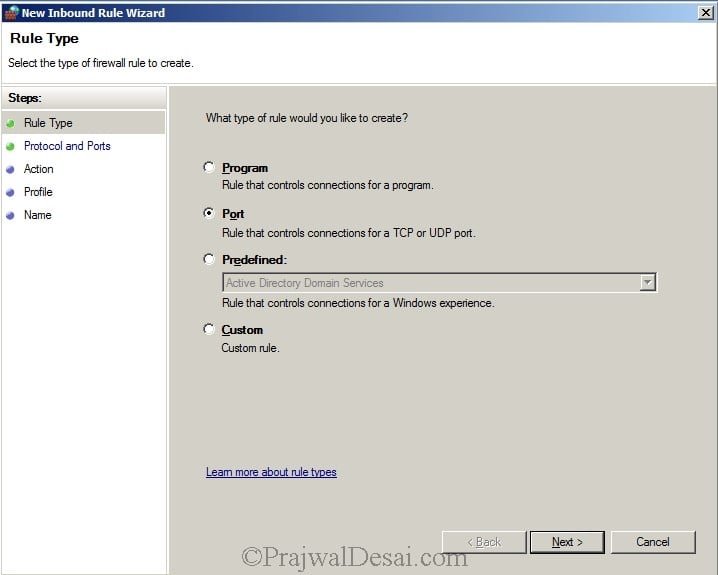
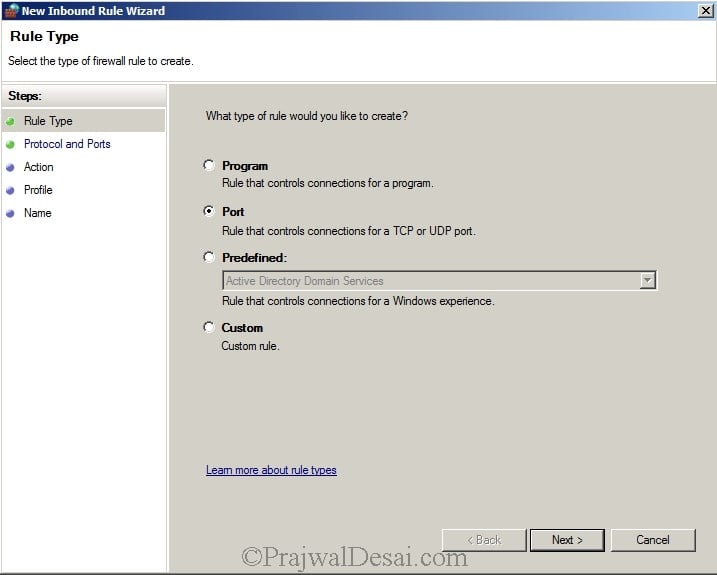
Create an Inbound Rule and select Port. Click Next.
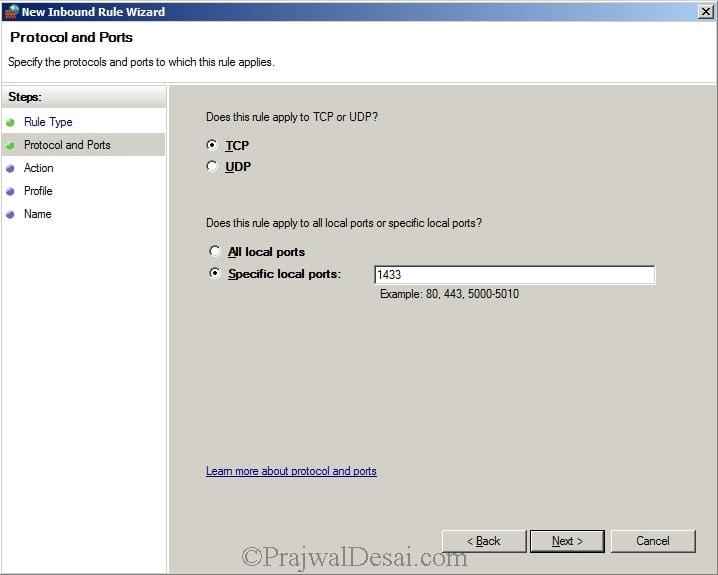
Select TCP, and specify port 1433 in specific local ports. Click Next.
Click Allow connection and click Next.
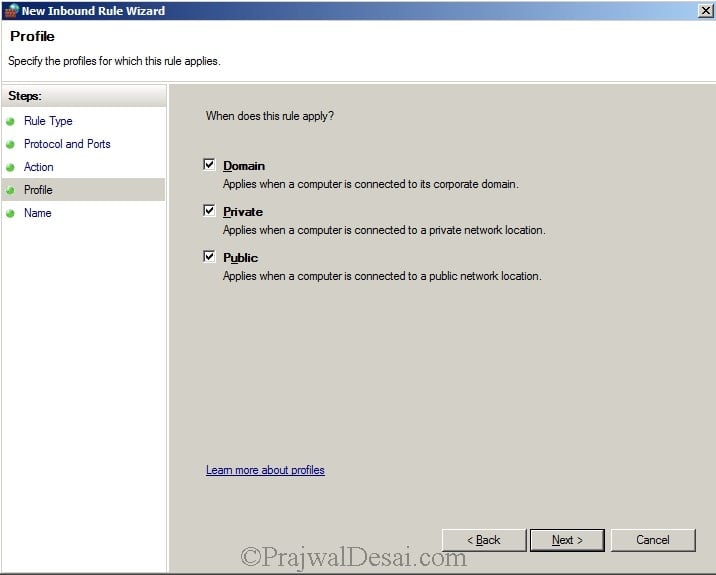
The firewall rule will be applied for all the 3 profiles. Click Next.
- Domain
- Private
- Public
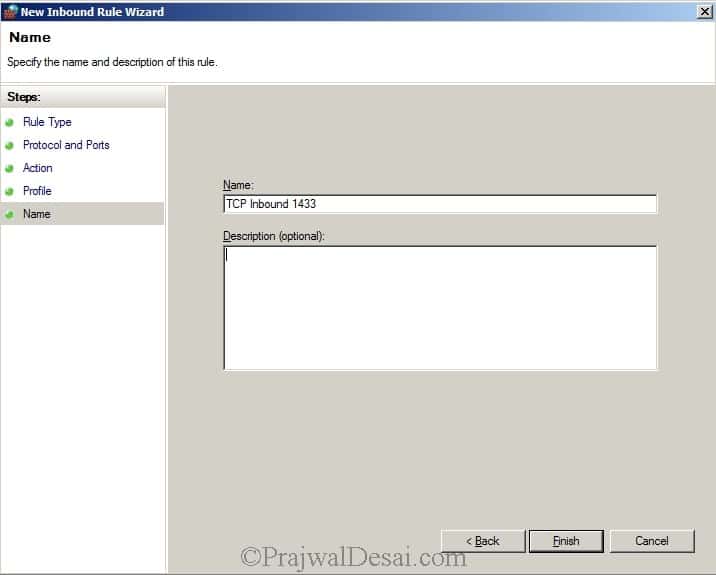
Specify a rule Name. Click Finish.
SQL Ports – Open TCP Port 4022
We will now open the TCP port 4022. Create an Inbound Rule and select Port. Click Next.
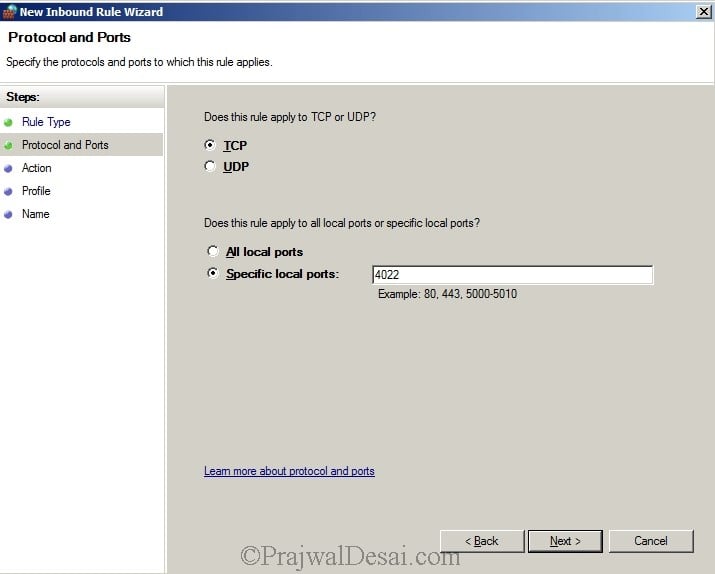
Specify the port number as 4022. Click Next.
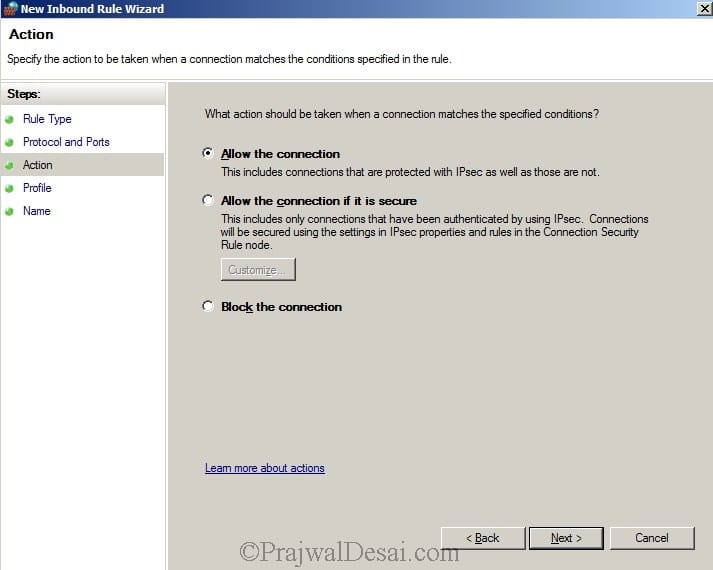
Choose Allow the connection.
This rule applies to all the 3 profiles, click Next.
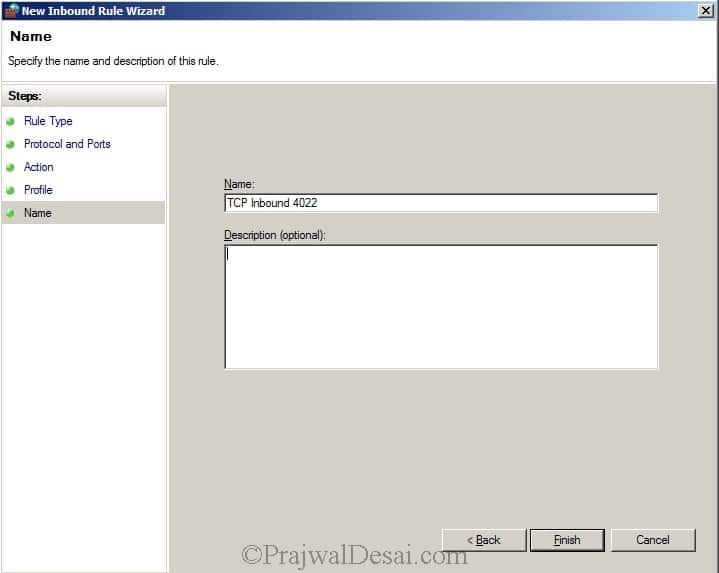
Specify a rule name and click Finish.
The rules that we created can be seen in the inbound rules section.









Hi PD sir , I rajendra, i have a problem on my system…
when ever i install sql server on windows server 2016. It shows domain controlling warning message. In that warning message was Installing sql server on a domain controller is not recommended….what can i do… please solve my problem…Due to this effect my MECM doesn’t configured….
thank you
please cloud you tell my the steppes in order to Configuring Firewall for Client installation on windows 8.1 ?
thank you
what steps for Configuring Firewall for Client installation on windows 8.1 ?
thank you
can i make all this firewall rules in sccm2012 server only or must be put in group policy ? why?
and if group policy what ou does the sccm 2012 server hosted and the client machine also what ou they will be hosted and if this group policy applied also in ou hosted client machine
thank you
The firewall exceptions must be configured through a group policy. It’s done on a domain controller and the policy is created at the domain level so that all the domain computers are enforced with this policy.
I have configured updates with SCCM, here is my problem:
1) Clients not getting updates
2) SCCM is not getting updates from Microsoft. Sync failing.
How can I determined whether the problem is the WSUS server (not configured correctly, writes issue, incorrect ports used, group policy wrong etc…..) or the Clients ?
Background: I am a tech (responsible only for pc’s in my company) I did not setup the WSUS or SCCM server. I need to prove to our Network Admin that the problem is with the server not my pc’s. I have verified that SCCM is setup for updates correctly. Your help appreciated.
we have a test lab where we have only one primary server and and windos 8 client now my requirement is
Requirements
1. As part of patching, we will not create a package for windows updates and deploy it to collections.
2. Also we didn’t want to download the updates and save it locally in our WSUS Server. Windows clients will download the updates from Microsoft directly, but we have to keep track/record of updates installed to client machines using SCCM server.
I don’t think you can generate reports of windows updates installed on client computers through SCCM if the updates have been pushed through WSUS server and not through SCCM server. There is a way to check whether a specific update has been installed on client computer and that is through creating a DCM rule (SCCM 2007) or configuration baseline in SCCM 2012. Let me try this in my lab setup and i will get back to you soon..
Does port 1433 and 4022 need to be open for the entire domain? Or just for the SCCM/SQL server? I see the need for WMI and File and Print sharing but not the SQL replication ports.
I would recommend to open the ports using group policy for entire domain. SQL replication ports TCP 1433 and 4022 must be opened because these are required to access SQL and for SQL to replicate to other SQL servers. WMI and File and Print sharing services must be enabled. Both the steps are shown in the post.