This post is a complete guide to install HP support assistant using SCCM. I will download the latest version of the application, package and deploy it to Windows devices using Configuration Manager.
HP Support Assistant is a free utility software developed by HP for their desktops and laptops. It is designed to help users manage and maintain their HP devices by providing tools for troubleshooting, diagnostics, updates, and system optimization. It is included on new HP desktop and notebook PCs.
In my earlier guide, I demonstrated the deployment of HP support assistant via Intune. I’ve received several emails requesting a demonstration of deploying the same application using Configuration Manager. This guide is for everyone who reached out to me about the deployment process.

HP Support Assistant Deployment using SCCM
Let’s go through the correct procedure for deploying the HP support assistant using Configuration Manager.
Download and Extract HP Support Assistant Installer
Visit the official HP Support Assistant website and download the latest version of the installer (usually in .exe format). The browser downloads the installer file, which is the main setup file that will be used for deployment.
The HP Support Assistant setup file cannot be deployed directly through SCCM, as it requires extraction to access the actual installation file, uninstallation file, and framework components. To extract the setup file contents into a folder, you can use the 7-zip app or WinRAR app. Right-click the setup file and select extract to a folder.
The extracted folder includes multiple files and directories. Key files are InstallHPSA.exe, which installs the HP Support Assistant, and UninstallHPSA.exe, which removes the HP Support Assistant application from your computer.

Create HP Support Assistant Application in SCCM
Perform the following steps to create a new application for HP Support Assistant in SCCM.
- Launch the Configuration Manager console.
- Go to Software Library > Overview > Application Management.
- Right-click Applications and select Create Application.

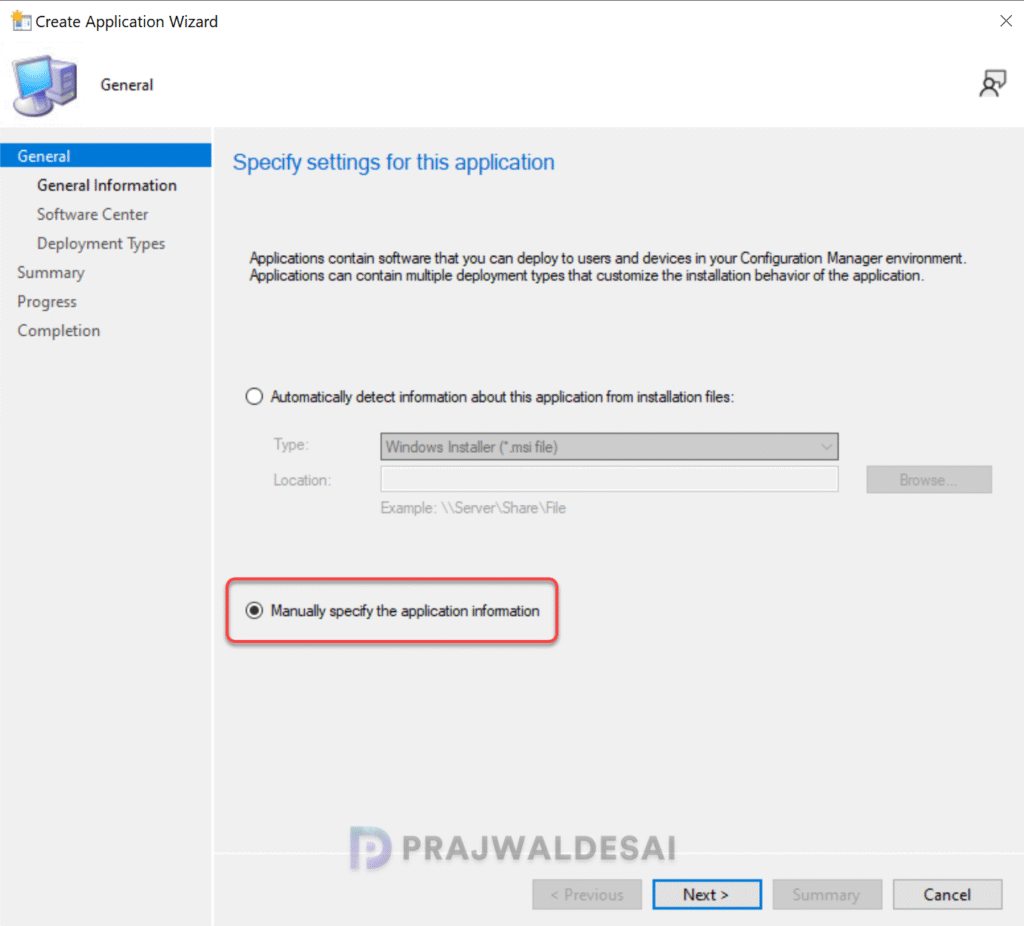
On the General window, select Manually specify the application information and click Next.
Specify the application details such as Name, Publisher, Software Version, etc. Click Next.

On the Software Center page, specify an icon for HP support assistant app that will be visible to users in Software Center. Click Browse and select an app icon and click Next.

On the Deployment Types page, click the Add button to add a new deployment type for the application. Click Next to continue. On the General window of Create deployment type wizard, select Manually specify the deployment type information. Click Next.

On the Content tab, specify the content location and use the below provided install and uninstall command for HP Support Assistant.
- Install command: InstallHPSA.exe /s /v/ qn
- Uninstall command: “%ProgramFiles(x86)%\HP\HP Support Framework\UninstallHPSA.exe” /s /v/qn UninstallKeepPreferences=FALSE
Click Next.

To add a new method for HP support assistant app, click Add Clause. On the Detection Rule window, create a rule with the following options.
- Setting Type: File System
- Type: File
- Path: %ProgramFiles(x86)%\HP\HP Support Framework
- File or Folder name: HPSupportAssistant.dll
- Property: Version
- Operator: Greater than or equal to
- Value: 9.44.2.0
Once you have specified the above details, click OK and then select Next.

Specify the user experience settings for the application. I have specified the following settings in the below example.
- Installation behavior: Install for system.
- Logon requirement: Whether or not a user is logged on.
- Installation program visibility: Hidden.
Click Next.

Additionally, you can specify the requirements and dependencies for the application. Click Next and on Completion window, click Close.

Deploy HP Support Assistant using SCCM
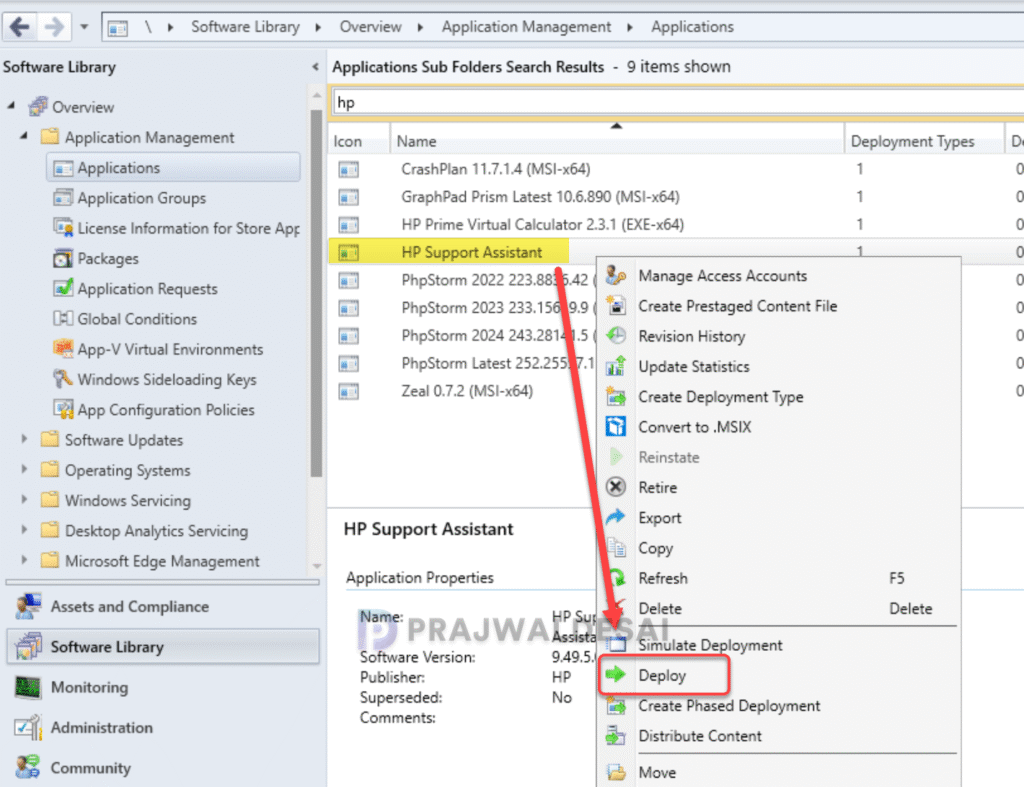
To deploy the HP support assistant application in SCCM console, go to Software Library > Application Management > Application. Right-click HP support assistant application app and select Deploy.
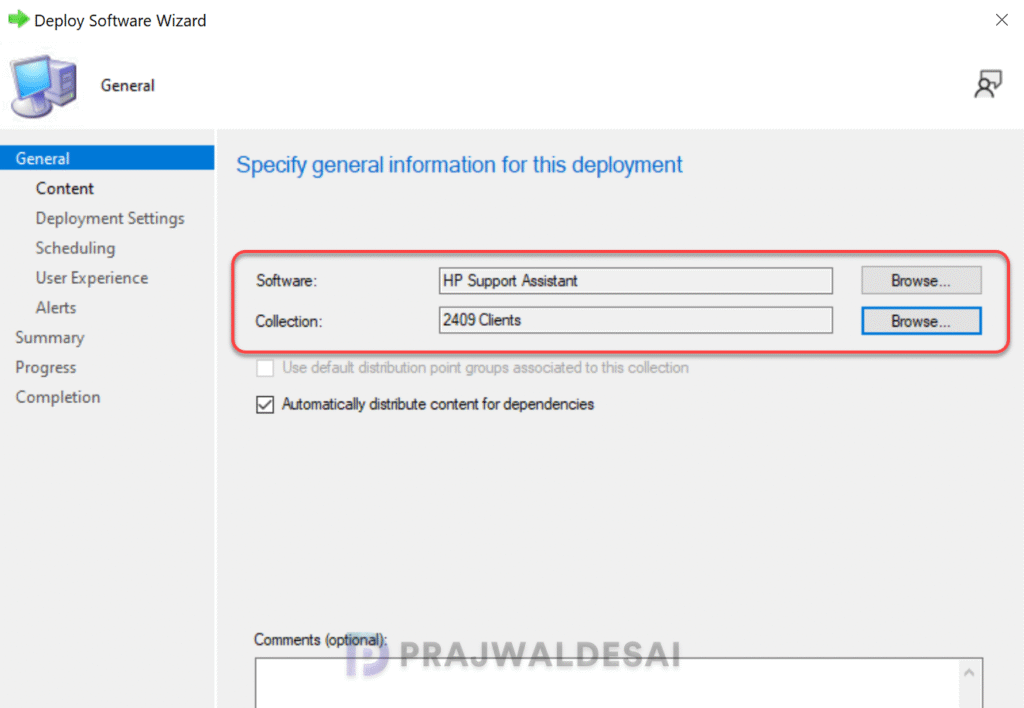
On the General page of Deploy Software Wizard, click Browse and select a device collection to deploy the application. Click Next.
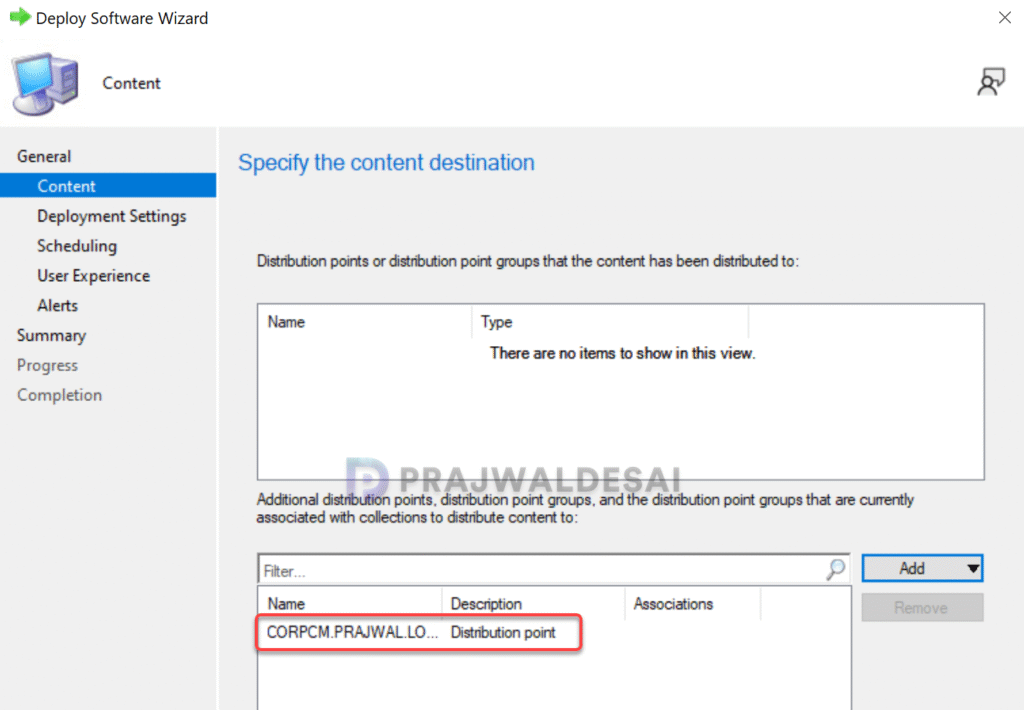
On the Content page, click Add button and specify the distribution points to distribute the application content. You may also select distribution point groups. Click Next to continue.
On the Deployment Settings window, specify the settings to control the deployment. Select the Action as Install and Purpose as Available. Learn the difference between Available and Required deployment in SCCM. Click Next.

Finish the remaining steps in the deployment software wizard and close it. The HP Support Assistant application has now been distributed to the DP, and it should appear in the Software Center on client machines.
Verify the Application Installation
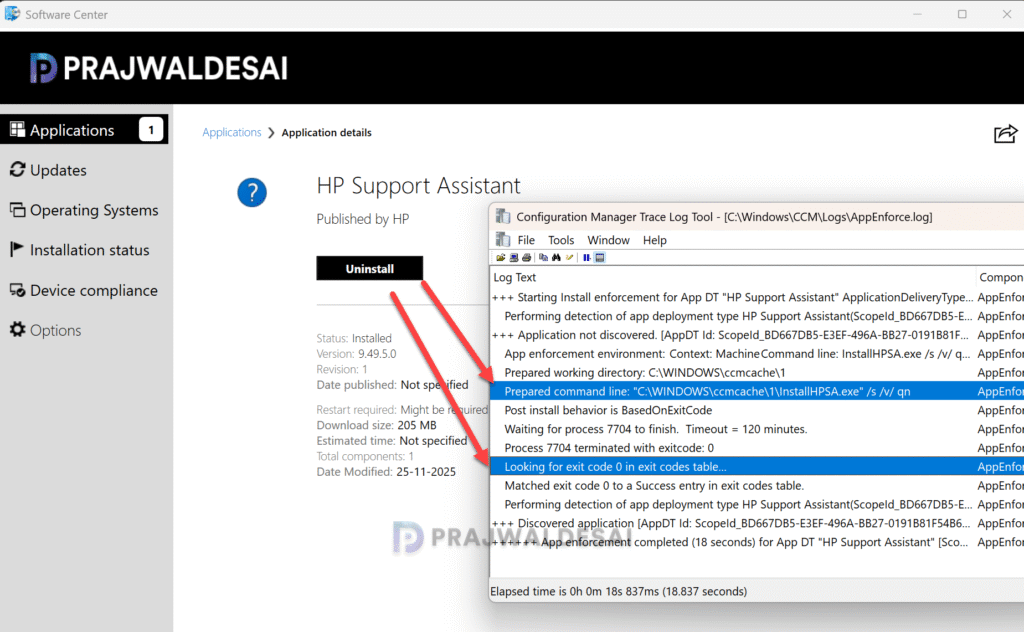
In this section, we will verify if the HP Support Assistant application installs fine on the client computers. Log in to a client computer, and launch the Software center. Click on the Applications tab and select HP Assistant application and click Install.
The application is now downloaded from the local distribution point server for installation. You can review the application installation progress using AppEnforce.log. To know the location of this file and other files, refer to the SCCM Log files.
Matched exit code 0 to a Success entry in the exit codes table confirms that the HP support assistant application has been installed successfully. The uninstallation command that we specified during application packaging should work fine.