

In this guide, I will show you how to configure Software Update Point to use SSL in SCCM. When you setup WSUS servers and their associated SUP servers to use SSL, it enhances security by minimizing the risk of remote attacks that could compromise client systems or lead to privilege escalation.
In Configuration Manager, the SUP site system role is always installed on a server that has the WSUS role installed. The Software Update Point (SUP) role integrates with WSUS to manage synchronization settings, including product categories, update classifications, and supported languages. The end goal is to deploy software updates to clients with SCCM.
When you have a WSUS running on a remote server, you can secure the traffic between the SCCM and remote WSUS server by enabling SSL and thereby encrypting the traffic. In short, we’ll configure our software update point to require SSL communication to the WSUS server.

In one of my guides, I covered the implementation of PKI certificates for SCCM infrastructure. If you haven’t configured PKI certificates yet, these guides will assist you and they also include the installation process for setting up an Enterprise Root Certificate Authority for your organization.
Prerequisites
Make sure the following requirements are in-place for setting up your SUP in SSL:
- A WSUS server with the software update point role installed.
- A security group in AD containing all of your WSUS servers.
- Access required to Certificate Authority to generate certificates.
- A working PKI certificate is already in the WSUS server’s Personal certificate store. If not, you can create one with the steps covered in this guide.
- The ability to request and obtain an appropriate PKI certificate for the WSUS server from your Enterprise root certificate authority (CA).
- Full administrator role permissions for SCCM.
Steps to Configure Software Update Point to use SSL
After going through the prerequisites, let’s proceed with the steps to configure Software Update Point to use SSL in SCCM. This process includes creating a web server certificate template for WSUS, enrolling the certificate on the SUP (WSUS) server, and finally setting up SUP to operate in SSL mode. I have broken down the entire process into individual steps which makes it easy to follow.
Step 1: Create SSL Certificate Template for SUP/WSUS
To enable SSL communication for WSUS/SUP servers, a certificate template needs to be generated and issued from within the Certificate Authority. Launch the Certificate Authority and right-click Certificate Templates and select Manage.

In the Certificate Templates console, right-click Web Server and select Duplicate Template.

In the General tab of the certificate template, specify the template display name and set the certificate validity period.

In the Compatibility tab, make sure the following compatibility selections are enabled:
- Certification Authority: Windows Server 2003
- Certificate recipient: Windows XP/Server 2003
Click Apply.

Select the Request Handling tab and checkbox “Allow private key to be exported“.

Head to the Security tab and here you can remove the Enroll permissions for the Enterprise Admins group. Click Apply when you make the changes.

Navigate to the Security tab, click Add, select the group associated with WSUS/SUP servers, and assign Enroll and Read permissions to this group. Click Apply and OK.
Close the certificate templates console.

Step 2: Issue the Certificate Template
The certificate template configured for SUP/WSUS in the previous step is now ready to be issued. It must be issued before it can be enrolled on your WSUS servers. In the Certificate Authority console, right-click Certificate Templates and select Certificate Template to Issue.
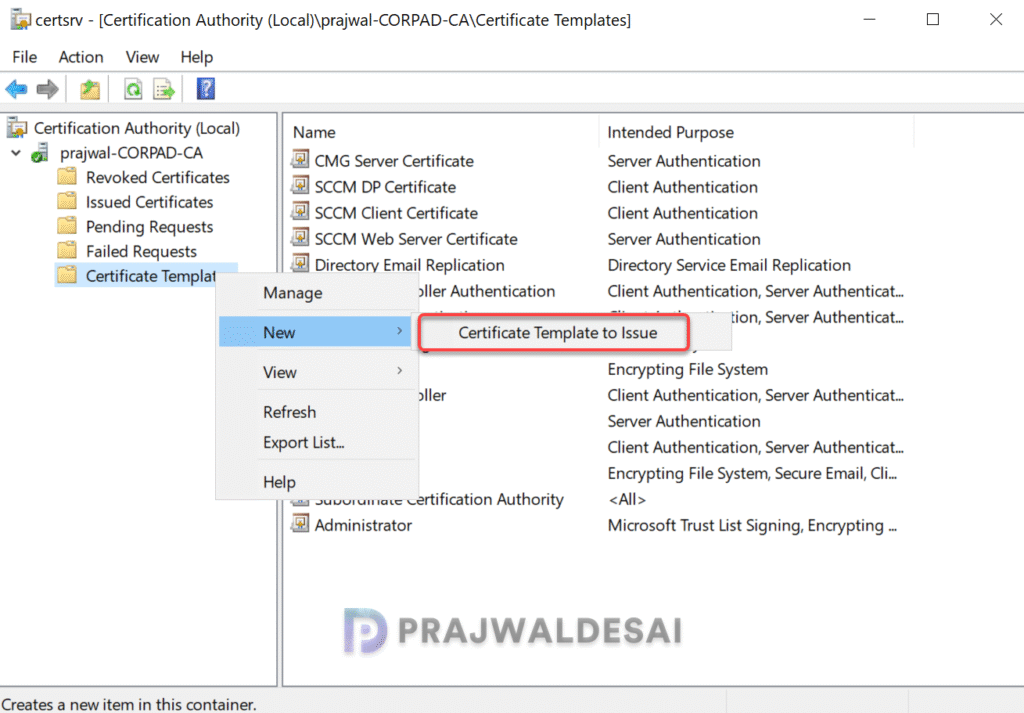
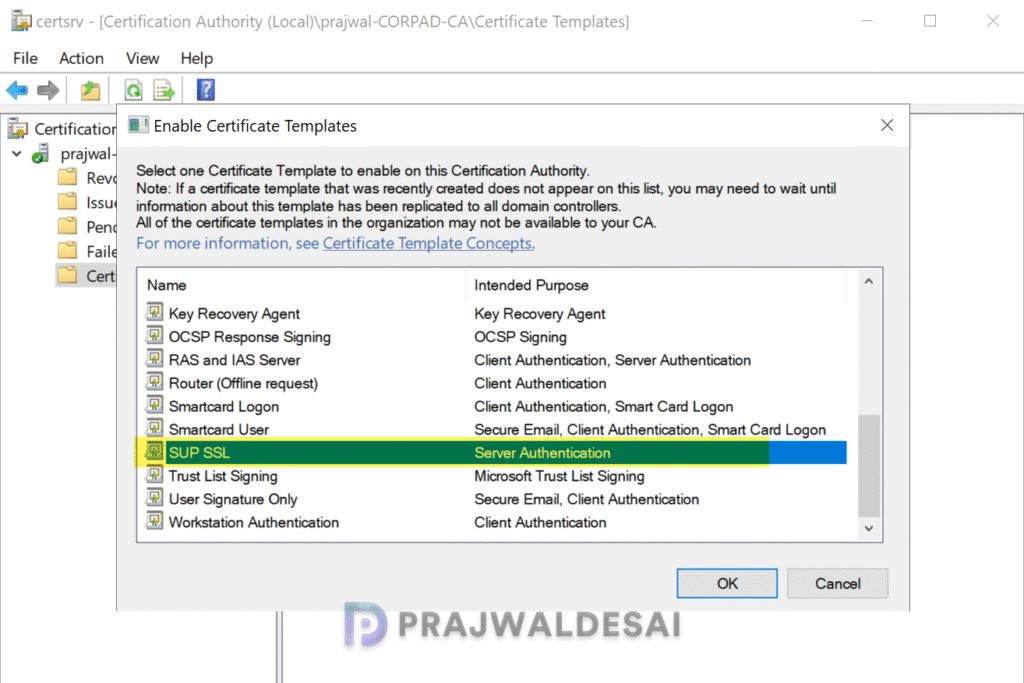
Now select your WSUS SSL certificate template that you created in Step 1. Click OK.
Step 3: Request and enroll the SSL Certificate on SUP/WSUS Server
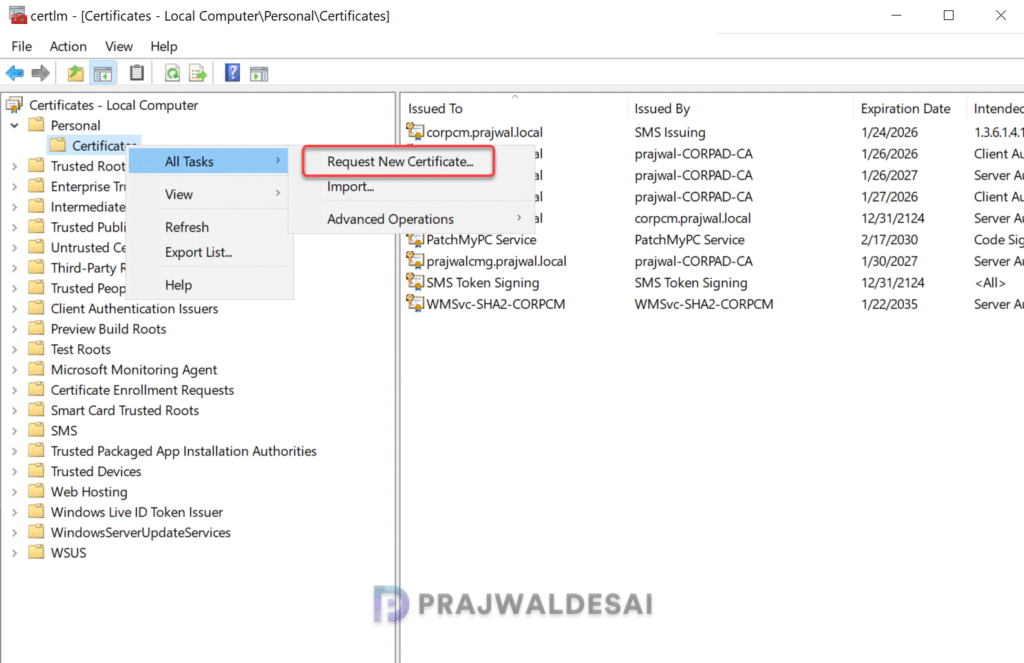
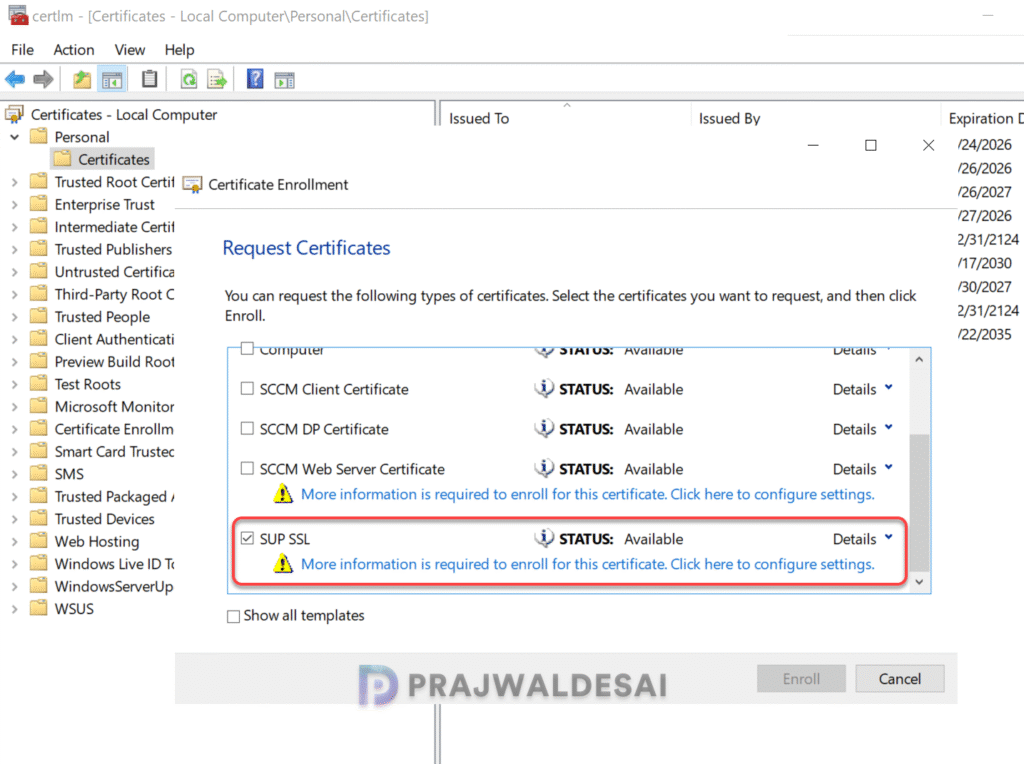
In this step, I will show you how to request the SSL certificate on servers running WSUS/SUP roles. Sign in to the WSUS/SUP server and launch the Certificates console by running certlm.msc command. In the certificates console, go to Personal > Certificates. Right-click and select Request New Certificate.
We’ll now go through the certificate enrollment process. In the Request Certificates window, select the SSL certificate you created for WSUS/SUP and click on More information is required to enroll for this certificate.
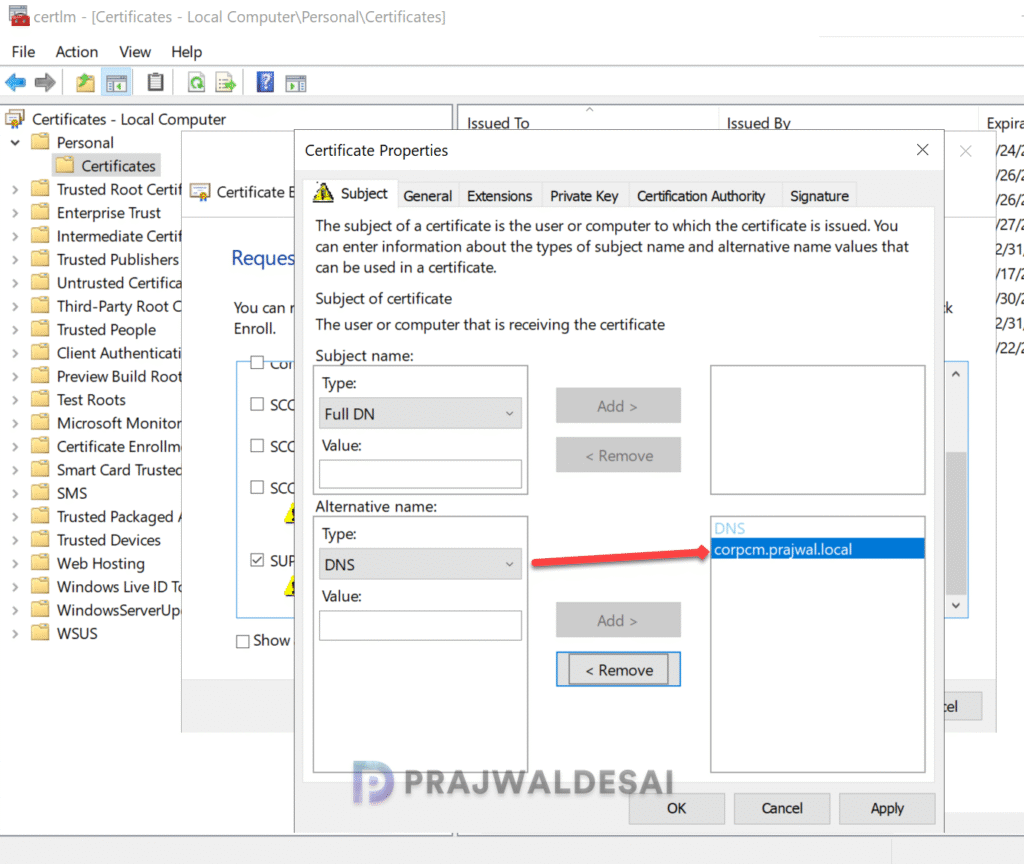
In the Certificate Properties window, navigate to the Subject tab. Within the Alternative Name section, select the Type as DNS and enter the FQDN of your WSUS/SUP server. Click the Add button to see the entries below DNS. Click Apply.
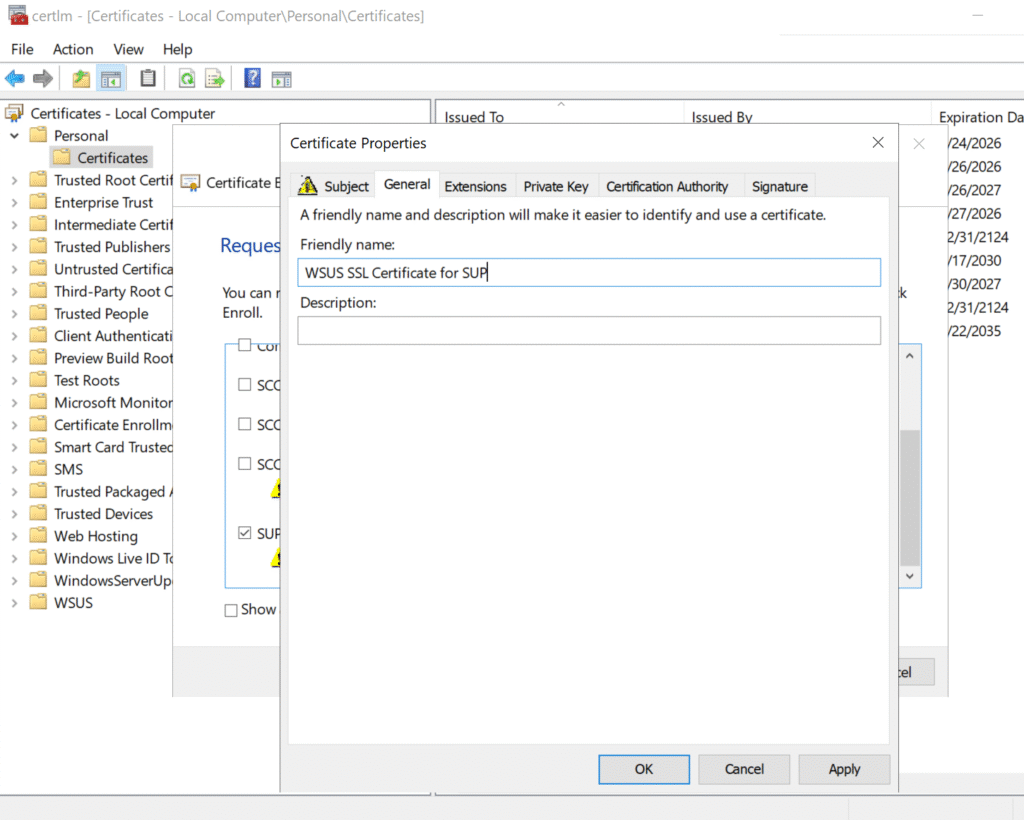
Switch to the General tab and set the value to a descriptive name to help you identify the certificate later. Click OK and Apply.
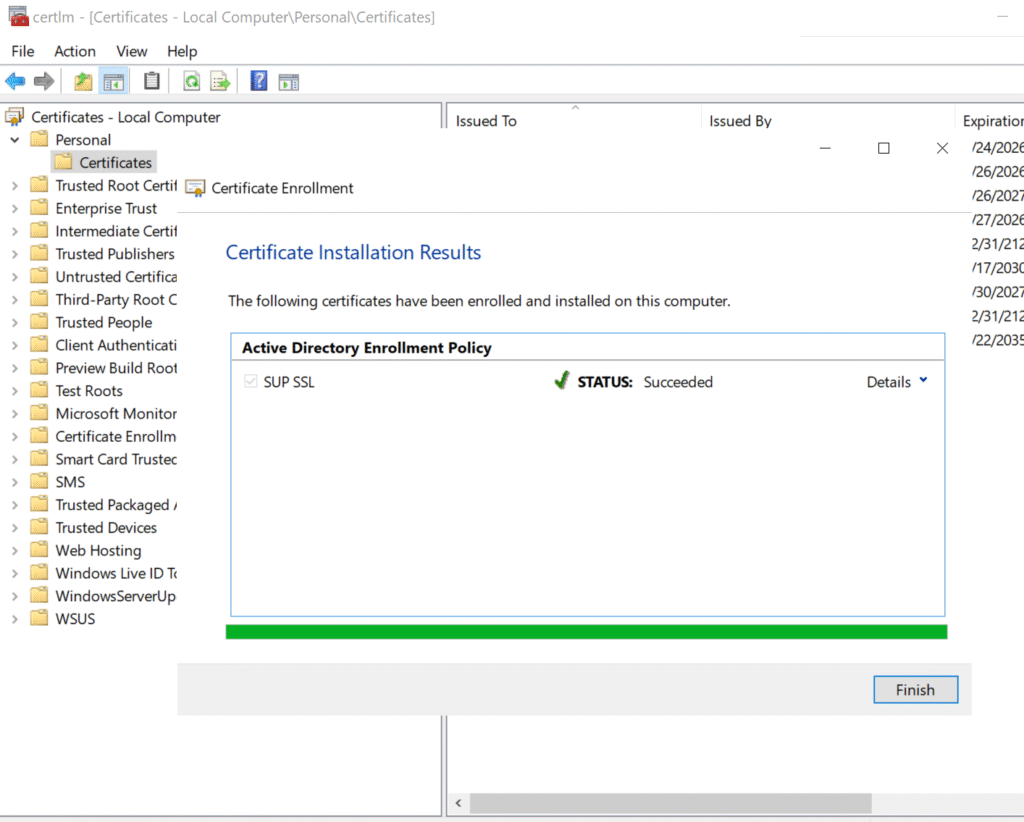
Select Enroll then Finish to complete the enrollment. The certificate is now found in the WSUS server’s personal certificate store.
Step 4: Bind the SSL certificate to the WSUS Administration site
Once you have the SSL certificate in the WSUS server’s personal certificate store, the next step is to bind it to the WSUS Administration site in IIS. To configure the IIS bindings for WSUS, follow the below steps.
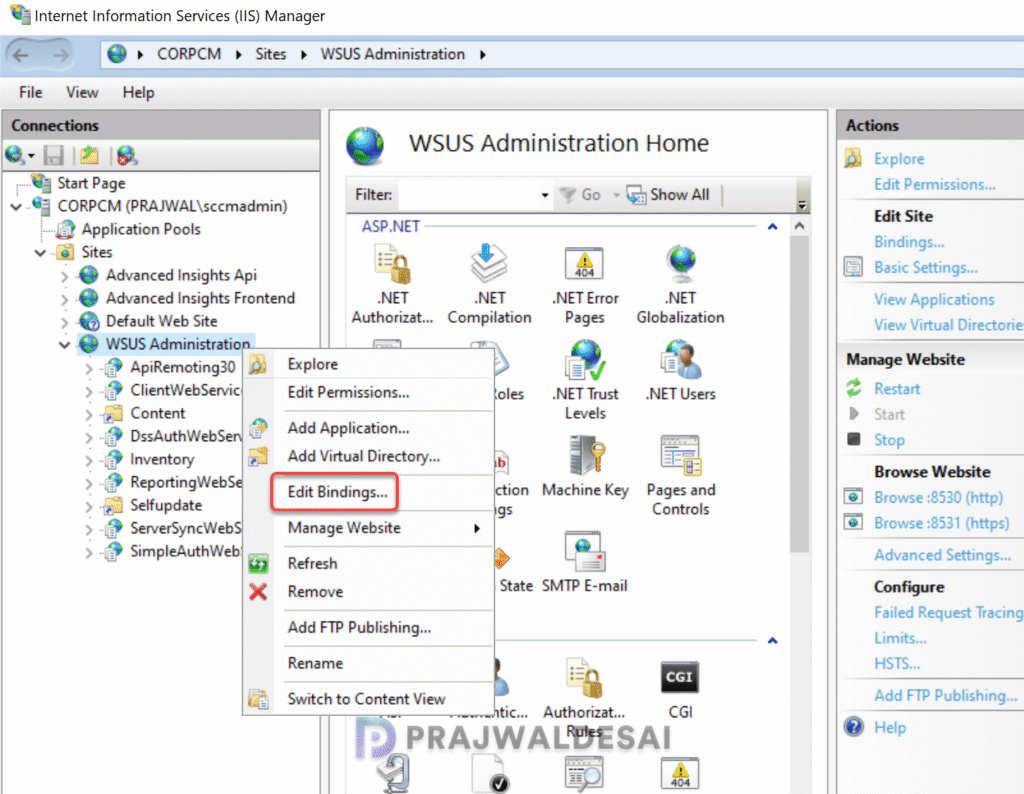
On the WSUS server, open Internet Information Services (IIS) Manager. Go to Sites > WSUS Administration. Select Edit Bindings from either the action menu or by right-clicking on the site.
In the Site Bindings window, select HTTPS and click Edit. Under the SSL certificate option, choose the SSL certificate to bind to the WSUS Administration site. The certificate’s friendly name is shown in the drop-down menu.
Select OK when you’re done, then Close to exit the site bindings.
Note: At this point, don’t remove the HTTP site binding. WSUS uses HTTP for the update content files.

Step 5: Configure the WSUS web services to require SSL
In this step, we will enable SSL enforcement for web services hosted on the WSUS server, ensuring all WSUS web service communications are securely transmitted using SSL.
In IIS Manager on the WSUS server, go to Sites > WSUS Administration. Expand the WSUS Administration site to see the list of web services and virtual directories for WSUS.
For each of the below WSUS web services, go to the SSL settings and enable the “Require SSL” option.
- ApiRemoting30
- ClientWebService
- DSSAuthWebService
- ServerSyncWebService
- SimpleAuthWebService
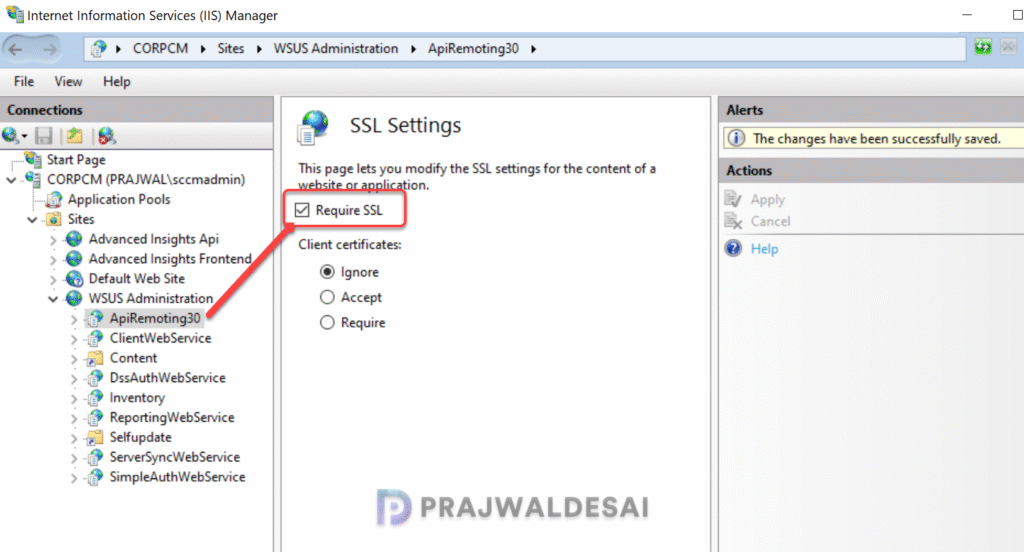
For example, select the ApiRemoting30 web service and select SSL Settings as shown in the below screenshot.

On the SSL settings page, enable the Require SSL option. Verify the Client certificates option is set to Ignore. Select Apply.
Once you have completed the above procedure for all the web services, close the WSUS admin console.
Step 6: Configure the WSUS to use SSL
After configuring the web services to require SSL, we will now configure the WSUS to use SSL.
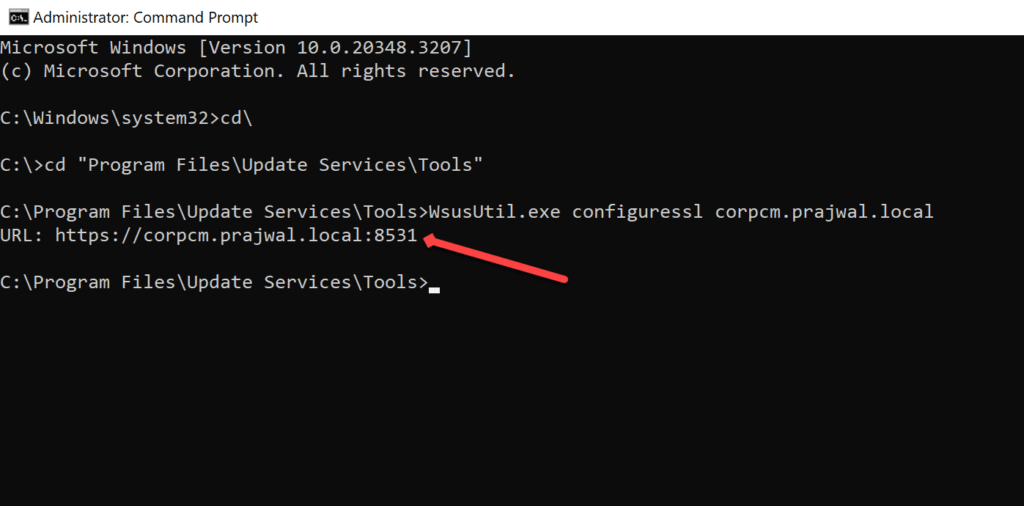
- On the WSUS server, launch the command prompt as administrator.
- Change the directory to the tools folder for WSUS:
cd "c:\Program Files\Update Services\Tools" - Configure WSUS to use SSL with the following command (Enter the FQDN of the WSUS server)
WsusUtil.exe configuressl WSUS_SERVER_FQDNAfter running the above command, notice that the WsusUtil returns the URL of the WSUS server with the port number specified at the end. In the below example its 8531.
Step 7: Verify the WSUS console can connect using SSL
The WSUS console connects through the ApiRemoting30 web service. In this step, I will demonstrate how to confirm the functionality of the WSUS admin console by establishing an SSL connection to the WSUS server’s ApiRemoting30 web service via port 8531.
Open the WSUS console and select Action > Connect to Server. Enter the FQDN of the WSUS server for the Server name option. Choose the port number as 8531. The Use Secure Sockets Layer (SSL) to connect to this server option is automatically enabled when either 8531 (default) or 443 are chosen.
Click the connect button and you should now have access to the WSUS and its settings. If you see errors here, go back to step 4,5,6 and check if you have followed the procedure correctly.

Step 8: Verify the site server can sync updates
In this step, we will check if the site server can synchronize the updates after SUP is set to use SSL. In the SCCM console, go to Software Library > Overview > Software Updates > All Software Updates. From the ribbon, select Synchronize Software Updates. Select Yes when asked if you want to initiate a site-wide synchronization for software updates.

Open the wsyncmgr.log for the site and you should find the similar entries as listed below. This confirms that site server can sync updates correctly after the SUP is configured to use SSL.
https://corpcm.prajwal.local:8531	SMS_WSUS_SYNC_MANAGER
Synchronizing WSUS server corpcm.prajwal.local
Done synchronizing WSUS Server corpcm.prajwal.local	SMS_WSUS_SYNC_MANAGER
Synchronizing SMS database with WSUS, default server is corpcm.prajwal.local
STATMSG: ID=6705 SEV=I LEV=M SOURCE="SMS Server" COMP="SMS_WSUS_SYNC_MANAGER"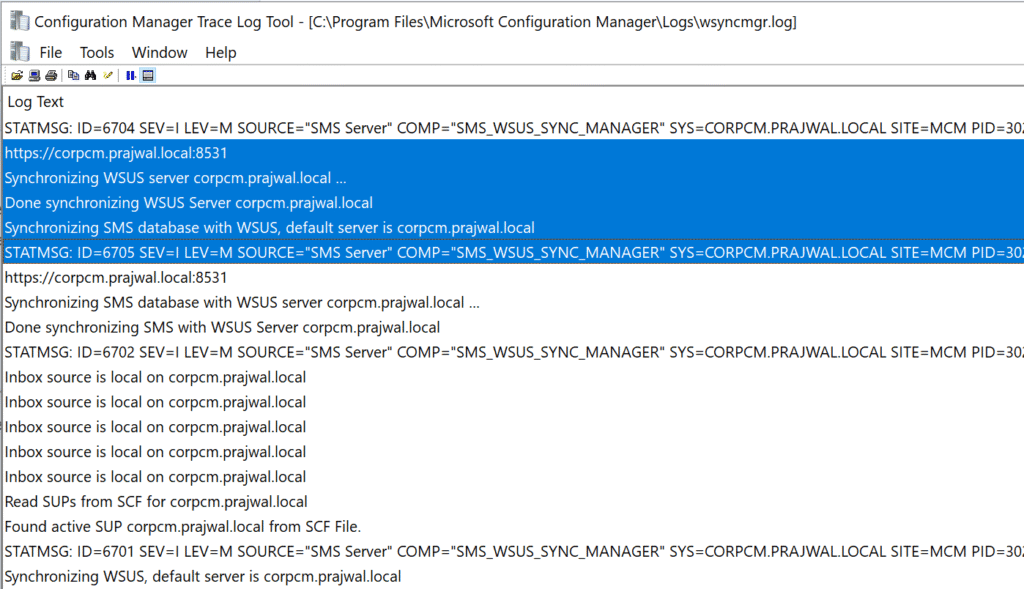
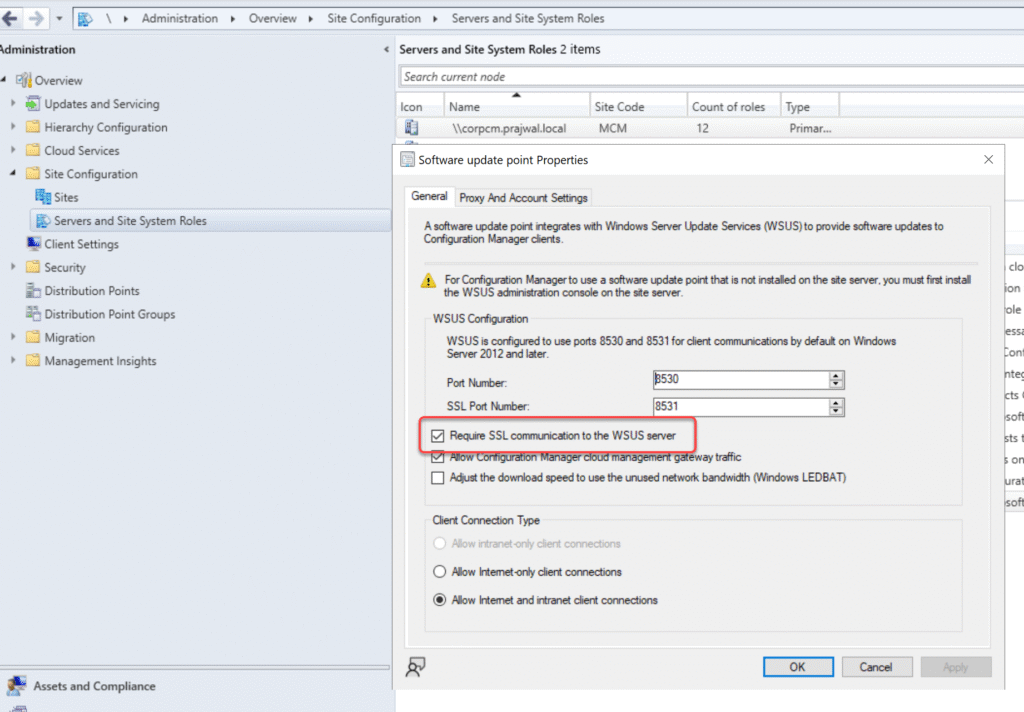
Once WSUS is set up to use TLS/SSL, you’ll need to update the corresponding software update point to require SSL too. To do that, open the Configuration Manager console and navigate to Administration > Overview > Site Configuration > Servers and Site System Roles. Select the site system server installed with software update point site system role. From the ribbon, choose Properties and enable the ‘Require SSL communication to the WSUS server‘ option.
Note: If you’re installing the software Update Point role on a new server, you get to enable the SSL communication option during the role setup.
The WCM.log records the following after SUP is set to operate in SSL mode:
Configuration successful. Will wait for 1 minute for any subscription or proxy changes	SMS_WSUS_CONFIGURATION_MANAGER
Setting new configuration state to 2 (WSUS_CONFIG_SUCCESS)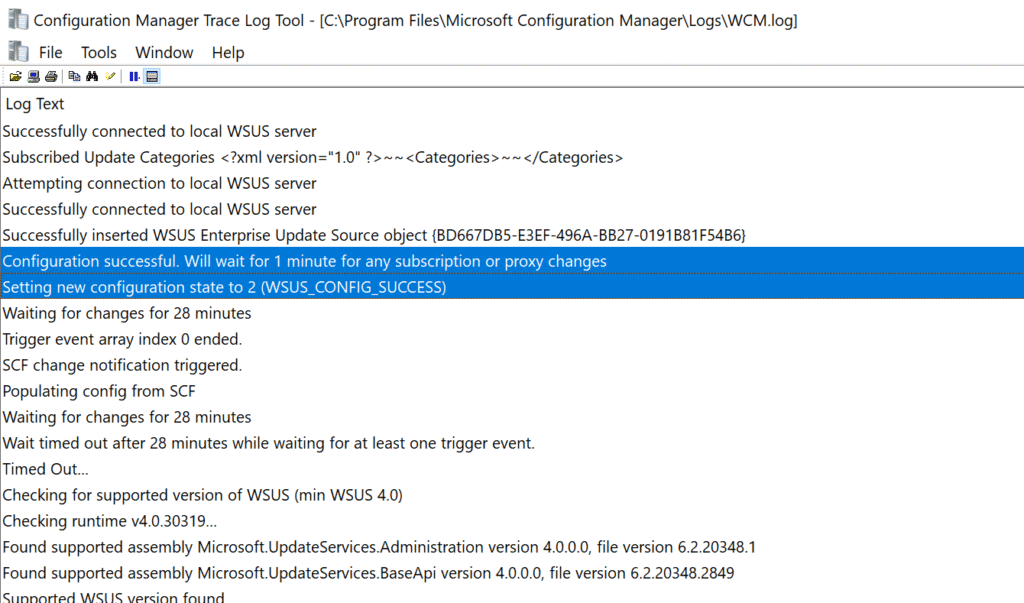
Step 9: Verify a client can scan for updates
When you change the software update point to require SSL, Configuration Manager clients receive the updated WSUS URL when it makes a location request for a software update point.
The below tests will verify if the clients trust the WSUS server’s certificate and SimpleAuthWebService and the ClientWebService for WSUS are working correctly.
Open the PowerShell on the client computer and run a software update scan cycle using the below script:
Invoke-WMIMethod -Namespace root\ccm -Class SMS_CLIENT -Name TriggerSchedule "{00000000-0000-0000-0000-000000000113}"Review the WUAHandler.log on the client computer to see the below entries.
Enabling WUA Managed server policy to use server: https://corpcm.prajwal.local:8531In addition, review the LocationServices.log to verify that the client sees the correct WSUS URL:
LS Request CorrelationID {60D2E32F-807E-4D28-92E1-3180A73441DD} - WSUS Path='https://corpcm.prajwal.local:8531', Server='CORPCM.PRAJWAL.LOCAL', Version='4', LocalityEx='BOUNDARYGROUP', SUPFallbackIn='0'