


This post shows the steps to integrate SCCM Power BI reports in SharePoint online. In early February 2017, Microsoft announced the availability to embed or integrate Power BI report in SharePoint Online. This means you can easily embed SCCM Power BI reports in SharePoint Online pages. Power BI service is increasingly getting popular these days. The ability to view the data in interactive way is one of the reason for it’s growing popularity. I have been working on integrating Power BI with SCCM and you bet it’s so fun to work with it. I am still learning to customize the solution templates and create more interactive reports.
In my previous post we did see deployment of Power BI desktop using SCCM. We also saw the steps to install and configure SCCM Power BI dashboard. Since I am publishing SCCM reports in SharePoint online, the post title reads SCCM Power BI reports. However you could use the below steps to publish any Power BI reports in SharePoint online.
Power BI allows users to export the reports in different ways and they are listed below.

- You can embed the report in SharePoint Online.
- Publish the report to web.
- Export the report as PowerPoint presentation.
How to Integrate SCCM Power BI reports in SharePoint Online
We will now look at the steps to integrate SCCM Power BI reports in SharePoint Online. In order to publish the report in Sharepoint online we first require report URL. I will show you how to get the report URL. Login to Power BI service and open the template that you want to publish. Click on File and then click Embed in SharePoint Online.
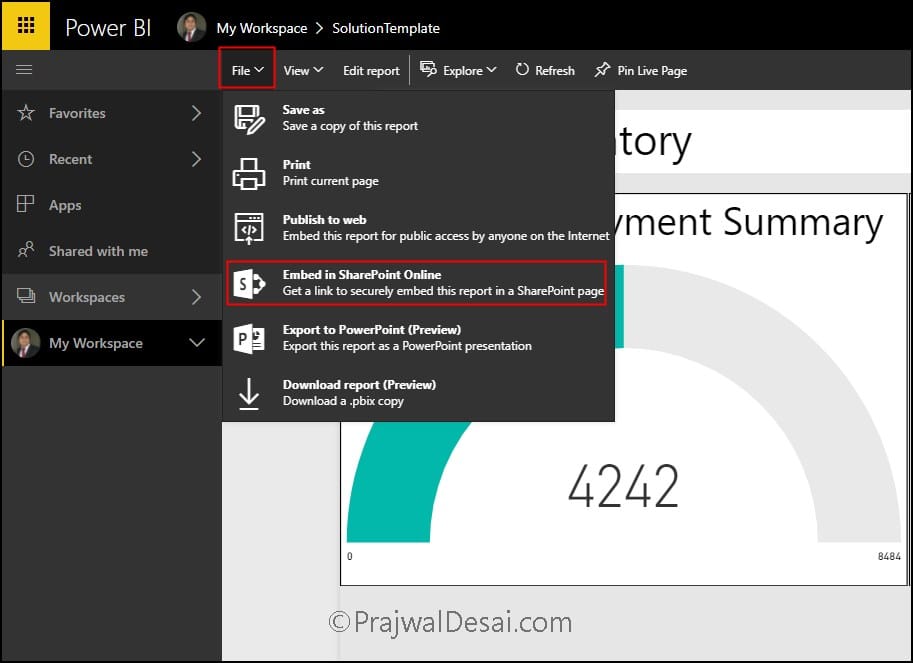 In the next step you see the embed link for SharePoint. Copy the URL and proceed to next step.
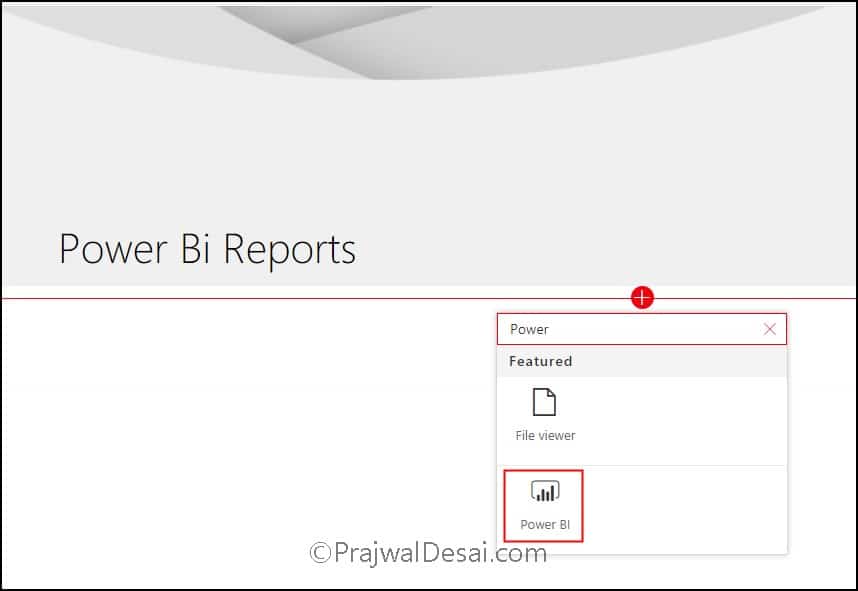
 We will add Power BI report to a SharePoint Online page. Login to Sharepoint online and open the page on which you wish to publish the report. Edit the page by clicking edit option located on right hand side. If you don’t have site page you could also create a new site page. To add report URL, click on + symbol and click Power BI.
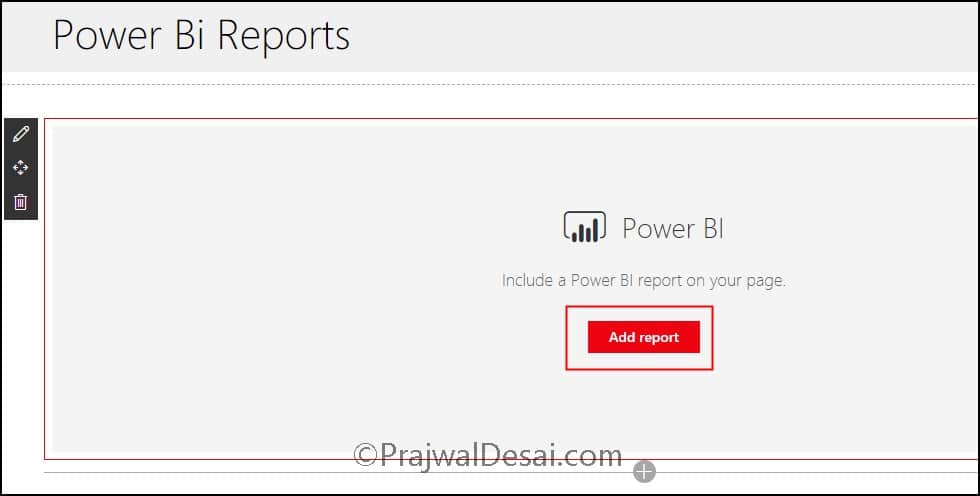
 In the next step click Add report.
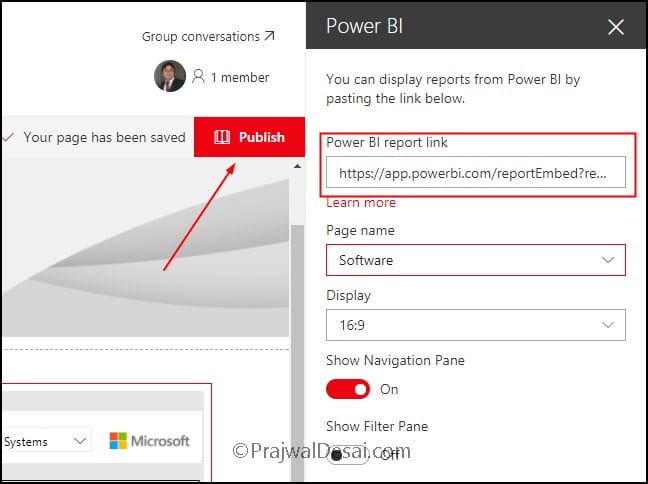
 On the property pane located on right hand side, paste the report URL into the link textbox. You will now notice that the report will load automatically. Select the Page name and display size. Finally click Publish and this report can now be seen by SharePoint online users.
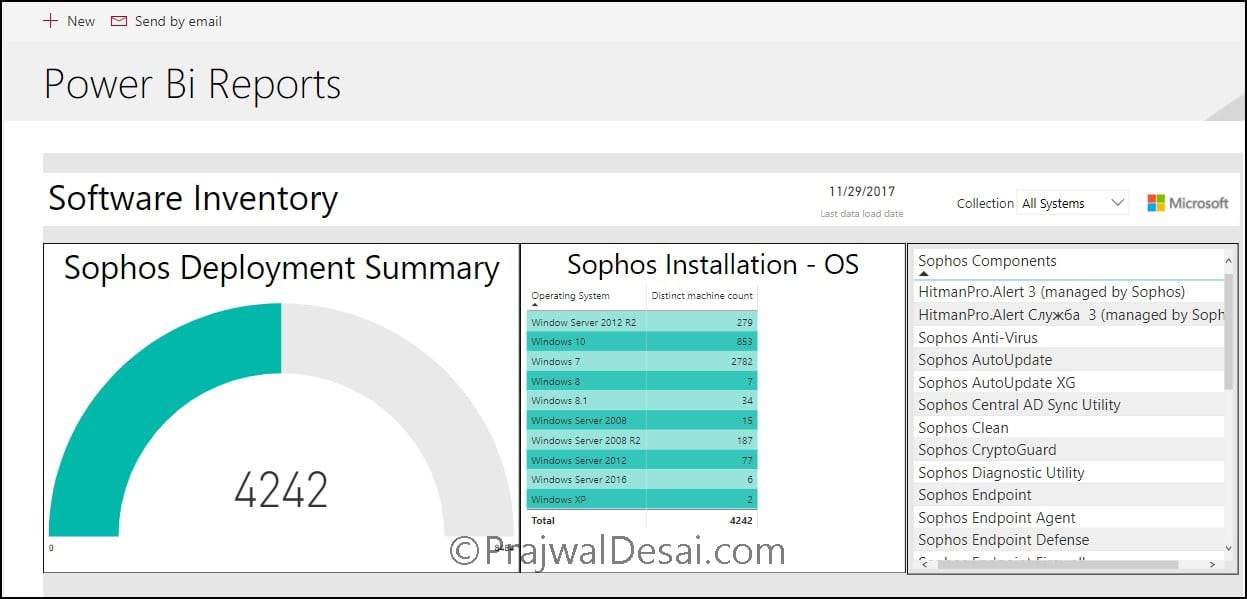
 Once the report is published you will see the report on page. Most of all the permissions to view the report are set within the Power BI service. So ensure that you allow desired users to view the report else they would not be able to view reports at all.
 I hope you got the steps to publish Power BI reports in SharePoint online. Let me know your experience with Power BI in the comments section.

Prajwal,
mate you are a legend , the best SCCM guides I’ve been reading is written by you. As a starter your articles is the simplest to understand and build on