

Installing SQL Server For SCCM 2012 SP1 – In this post we will see the steps to install SQL server for SCCM 2012 SP1. Configuration Manager 2012 uses Microsoft SQL Server as a distributed change management database and integrates with SQL Server Reporting Services (SSRS) to produce reports to monitor and track the management activities. When you use SQL Server Enterprise or Datacenter for the site database at the central administration site, the shared database and hierarchy supports up to 400,000 clients. When you use SQL Server Standard for the site database at the central administration site, the shared database and hierarchy supports up to 50,000 clients. A child primary site that uses SQL Server installed on the same computer as the site server can support up to 50,000 clients. When you use SQL Server that is installed on a computer that is remote from the site server, the child primary site can support up to 100,000 clients.
Before you start installing SQL server for SCCM 2012 SP1, please check Supported SQL Configurations for Configuration Manager. Most of the times I have seen that users encounter the SQL server error during the configuration manager setup either because the installed SQL server version is not supported by SCCM or cumulative updates are not installed. Configuration Manager 2012 SP1 supports SQL Server 2008, SQL Server 2008 R2, SQL Server 2012, SQL Server Express 2008 R2, SQL Server 2012 Express editions. In this post we will be installing SQL server 2008 Standard Edition, SQL server service pack 2 and Cumulative update 9.


Installing SQL Server 2008 Standard
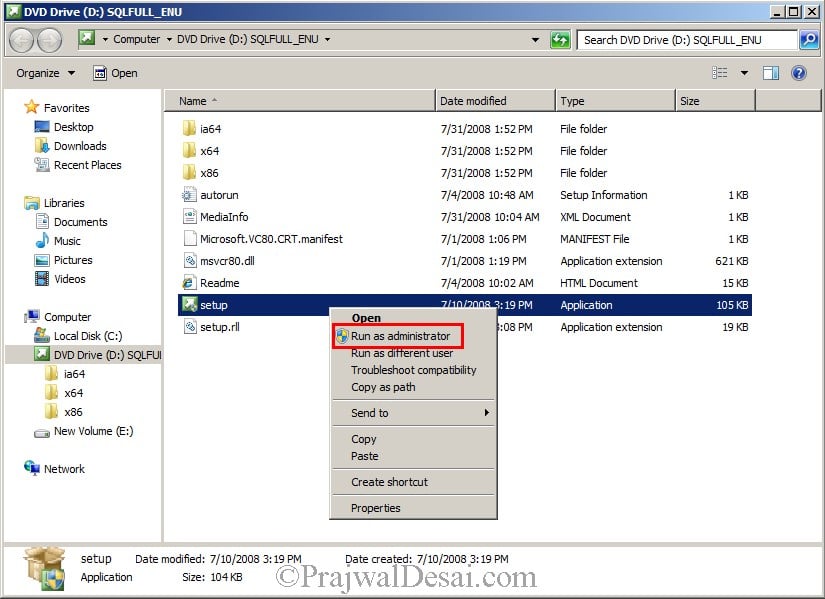
Insert the SQL server 2008 DVD and right click on setup.exe, click on Run as administrator.
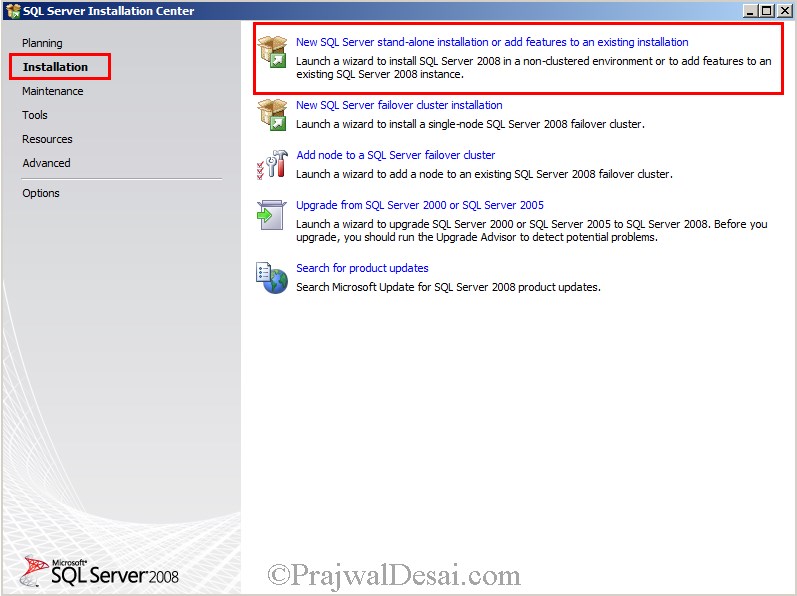
Select Installation and Click on New SQL server standalone installation.
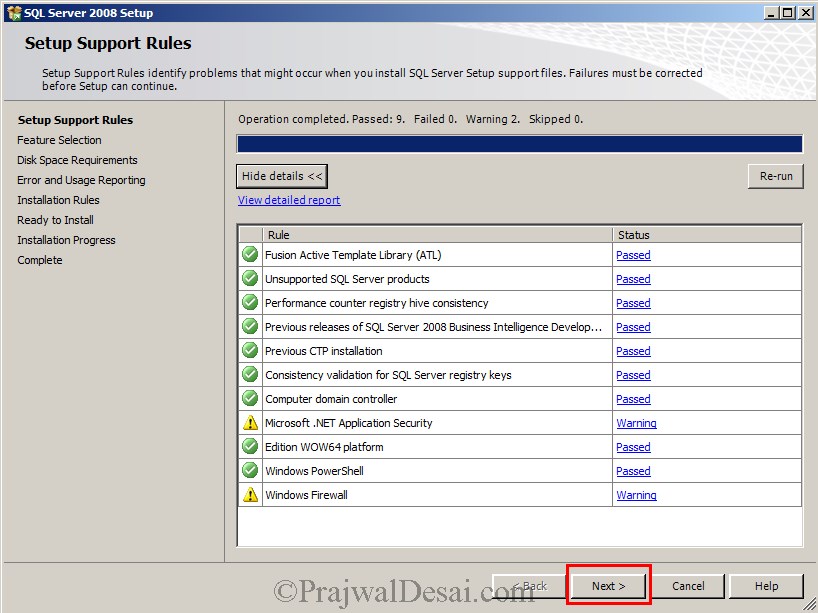
Click on OK once the Setup support rules are run and verified.

Enter the product key and click on Next.

Click on Install.

We see there are 2 warnings. Windows Firewall is currently turned on and we have not yet opened the SQL ports on Firewall. We will do this in the next post. Click on Next.
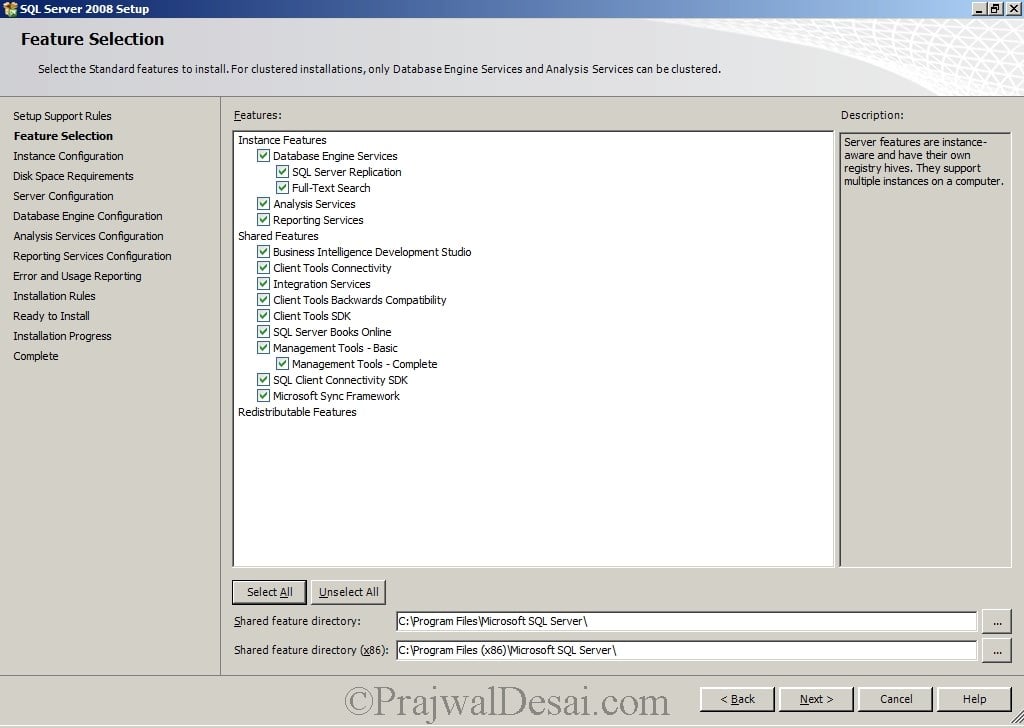
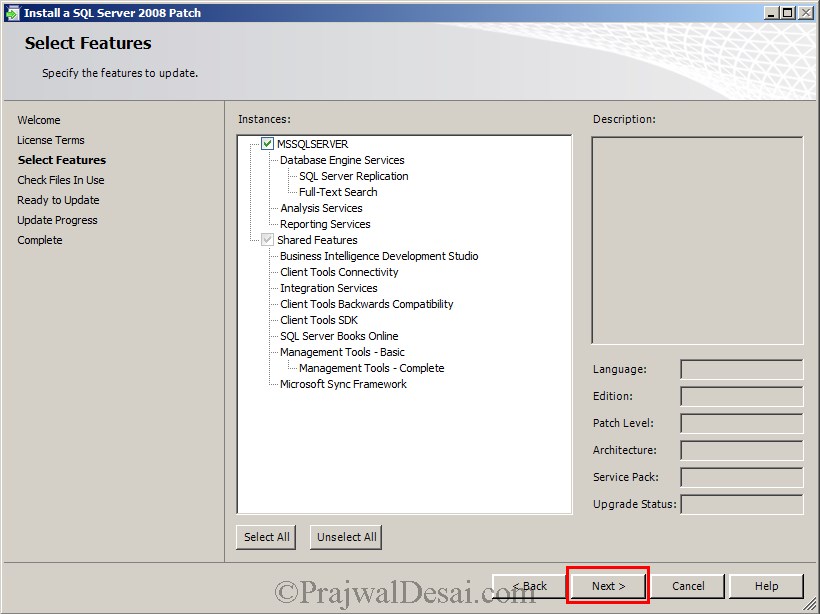
On the Feature Selection page, choose all the features by clicking Select All and click on Next.
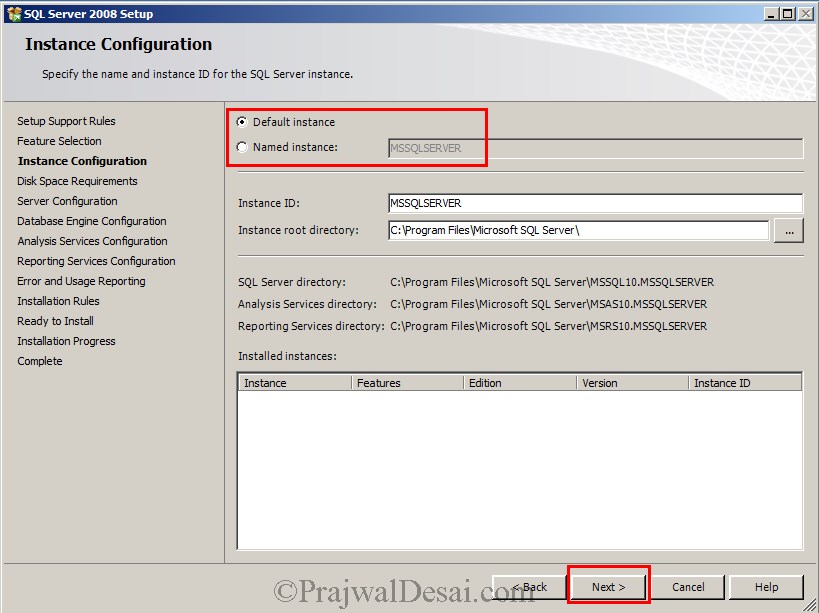
On the Instance Configuration page, choose the Default Instance and click on Next.
Note – If you are creating a Named Instance, then during the SCCM 2012 SP1 setup you might come across this error “The specified SQL Server instance is not configured to use dynamic ports” unless you have not configured dynamic ports for SQL server instance. To fix this error launch the SQL Server Configuration Manager, expand SQL Server Network Configuration. Click on Protocols for Instance (Instance is your Named Instance). On the right side pane, right click on the TCP/IP and click on Properties. Click on IP Addresses tab and scroll down to the bottom and under the IPALL, set TCP Port value to 1433. Click on Apply and after this change you must restart SQL Server Service.
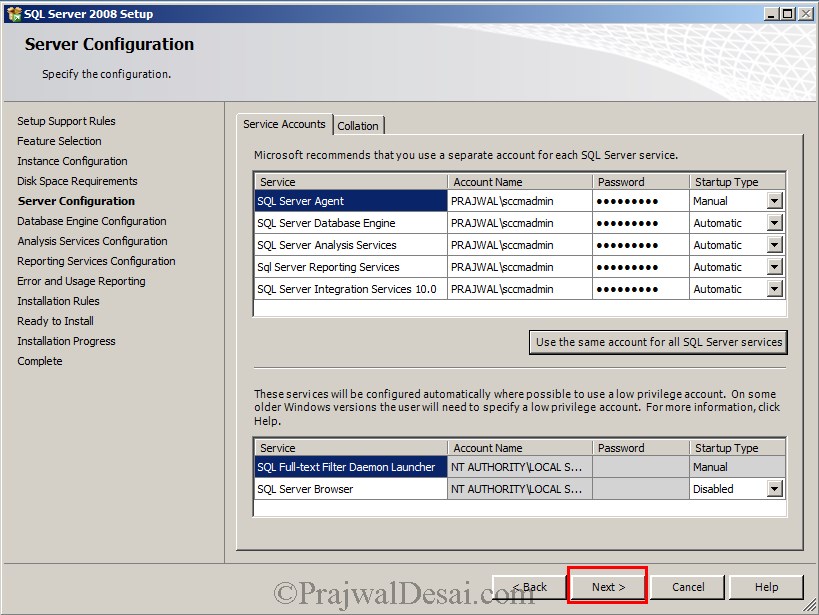
Click on Use the same account for all the SQL Server Services. Click on Browse. If you have a created a separate user account for SQL server services specify it here, in this post we will be using user account named “sccmadmin”. Specify the account name and password. Click on OK.

Click on Next.
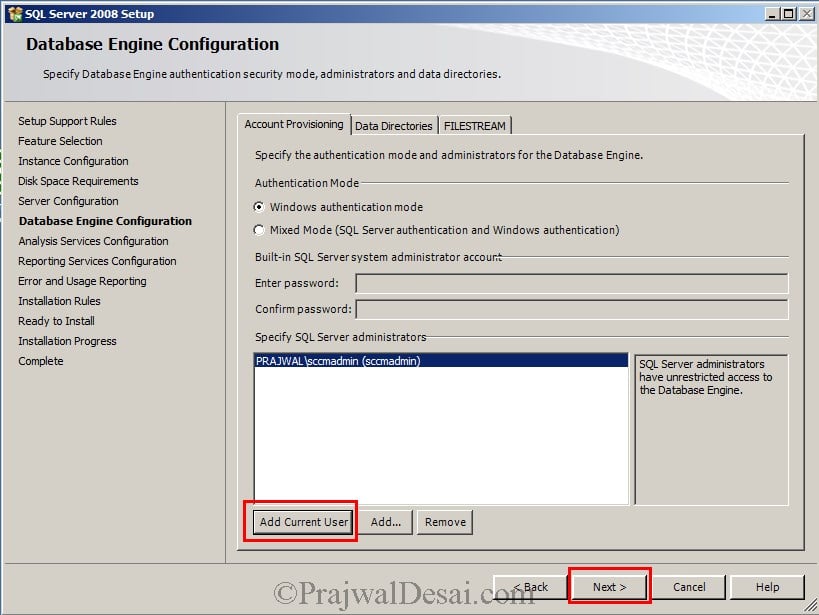
On the Database Engine Configuration window, click on Add Current User. Click on Next.
On the Analysis Services Configuration window, click on Add Current User and click on Next.

Choose Install the native mode default configuration and click on Next.

You should see the status of all the rules as Passed. Click on Next.

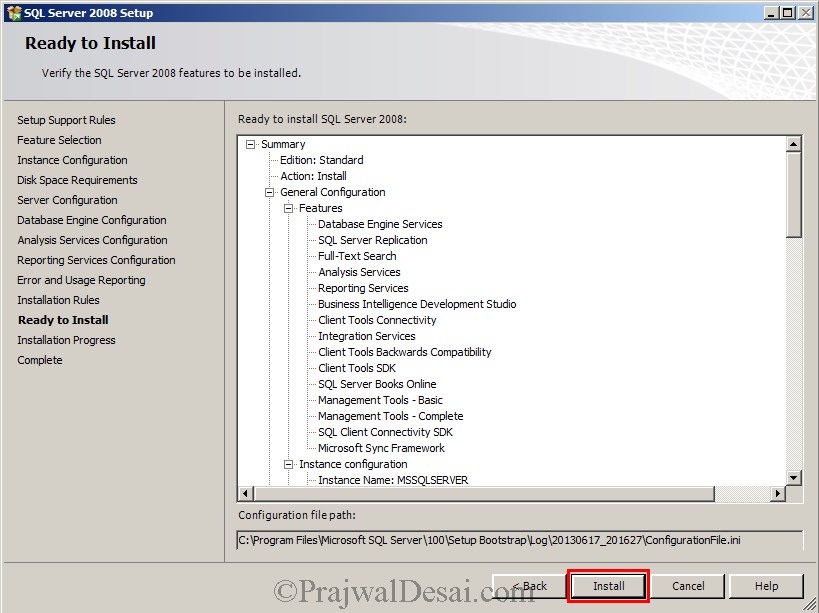
Click on Install to start the SQL server 2008 installation.
After few minutes, we see that the SQL Server 2008 installation has been completed successfully. Click on Close.

Installing SQL Server 2008 Service Pack 2
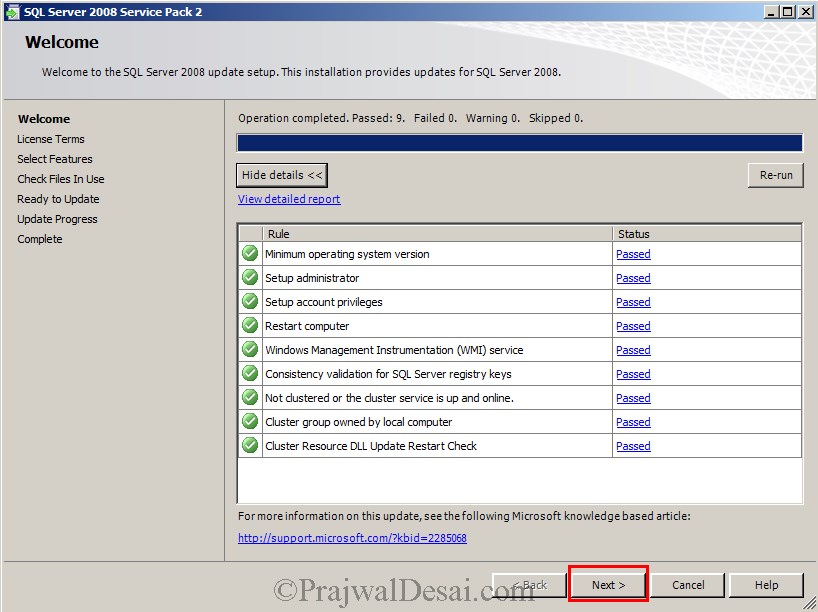
We have installed the SQL server 2008 Standard edition. Our next step is to install the SQL server 2008 Service Pack 2. You can download the SQL server 2008 Service pack 2 from here. Once the download is complete, right click on the setup file and click on Run as Administrator. On the Welcome page, click on Next.
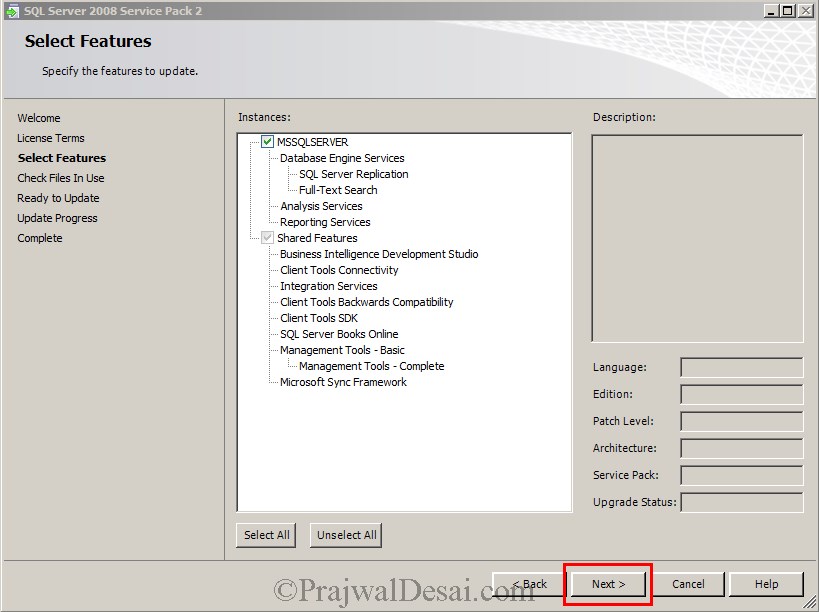
The instance is automatically selected, click on Next.
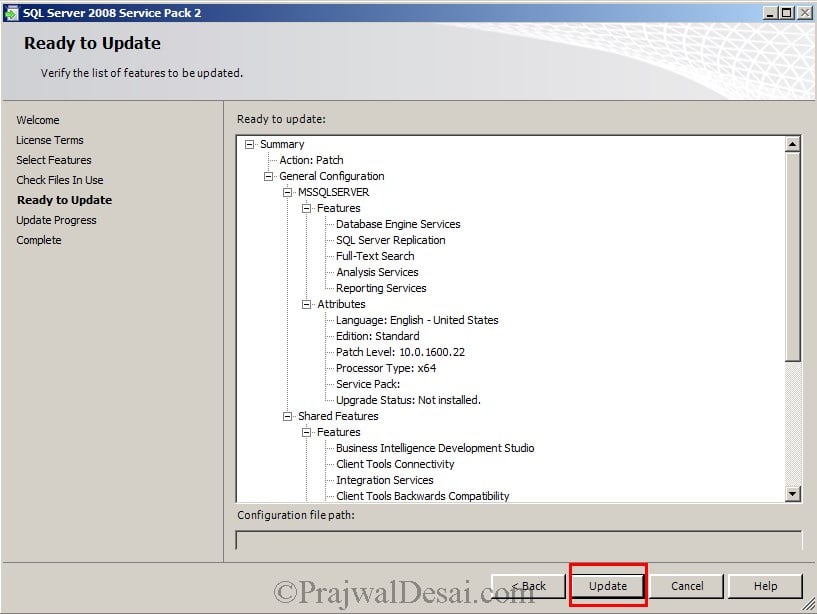
Click on Update.
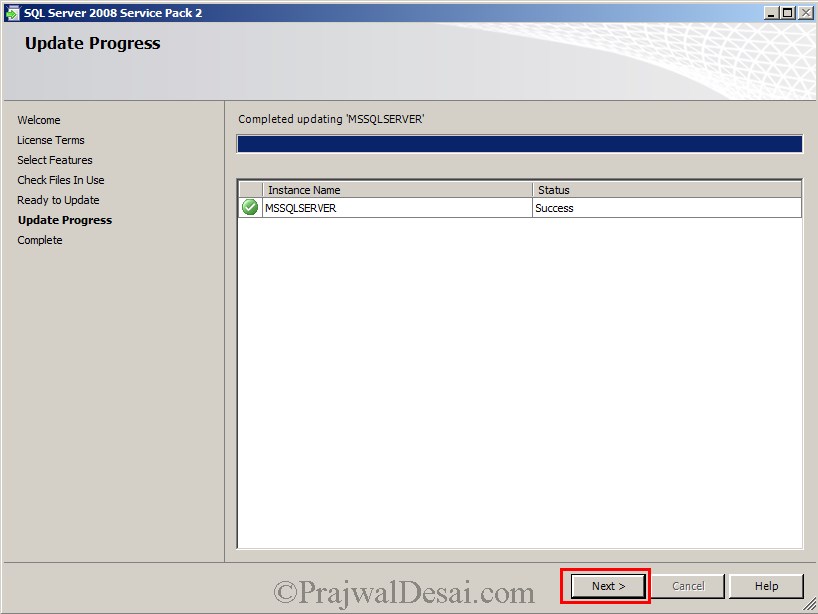
The installation of SQL Server 2008 Service Pack 2 is complete. Click on Next and on the next page click Close to close the setup wizard.
Installing SQL Server 2008 SP2 Cumulative update 9
In the above steps we have installed SQL Server 2008 Standard edition, next we have installed SQL Server 2008 service pack 2. Now we will be installing SQL Server 2008 SP2 Cumulative Update 9. You can download the SQL Server 2008 SP2 Cumulative Update 9 here. Right the setup.exe and click on Run as Administrator. On the Welcome page click on Next. Read the license terms and check the box I accept the license terms and click on Next.

The instance is automatically picked, click on Next.
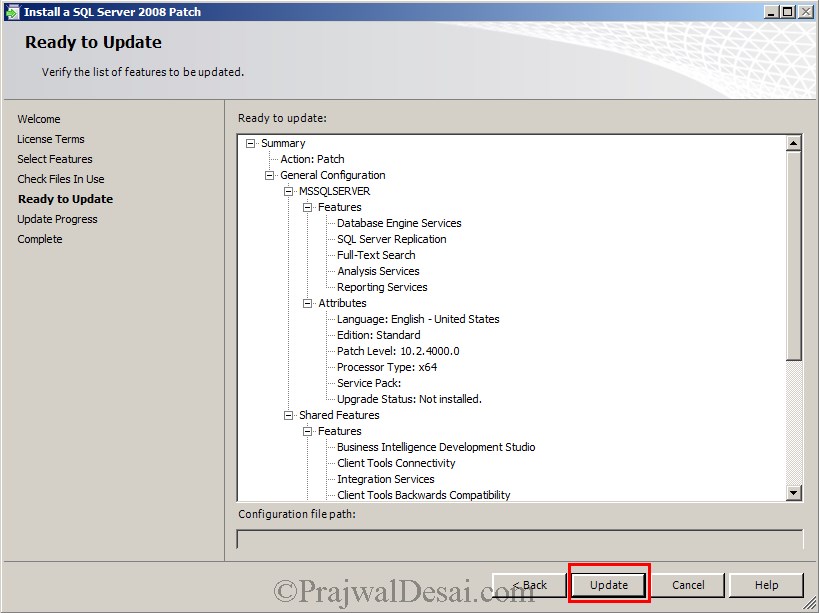
Click on Update to install the cumulative update.
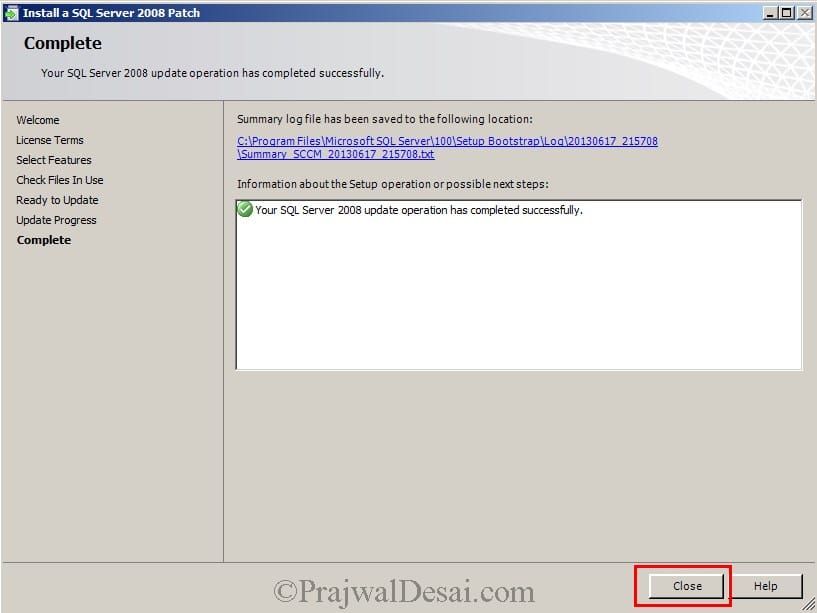
The Cumulative update has been installed successfully. Click on Close.
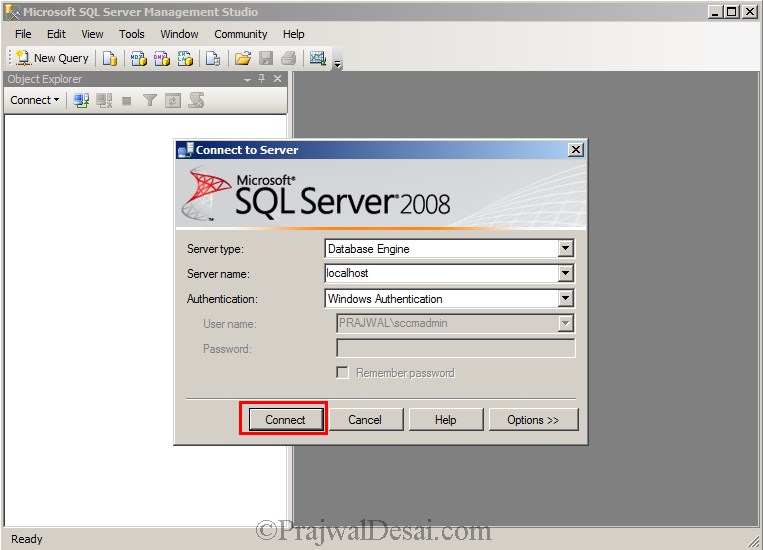
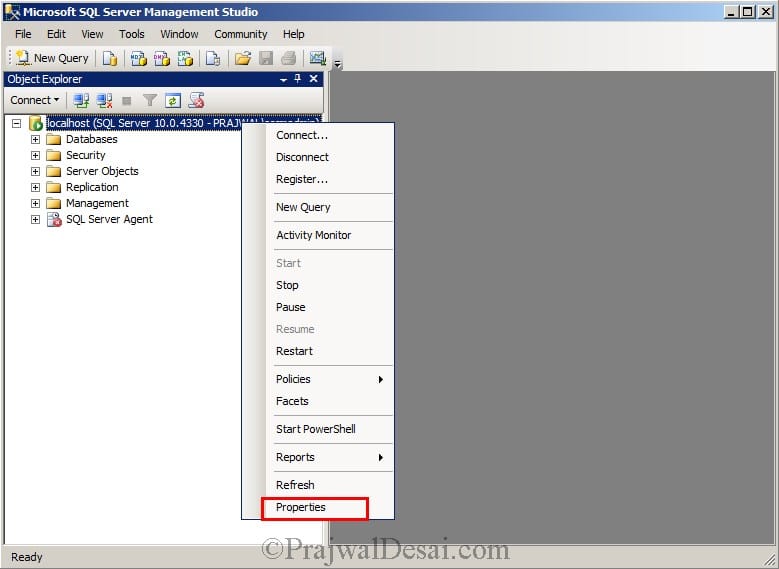
During the installation of Configuration Manager 2012 SP1, the configuration manager checks if the SQL server memory limit is limited. If the memory is not limited, then a warning is displayed. To avoid that lets limit our server with a memory limit. Click on Start, click on All Programs, click on Microsoft SQL Server 2008, click on SQL Server Management Studio. Login to the server by specifying the server name. Since the SQL server is installed on the same machine I am using localhost as the server name. Click on Connect.
Right click the Server and click on Properties.
Click on Memory, set Minimum server memory value to 4096 MB and set Maximum server memory as 8192 MB. Click on OK and close the SQL management studio.

We have completed the installation of SQL server 2008, service pack and cumulative update. In the next post we will see installing WSUS, configuring firewall exceptions and opening ports for SQL replication for SCCM 2012.
