create fine grained password policy using ldifde In this short post we will see how to create fine grained password policy using ldifde. LDIFDE is a utility that enables you to import or export information from or to Active Directory. LDIFDE queries any available domain controller to retrieve or update AD information. You can use the ldifde command as a scriptable alternative for creating PSOs. A lot of info on FGPP has been shared in my previous post (How to Create Fine Grained Password Policies). My previous post shows how to create fine grained password policies using Active Directory Administrative Center while in this post we would be using the ldifde to create fine grained password policy. About ldifde command you can get more info here.
Create fine grained password policy using ldifde
STEP 1 – Define the settings of a new PSO by saving the following sample code as a file. Save the filename with .ldf as extension.
dn: CN=PSO1,CN=Password Settings Container,CN=System,DC=dc1,DC=contoso,DC=com
changetype: add
objectClass: msDS-PasswordSettings
msDS-MaximumPasswordAge:-1728000000000
msDS-MinimumPasswordAge:-864000000000
msDS-MinimumPasswordLength:8
msDS-PasswordHistoryLength:24
msDS-PasswordComplexityEnabled:TRUE
msDS-PasswordReversibleEncryptionEnabled:FALSE
msDS-LockoutObservationWindow:-18000000000
msDS-LockoutDuration:-18000000000
msDS-LockoutThreshold:0
msDS-PasswordSettingsPrecedence:20
msDS-PSOAppliesTo:CN=user1,CN=Users,DC=dc1,DC=contoso,DC=com
For example in my case it looks like as shown in the below screenshot. When you use ldifde to create PSOs, values for the four time-related PSO attributes (msDS-MaximumPasswordAge, msDS-MinimumPasswordAge, msDS-LockoutObservationWindow, and msDS-LockoutDuration) must be entered in the I8 format. For more information about how to convert time unit values into I8 values, check this link.
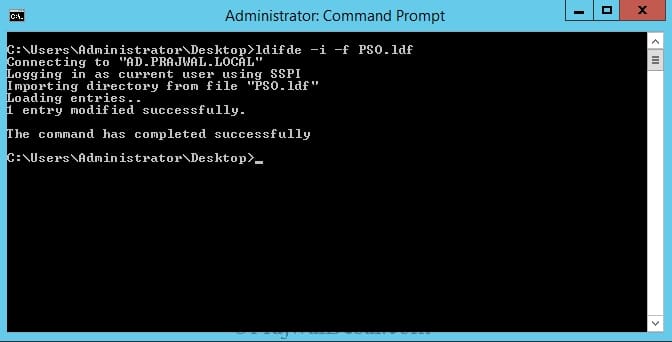
STEP 2 – After you save the file, you need to run the below command in a command prompt.
ldifde –i –f pso.ldf
where -i specifies that Import Mode is turned on. -f pso.ldf specifies the name of the input file that you created.
STEP 3 – To view the resultant PSO for a user, open Active Directory Users and Computers. On the view menu, ensure that Advanced Features is checked. In the console tree, click Users. In the details pane, right-click the user account for which you want to view the resultant PSO, and then click Properties. Click the Attribute Editor tab, and then click Filter. Ensure that the Show attributes/Optional check box is selected. Ensure that the Show read-only attributes/Constructed check box is selected. Locate the value of the msDS-ResultantPSO attribute in the Attributes list. You should now see the PSO that you created and had applied to a user.


Thanks Prajwal, it worked for me well.
Great Work Praj! This worked like a charm!
Thank you qhdevon43.