This post shows how to configure asset intelligence in configuration manager. First of all let’s understand what is Asset Intelligence. Asset Intelligence feature in Configuration Manager lets you inventory and manage software license usage in your enterprise. The another term that you need to get familiar is Asset Intelligence catalog. The Asset Intelligence catalog contains a set of database tables stored in the site database. In turn these tables contain categorization and identification information for various software titles and versions. When we say categorization info, it basically includes product name, vendor, software category, and software family. If you have noticed the Asset Intelligence catalog comes with predefined set of hardware requirements for software titles.
Had you noticed a role name “Asset Intelligence Synchronization Point” while installing other roles ?. Yes this role Asset Intelligence synchronization point is a Configuration Manager site system role. You install this role and connect to System Center Online (by using TCP port 443) to manage dynamic Asset Intelligence catalog information updates. Note that you must install this role only on top-level site of the hierarchy.
Once you install Asset Intelligence synchronization point site role, you can request on-demand catalog synchronization with System Center Online. You can also schedule automatic catalog synchronization. Furthermore you can customize information in the Asset Intelligence catalog. You can then upload software title information to System Center Online for categorization. Ensure that your custom software titles do not contain confidential info because MS treats this info as public information.
How to Configure Asset Intelligence in Configuration Manager
We will now see the steps to configure Asset Intelligence in Configuration Manager. We will break the procedure into steps so that it will be easy to implement.
Step 1 – Extend hardware inventory in Configuration Manager
To configure Asset Intelligence in Configuration Manager the first step is to extend hardware inventory in configuration manager. We need to collect the inventory data required for Asset Intelligence reports. You can refer my post on configuring hardware inventory in configuration manager.
Step 2 – Enable Asset Intelligence Hardware Inventory Reporting Classes
In Step 2 we enable asset intelligence hardware reporting classes. Launch configuration manager console,
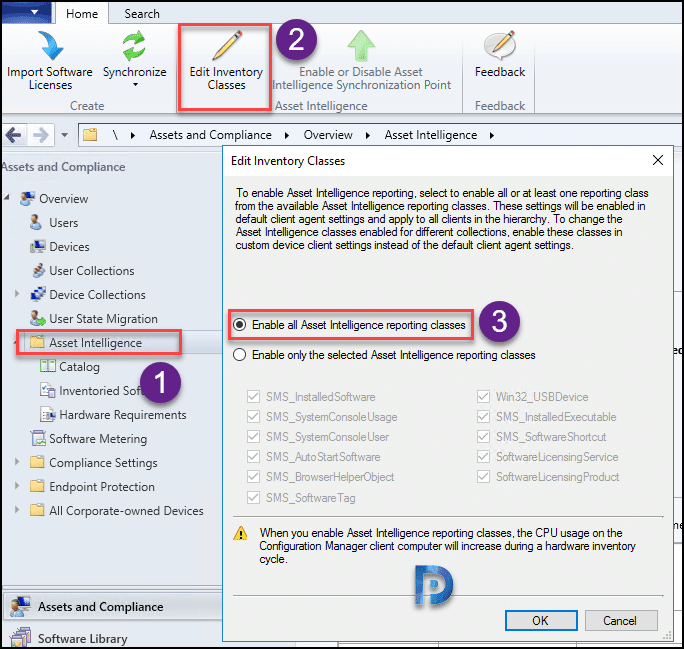
click Assets and Compliance > Overview > Asset Intelligence. On the top ribbon click Edit Inventory Classes. You will now see Edit Inventory Classes window. Here you can choose to enable specific AI reporting classes or enable all classes. Based on your requirements, select the ones that you actually need. Click OK.
When you enable AI reporting classes you will see a warning box. Click Yes. You have now enabled Asset Intelligence Hardware Inventory Reporting Classes.
To ensure that only necessary reporting classes have been enabled, verify the selected settings before continuing. Enabling Asset intelligence reporting classes will increase computer resource usage during configuration manager client hardware inventory.
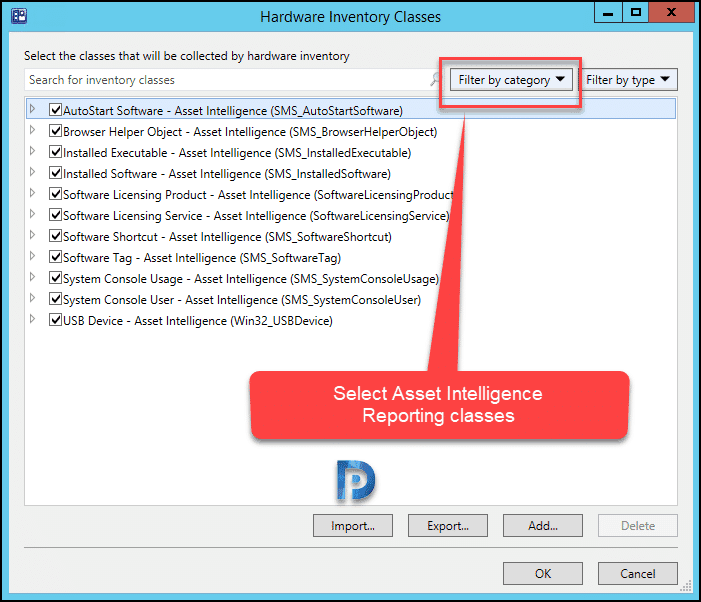
Ensure that you enable Asset Intelligence hardware inventory reporting classes from client settings properties. Click Administration > Client Settings > Default Client Agent Settings. Right click agent settings and click Properties. Choose Hardware Inventory > Set Classes. In the window, click Filter by category drop-down and select Asset Intelligence reporting classes. Select the required classes here and click OK.
Step 3 – Install an Asset Intelligence Synchronization Point
Once you complete steps 1 and 2, proceed to install Asset intelligence synchronization point role. As mentioned earlier, this role is required to synchronize the catalog with system center online. To install an Asset Intelligence synchronization point site system role, perform the below steps.
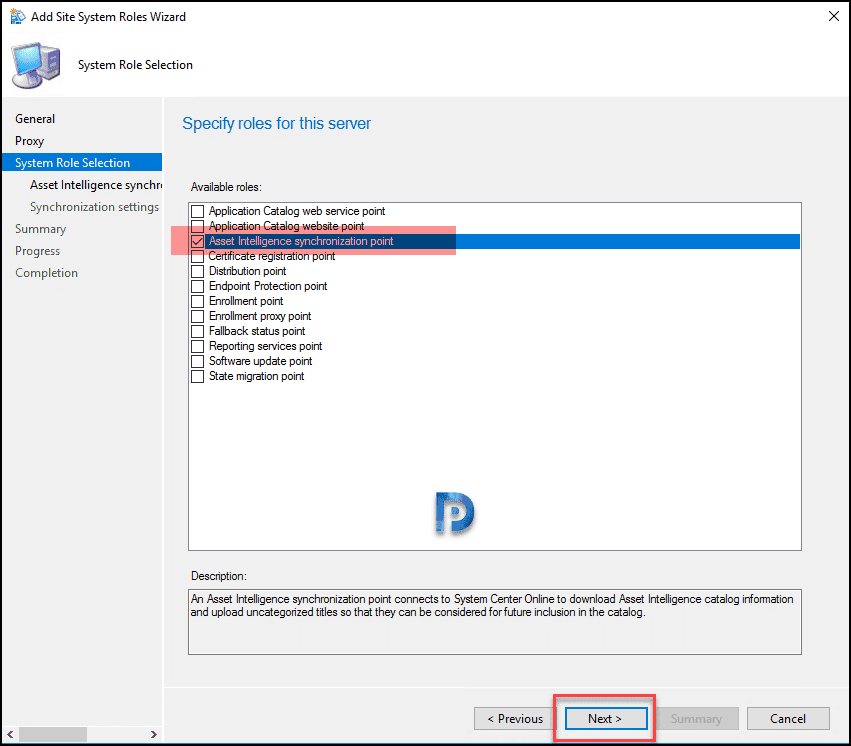
Navigate to Administration > Site Configuration > Servers and Site System Roles. Right click the server on which you want to install AI synchronization point role and click Add Site System Roles. On the system role selection page, select Asset Intelligence synchronization point role. Click Next.
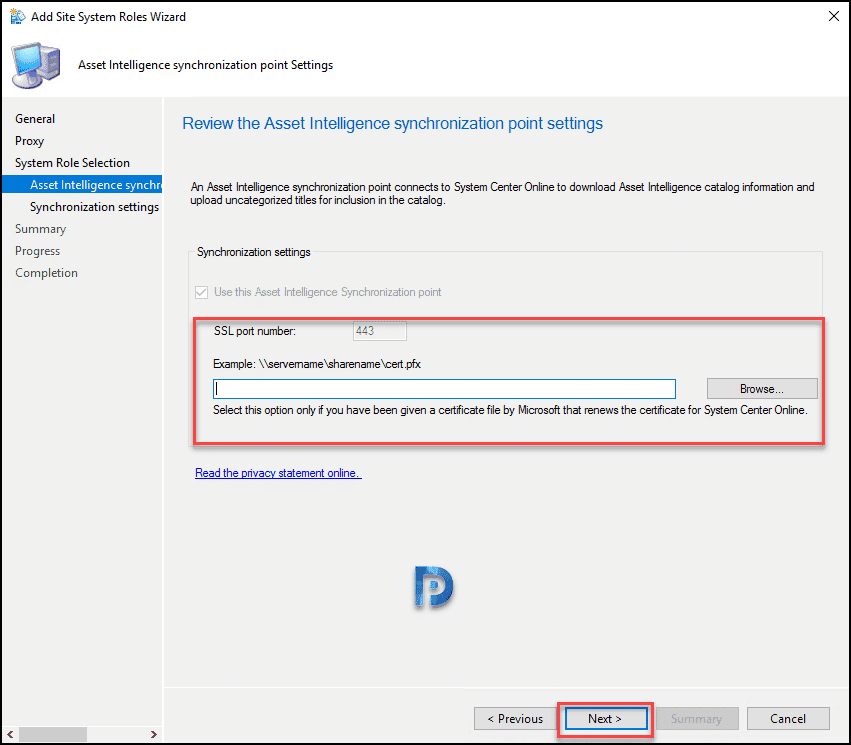
Notice that “use this asset intelligence synchronization point” is selected by default. Note that to connect to System Center Online, only TCP port 443 is used. If you have a cert file from MS that renews the cert for system online, specify it here. If not click Next.
Select the synchronization schedule. By default the sync is set to run every 7 days. This can be changed later, so don’t worry. Click Next.
 Click Next on Summary and Progress page and finally click Close. You have successfully installed asset intelligence synchronization point role. Monitor AIUSSetup.log to see the AI role installation progress.
Step 4 – Enable auditing of success logon events
We will now enable auditing of success logon events using group policy. This is because we want AI reports to display info gathered from the Windows Security event logs on client computers. To enable auditing of Success logon events, we can either use local security policy or active directory domain security policy. In this post I will cover the steps to do it via AD domain security policy.
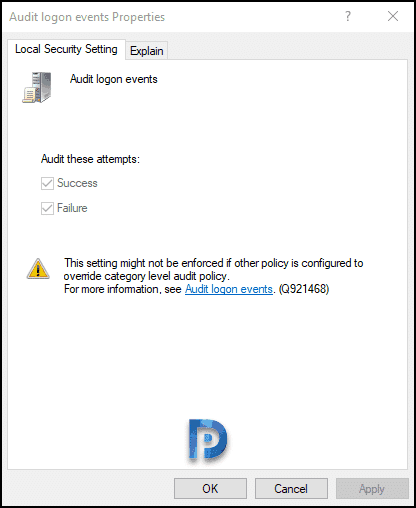
I assume you login with an account that has got access to domain controller. Probably an account that can create and modify GPO’s. Login to domain controller computer. Open group policy management console. You can either edit a existing policy or create a new one. Expand Computer Configuration > Windows Settings > Security Settings > Local Policies > Audit Policy. Double click Audit Logon Events. Ensure the success checkbox is ticked. Click OK and allow the policy changes to replicate.
Step 5 – Import Software License Information
The most important step is to import software license information. The first step is to download the license file. You must have an account that has access to volume licensing service center. Sign-in to Microsoft VLSC with your account. Click Licenses tab and click Licenses Summary. Now click Download License Information and save the .csv file on to your computer. This is the file that we will be importing in asset intelligence.
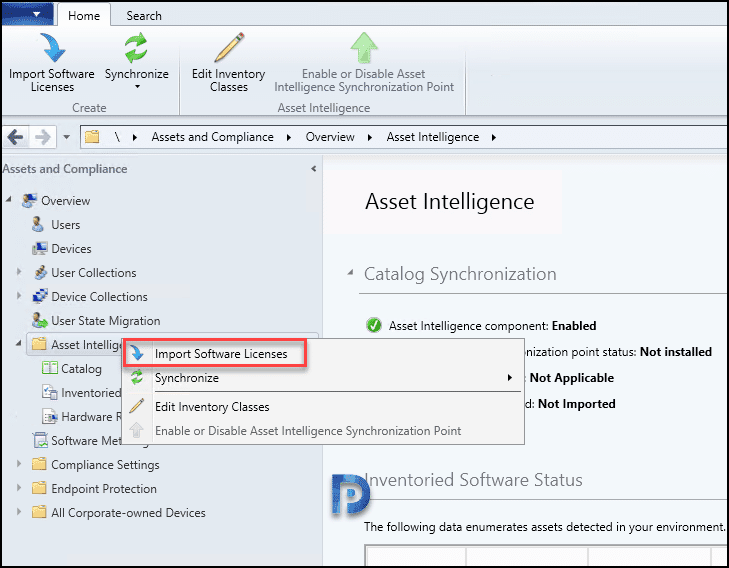
Click Assets and Compliance > Overview > Asset Intelligence. Right click Asset Intelligence and click Import Software Licenses.
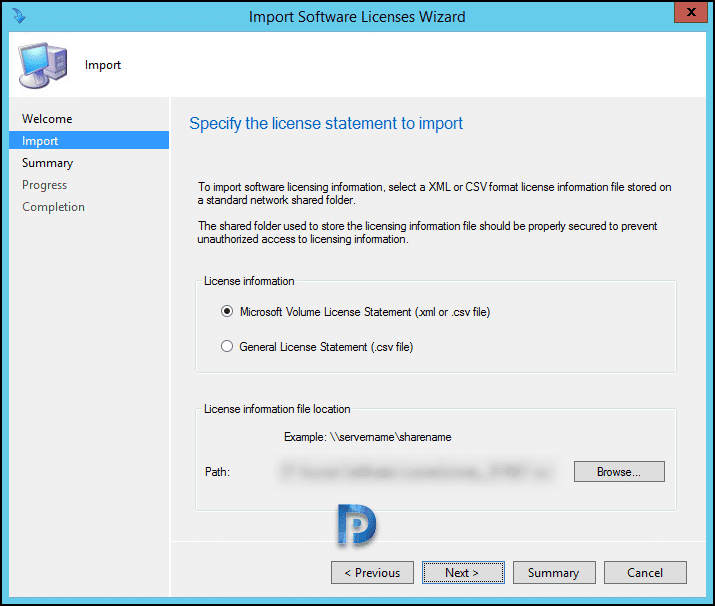
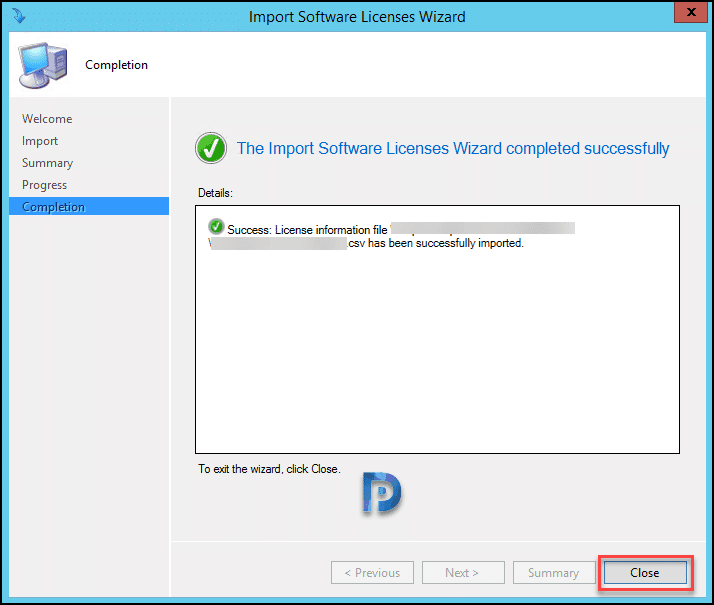
Enter the path to .xml or .csv file and click Next.
Click Next and complete the wizard.
Step 6: Configure Asset Intelligence Maintenance Task
There are two maintenance tasks that are available asset intelligence. You can choose to customize them if required.
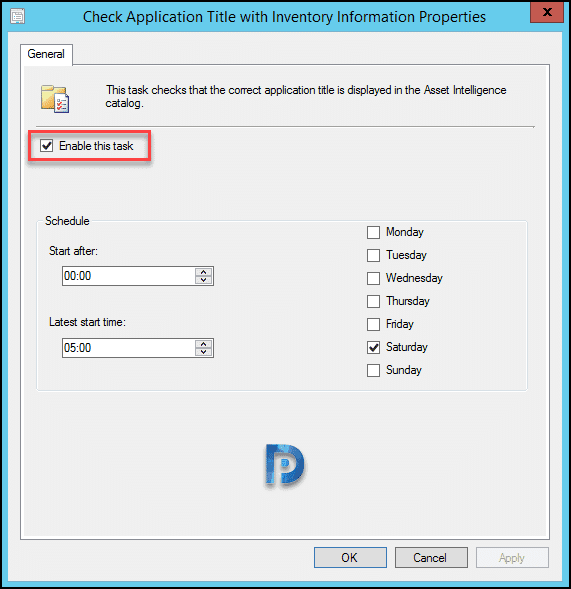
- Check Application Title with Inventory Information Properties – The function of this task is to check if correct app title is displayed in AI catalog. The below screenshot shows the schedule at which this task runs.
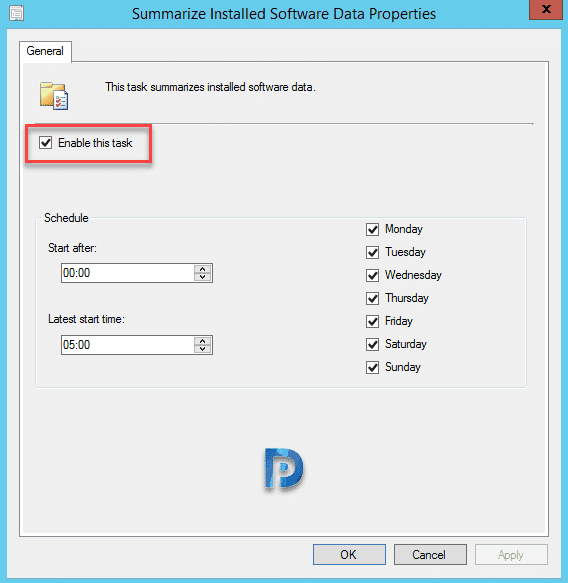
- Summarize Installed Software Data Properties – This task summarizes installed software data. The same summarized info is displayed in AI reports, hence this task is important one. The task is set to run on all days of week. Once again, you can customize it to run as per your requirement.
 I hope using the above steps you can configure Asset Intelligence in Configuration Manager. If you have any questions do write it in comments section or create a support thread in community forums.




Should software no longer installed fall off of the Asset Intelligence tables and reports? My AI tables have previous versions of the same software as if they are not being replaced when upgraded (or removed when software is uninstalled). I have the maintenance tasks above setup correctly.
I am having the exact same issue now.
I am having problems importing the Software License file .csv file into SCCM.
Is there a specific format for the CSV? If so where can I get a template? What info is required in the csv?
Other than that this is pretty straight forward.
Works with SCCM 1806 5.00.8692.1009